Saturday, August 27, 2016

Spring chickens

The last few days have been hectic. The kind of hectic you plan for and anticipate, but you never know what it's going to be like, until the actual day arrives.

For the past 21 days, I set some 20 chicken eggs, in our incubator. I forgot to turn the eggs, once, in the first week. You're supposed to turn them twice a day. Plus I had a temperature fluctuation, a few days in. It dropped by a few degrees, overnight. So I didn't even know if we were going to get any chicks at all.

Then on day 20, at precisely midday, our first egg hatched...


Egg #1


I wanted to check which eggs were viable, as we had a new rooster on the job. So I numbered all the eggs from one to twenty, as I collected them. Since they were only laying 3-4 eggs a day, it took several days to collect enough. Number one, was in the first group to be collected, so it was one of the oldest eggs. Can you guess which one hatched first? Yes, it was "1" and thus, we are naming them, number one.

Our eldest has taken a liking to them in particular, because they are both the first born in their family!


Drying


This is still number one, only a few more hours older. They're wet when first born, and once their down dries, they look like little fluff balls.  Although the humidity in the incubator meant, their down didn't get completely dry yet.

The next egg to hatch however, was number eight.


Egg #8


Eight, came much later on day 20. Like, eight hours later at 8pm. Number eight, eight hours later, at eight PM! You will find many of the numbers have bizarre placements as we go along. But we worried initially, that the first chick would be a lone survivor. Because although several other eggs had pipped (meaning the chicks had broken the egg with their egg tooth) nothing much had happened for eight, excruciating hours!

Number eight, looks just like the first chick, only it has a dark coloured beak. As they are both yellow, they will both grow in white feathers. We're dealing with Isa Brown, crossed with a Leghorn rooster, who is also part Isa Brown. So the colours are all going to be very different!

The third, and last to be born on day 20, was number 16. They hatched just 45 minutes after the last, and at that point, we didn't known how many more would hatch the next day. Twenty-one days, is the final day. Anything after that, won't likely hatch or won't likely survive, if they do. As they tend to be too weak.


New arrivals, from eggs #15, #17 and #19


Sometime overnight however, three more hatched. The three up front (to the right) were the day 20 hatchlings. The single one to the left, and the two at the back, were the new arrivals. You can see, some more eggs had pipped, but we still didn't know what day 21 would bring. Sometimes nature doesn't always deliver, and the chicks simply die in their shells.

The next two eggs to hatch, virtually happened at the same time.


Egg #2


Number two hatched at 6.30am. We didn't see the other chicks hatch (we were alerted by their peeping instead) but it was amazing to see the chicks slowly emerge from their shells.

Nearly at the same time, number four, hatched...So number 2 and four, were 7th and 8th to hatch. We think of them, as the twins.


Egg #4


At this point, we were very happy with the outcome. Eight chicks, wasn't a bad turnaround, for something I wasn't sure would even succeed. But there were still more surprises to come.

Number fourteen, arrived at 6.45am, and a half hour later (at 7.15am) number ten made it! What is so funny about number ten is, their placement in the que.


Egg #10


Just as number one, came first - number ten, came tenth! Dab smack in the middle of 20 eggs, number ten, hatched tenth. I was glad in the fact, I decided to number them, as I collected their eggs from the nest. It made hatching all the more interesting!

Something bad happened after 10 though. My son got a hold of our camera. I normally kept it well out of reach, but I left it in the laundry to take pictures, as the chicks emerged. It just so happened, he dropped my camera after number 10 was born, and cracked something inside. It no longer works.

So the next photos, I took with the camera in my smart phone. Which happened to be after I relocated all the chicks, from out of the incubator and into the brooder.


Recovering in the brooder


We got quite a variety of colours in the end. Even some with racing stripes! That was egg number 20, and born eleventh. This racing stripe however, is indicative of a brown leghorn. We were never told which coloured leghorn, fathered our working rooster, but there was a chick born with feathers on it's legs too. So there's definitely more in the mix, than anyone knows.

In the end, we got 15 chicks out of 20 eggs. There was only one casualty. Number eighteen (born thirteen) made a lot of noise after they hatched. Plus they couldn't stand up initially. They kept flipping onto their back, with their feet in the air. I eventually assessed they had crooked neck, indicative of their inability to keep their head up, and a small lump on top of their head.

If you want to read about crooked neck, you can do so, here. It's most likely genetic, and it means part of the brain has been injured.


The brood


Luckily, I have successfully treated something similar before, and thus far, the chick has shown some improvement. They have more control over their neck, and can get about to eat and drink. You can see them in the picture above (bottom, centre) with a little red bump, poking through the top of their yellow down.


Egg #18, aptly named "Mumble" from the movie:
Happy Feet


I had to sprinkle some antiseptic power on top of that bump, to help disguise it. As the chicks kept pecking at it. That's how chicks learn to eat - by noticing things which stand out. They instinctively go over and peck at it.

We will have to watch and see how Mumble goes. They have been accepted by the group and hasn't been pecked at, since applying the powder. Which is a good sign. They all had their first day out on the grass already, and loved to sleep in the sunshine. Most of the time however, they stay in the heated brooder, as they can't regulate their body temperature yet.

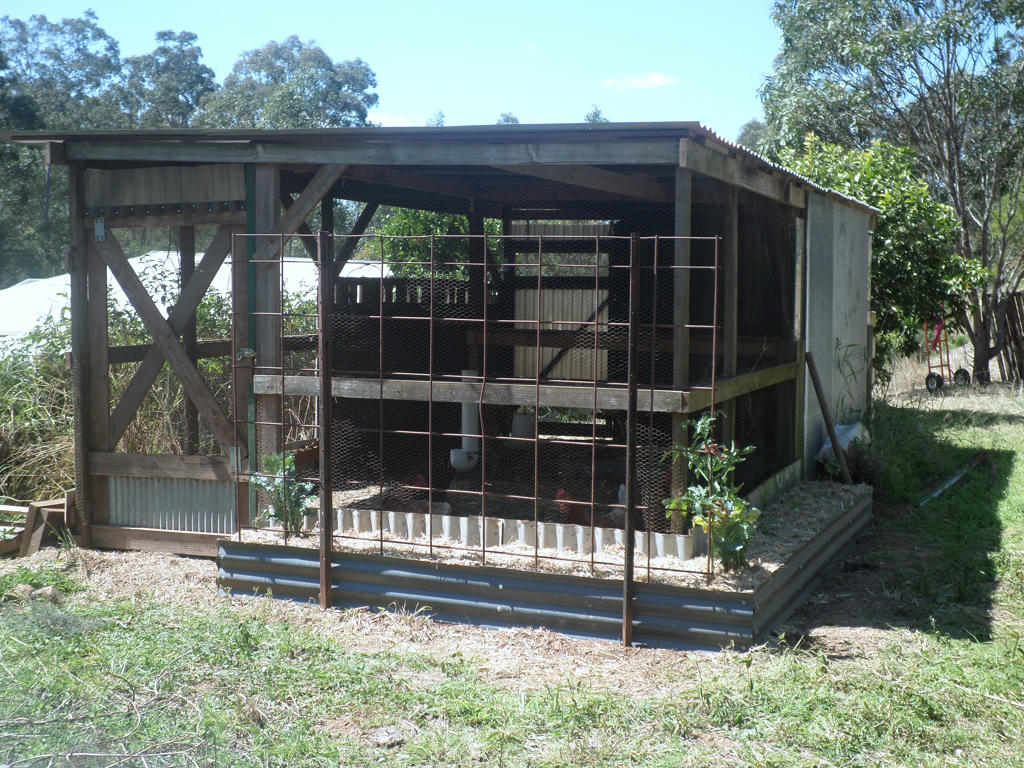
Now we have to repatriate a chicken tractor for outside, since we totalled the last one. I can't believe it's taken us 6 years to fix it! I guess we've been busy.

In closing though, I thought to share something really fascinating about the eggs which didn't hatch. They were all odd numbers: 3, 5, 9, 11 and 13.


Sunday, August 21, 2016

The messy garden

As any gardener knows, new plantings can look messy. Not just because they're too small for the space - requiring room to fill out, later on...but if you live with native animals, or free range poultry too, they like to scratch out any new and moist earth, you make available to them.

On acreage, it's just too hard (not to mention expensive) to fence everything in. Especially from nimble poultry, who specialise in defying gravity and barriers. They're jungle animals originally, so they've evolved into specialised earth movers in confined spaces.

I've actually found they will dig under netting, to get at the compost I've planted new seedling in. So fencing isn't exactly a foolproof solution either. The only effective method to thwart poultry, is the messy jungle approach. Any new plantings I put in the ground, get surrounded with whatever materials, I have available.


I've been putting new plants into this area, since autumn. It's just on the edge of our verandah. Much to my frustration, the brush turkeys and our free range chicken, delighted in scratching up the new plants. I realised I needed something to avoid their access. So I started collecting rocks and other random materials, to place around the plants.

I even left he grass and native peas on the edges, because if I pulled them up, it would just encourage the poultry to start scratching around the soft soil edges. It looks messy, but it's been effective. And it's only until I can get my plants established in the lovely compost, I planted them in.


I originally had a dead plant and it's unearthed root ball, protecting this liriope silverstar. But it didn't cover most of the soil, so they just rolled it off and dug up the liriope. So don't use lightweight materials, which can just be rolled over. I found a ring of heavy rocks has thwarted their antics. So long as they can't get a claw in, they can't dig up the earth.


I found they tried the same thing with this root ball, I tipped out of an old pot plant. I turned it over, to disguise the soil, but they just scratched it back, and unearthed the new succulent on the right. This is the repair job I did afterwards. By pushing a stick through it, into the soil, it effectively pinned it down. But it also makes it difficult to get purchase, to scratch around it. There are some rocks, above the succulent too. It's been effective, to date.

So if you are going to use more lightweight material, I have found the odd vertical stick out of the ground, makes it difficult for them to scratch around.


Here you can see the root ball again, next to a concrete chunk we had leftover, from an old project. Old concrete makes a good scratching deterrent. I even used an old solar light, with the spike missing - turned upside down, If I had the spike, I would put that into the ground too.

Once again, it looks messy, but it's only temporary. Maybe 12 to 18 months. I suspect the succulent, will simply exploit the nooks and crannies of the rocks anyway, and the plant will hide the mess from view. It's already gone to flower, so it will have offspring, soon enough.


Just a little further up the verandah, is another patch, I'm attempting to colonise with succulents. The idea is to thwart the grass that grows along the edges of the verandah, so we don't have to use machinery to trim it back. I put rocks around one planting and used another solution on the other side - just because I had it around...


This tub and bucket is where I plant my annual ginger crop. They're empty after harvesting, and won't be planted until September. As they were laying around, I butted them against the succulents, to make it difficult for any scratching opportunities.

I keep the gravel on the base, because I need it for drainage when the ginger does get planted out. But for now, it helps to weigh them down, so the wind can't blow them away. This is mixing storage solutions, with plant protection, even if it's only temporary. I've got to protect my new plants if I want them to survive.


I actually relocated this nasturtium that almost go scratched up, when it self-seeded in the vegetable patch. I put it in the crack of our retaining wall, so it would be protected from eager claws. It got eaten back by our chicken, but since it's grown bigger it's less attractive in flavour. So be sure to use up the nooks and crannies of existing hard surfaces, which are more than likely, being underutilised.


Here is another example of a nook I filled with a hardy daisy. It's placement was for two reasons. Firstly, to discourage purchase for scratching fowl - I didn't want soil scratched out from behind the retaining wall. But secondly, I wanted to shade the side of the raised, hugelkultur bed. Not just shade, but wind protection too.

As for the hugelkultur bed, itself...


It too was visited by scratching fowl. I had the heavy mesh on top, but they soon figured they could scratch between the grids. So I used a couple of the casurina branches I felled from a tree nearby, and they got placed on top of the mesh.

It's kind of a happy accident, because not only have I managed to keep the brush turkeys out of my beds now - it's also helping to shade the soil for the new seedlings. I'm tempted to experiment, and see what the results will be, if I keep them on for the entire growing season.


In other areas of the garden, I have used bricks, branches (some with spikes) and even logs, to keep away scratching from my new plants. The added benefit being, it's also feeding the soil, as the wood breaks down.


Other plants I have used to discourage scratching behind retaining walls, are spiky pineapples (they're especially effective) and strongly scented plants, like curry plant and pelargonium citronella. Fowl don't mind the strongly scented plants, but it's not something they hang around for long.

Our free range chicken likes to shade herself under the lime tree (above) preferring the side, furtherest away from the scented plants. I'm fortunate the pelargonium and curry plant are extremely hardly, and easy to propagate. They don't make bad nursery plants either, if you want to provide ground cover and shade, for a tender seedling.


A more recent project I did, was planting out some vetiver grass. I dug a hole, only large enough for the seedling, and placed rocks around them. So it's effectively surrounded by weeds and what not. Luckily, vetiver has a tenacious root system, that will easily out-compete the weeds. But I've keep the ground mostly in tact, so it's not going to be as attractive to scratching fowl anyway.


I planted out five sets of vetiver grass, and they haven't been disturbed yet. This will hopefully provide mulching material for my swale.

Basically I have found that hard, heavy barriers, vertical sticks out of the ground, spiky plants, condensed plants, scented plants and undisturbed soil, all to be effective deterrents from scratching claws.

I just have to live with a bit of mess and chaos, until the plants get more established. I also don't have to go out and buy a manufactured solution, which isn't always that effective anyway. The jungle solution, of removing the opportunity to scratch in as many ways as possible, using as many materials available, makes the rest of the yard look more attractive to jungle fowl. Instead of those tender seedlings, which have barely gotten their roots into the soil.

I imagine other materials, such as broken terracotta pots, car tyres, even recycled milk bottles, filled with sand or water and laid on their sides, would work at protecting new seedlings too. I especially like the idea, the plants they are projecting, will one day, cover them in greenery and look beautiful again.


Sunday, August 14, 2016

Soil filler

I had a dilemma recently, which I almost solved by throwing money at it. I thought I needed a trailer of compost. Maybe I still do, but at least I can delay it a while longer, now I discovered a new way to fill a raised bed. In this case, the one around Hilltop chicken coop.


Hilltop chicken coop, raised bed


It was built in September 2015. Has it almost been a year already? Of course it has, since I've already experienced a growing season with it. I grew a little kale and tomatoes, although they were plagued by wilt. The choko I planted died, so I planted some squash seeds, later on. They grew over the wire mesh and the sunflowers. Which were also supporting some beans! The sunflowers were the most productive crop I got, from this bed.


 December 2015


But after the growing season ended, I pulled everything out. The newly released, free range chicken, started to walk upon it and compact it down. She had some help too, with the growing number of brush turkeys, quail and even one of the neighbours' chickens, which flew their coop. What I was left with, was not conducive to growing anything.


Inside the bed


So it needed a revamp, and I needed some soil filler, to compensate for the drop. Thanks to a few other projects we had going, I figured I had everything I needed, without having to go out and buy a ready made product, from the nursery. I just had to get creative.

The idea dawned, after demolishing the old passionfruit vine, trellis, recently. Those old saplings, I used as braces, seven years ago, were perfect hugelkultur material now.


Soil filler


By collecting them up, I also cleared our work site a little more. They were light, spongy and excellent filler for the bed. I needed more though, so went searching around the yard. There was plenty of aged, woody material to scrounge. Like some old tree stumps, I kicked to get out of the ground. They were well rotted.


Coloured wood


Then there was the strange, purple coloured wood I found. Weird? It was under a tree, but in a slightly elevated position. Which is why it had kept it's form and weight, much better than the rest - because it wasn't in direct contact with the soil. Some kind of fungi grew on the wood, hence, the purple colouration. It wasn't what I was expecting, but would still do the job I intended.


Ready to go to work


After my little expedition (it took about half an hour) I had all the material needed. It was actually quite fun, pouring through the pieces of forgotten yard. As I turned things over, critters dashed for cover, and I carefully hauled my collection of forgotten things, up the hill.

A much nicer activity to achieve with a wheelbarrow, than having to attach the trailer and drive into town for compost. I'm coming to appreciate, how many assets our land generates naturally.


Removing soil


The next job was to dig out the soil. It still smelled like the coffee grounds, I added nearly a year ago, which was very pleasant. But the condition of the soil, was very poor too. I could now understand, why some of my plants struggled. I was amazed anything grew at all!


Soil profile


As I was digging it out, and placing it into my wheelbarrow, it came out in large, dry chunks. I found a few caverns in the soil, where some Slaters dashed out, but otherwise, there was no visible life in the soil. I suspect it became oxidised, with the long growing season, which saw very little rain, last year. The tin ensured, it was well and truly baked too!

But hopefully my new hugelkultur modification, will help to retain moisture for longer, in the soil this year.


Filled with carbon


After placing my collection of wood in, I made sure to water it well. Then I added some straw, dust and manure from the chicken coop, to help start the decomposition process. Then, I added more water again.


Straw on top


I did pay for the straw a while ago, so it's not exactly a closed loop. But by using it in the coop to help capture manure, it was literally just a few steps away now. Then it was just a simple matter of dumping the old soil, back on top again.


Half done, half to go


Working around the mesh, made it challenging. It's quite a narrow spot, so I had to work from both ends and meet in the middle. Which made sense really, when my barrow could only hold so much soil, at a time. This half was given the same treatment as the former...


Fill with carbon again


It looks like a simple job, but it was working around the mesh, that made me exhausted. But the mesh serves an important part in my coops design. It aids plants to to grow up the side of the coop. Which happens to be the side, facing west, and receives the hottest sun, during summer, in the afternoons.

Doing the longest stretch of bed, last, without the mesh to squeeze between, made it so much easier!


Celeriac


I still had some celeriac which survived, in that last section, I had yet to dig up. The chickens got one plant, and I relocated this one to another garden bed. The aim is to let it set seed. It hasn't died since the transplant, so here's hoping.

I dug the old soil out again, and relocated it to my wheelbarrow. It's actually quite hard ground underneath, with a high percentage of clay at the base. So hugelkultur should really help grow things better, in this location.


One side, left to clear


I had some lovely, long pieces of wood to fit in this section. What didn't easily fit, was broken into pieces, like stale sponge cake. I filled in the gaps with the woody crumbs.

My chicken supervisors were most curious, with my scratching around and what not! I'm sure they were waiting for a treat. Sorry guys. Not this time. Maybe next year this bed will have more soil critters, for me to throw to you?


More wood


It was just the right amount of old wood, to bring the soil level up to where it was formerly. I'm hoping it will perform a little better for me, this growing season. Though I'm going to have to select a range of tough plants. The ones that need a lot of attention, just won't cut-it, in this location.


Level


There was still the mandatory mulch to apply, in order to reduce evaporation. In this case, I chose sugar cane mulch. It's another purchased input, which was acquired a few months earlier.


Mulched


And because this is chicken territory (one, free range chicken, that doesn't live in the coop) and unfortunately, brush turkey domain too, I had to rig up something extra, for added protection...


Protected


I used the old chicken wire, from the trellis we took down recently. Plus some plastic netting I had laying around. The brush turkey's have been actively discouraged from this part of the yard now. They are welcome on the majority of our land, but not where we cultivate food growing areas.

They have a natural food supply, but seek our home grown compost instead. Which happens to be spread around a lot of things. They have already killed a bunch of plants meant for food production. Time will tell if my extra measures work, as they've thwarted me before. Don't get me wrong, we still appreciate their presence in our yard, but we have to roll up the welcome mat, in our sensitive areas.

We will plant this bed out, closer to September, and keep our fingers crossed. For a tiny area, it does grow quite a lot.


Thursday, August 11, 2016

Twin peaks

So I finally got that communal virus going around the family. You know how it is. Unfortunately, all those fun projects we were doing outside, suddenly came to a halt. All but one, that is.

We booked a date for some tree loppers to visit yesterday. It was a little overdue, which is a habit we tend to get in to, with our trees. We really value their shade. On the other hand, it then requires the experts to remove something of a monolith. Or in this case, two.


Last morning light


You can see them in the centre, standing side by side. They are hardwood, Spotted gums, and have been here longer than us. They provided shade even as young trees, on our dry creek bed. Hardly any vegetation was growing down in our lower gully, back then, so we wanted them to stay.

As larger trees, they even survived the 2011 Queensland floods. Receiving the full torrent of water, coming down from our slopes - they held the soil together with their indomitable roots. All manner of debris was wrapped around their trunks, afterwards. We have a lot to thank those trees for. Shade, soil protection and plenty of good memories, hanging out, under the trees.


Many years growth


But then, they grew too big for their location. Their wonderful canopy was starting to block our solar panels (hot water and power) and with every year they grew taller, they were becoming a liability to the house, should they decide to fall over. Which eucalyptus trees, are known to do.

So that is why we called the tree loppers. Logically, it makes sense, but then you can't help but mourn a little afterwards, too.


Both trees


Seeing them laid out like that, knowing how awesome they were as trees, made us feel like a couple of bad guys. Unlike the casurina tree we took down recently, these were much larger, and there's something magical about growing older (and watching your kids too) under the shade of the same trees. I don't think having the virus helped, as we couldn't get to work straight way, putting them to rest, properly. 

When we get our strength back, they will become edging to hold back the soil, making low retaining walls, with their trunks. Where they'll become food for the termites and all manner of insects and soil microbes.


Sawdust


So they will continue in our landscape, but in a slightly different way. From towering trees, to microscopic life, inside the soil. I was reminded of this, when I glanced upon the sawdust, sprinkled across their trunk.

It will take some time, and quite a few growing seasons, for that much carbon to transform into soil. But it's a resource in our landscape all the same. So we look forward to using it.

We really are fortunate to have so many trees, spring up naturally. But then you have to strive for some kind of balance too. We're always trying to work on that. Which is why we have our eye on some smaller trees, around the house, which need to come out too. Before they become monoliths. The aim is to replace them with equally hardy, but naturally smaller, in stature, trees.

I'm thinking macadamia nut trees, and some diciduous ones, to add fertility to the soil at leaf drop. It should add more diversity to the environment, with the remnants of these twin trees, to get them off to a good start.


Sunday, August 7, 2016

Carbon pathways

So here's something I've learned, which you simply must do if you have land, or access to a LOT of plant material. You need to put all that carbon back into your soil, in order for it to improve the soil. Sometimes, burning it off, can help put charcoal back into the soil, which is actually beneficial. You don't need much charcoal though. You certainly don't need it every year. Most of the time, you want to place the majority of your carbon material, onto, or back into the soil.

Think of it as rewarding the soil microbes for growing anything on your land in the first place. You can do this by using livestock, recycling plant material through their dung. Or you can use the plant material itself. Never remove from your landscape, what it had the wherewithal to produce. That's like robbing your own bank account. You'll eventually spend the land itself.


 Orange blossoms - looks to be an abundant harvest


Which is what carbon pathways are all about. It's a permaculture term, which plans to design excess carbon into the landscape, and recycles it back into the soil. Being cyclical in nature, it's designed to continue giving, indefinitely.

I'm constantly dealing with carbon in our garden, and I probably haven't given it as much credence as I should. At least from it's point of origin. You see, we have an abundance of eucalyptus, acacias and ironbark trees, which David and I are constantly having to deal with. We should have put them to work as a resource, a lot sooner than we have. At least now though, we see it's an asset to be utilised.

When David was taking down the old trellis recently, for example, I did some more mulching of our Leng Navel. It's a different tree to the Washington Navel, I gave the same treatment to a few months ago.


Leng Navel


We always have branches and twigs to spare, and using them up as mulch, really protects the soil from drying out, under the orange tree. It also stops the brush turkeys from digging up the roots. I just break up the branches and it's quite a calming activity, despite it's physical requirements.

It still needed a finer mulching material on top however, which came in the way, of another tree. Actually, it lived just next to the orange itself.


Leng Navel (centre) Hilltop chicken coop (right)
Casaurina (left)
 

It's a casuarina tree, and it was planted roughly the same time as the orange. It's better suited to our dry climate, than the orange tree was, and it's sole purpose was to protect the citrus, from the intense afternoon sun. Which it has done a successful job of doing. This orange tree is a lot bigger than it's sister Washington Navel, planted at the same time.

But now the casuarina is dwarfing it's citrus companion. Left unchecked, it could become a sooty mould problem. We've already seen some of the branches die on the side that receives the most shade.


 Removed


So out came the chainsaw, and the safety equipment. In a matter of minutes, the casuarina tree came down. With spring just around the corner though, we're hoping it will re-shoot, or coppice. That way, we will have more mulching material to place around the tree in another year's time.


Taking out the tree, is only the first step ~
now what to do with it?


That casuarina was about 8 years old, so it had a lot of carbon material to give. And use it, we did! Casuarina can sequester nitrogen from the atmosphere, so it's need-like leaves, are high in nitrogen. It can also reduce pH in alkaline soils, making them more acid for things like blueberries and strawberries.

I actually used most of it's trunk as garden edging/hugelkultur, for a nearby rose bed. It had provided beautiful flowers in the past, but now it was being overtaken by grass. So I'm in the process of using most of the Casuarina trunk, and some eucalyptus trunks we have laying around, for that project. It will then be covered in casuarina leaves. I hope to report on my roses at a later date.


Mulched with casuarina leaves


Of course, I also used a lot of leaves and branches under the orange tree. There was so much material to use up, I had enough to put around both orange trees, and a carob tree too. Not to mention the rose bed.

In the image above and below, you can see the Leng Navel, now has access to full sun.


A balance of sunlight


Those bare branches should fill up nicely with new leaves, and there's enough thick mulch around the tree, the ground shouldn't be exposed to intense summer heat. If the casuarina stump doesn't re-shoot, I have plans to grow pigeon peas and lemon grass, to replace as mulching plants.

Actually, this area will soon be filled with a range of new mulching plants. As we want to continue feeding the trees, which feed us.


Opportunities abound


Just below the recently felled, casuarina tree, is a new banana pit. I look forward to sharing more on that project, as it develops further. We're hoping it will become quite a productive area.

The theme to take away from this post however, is to think more about using all the plants on your property. Whether they be growing wild and you're forever having to deal with them (native trees in our case) or those plants you propagate, with the intention to chop and drop as perpetual mulch, to feed the soil - start thinking how diverse you can make the carbon pathways, across your landscape. How can you increase it, by using it up and increasing it again?

The more carbon materials you can sequester back into the soil, the more resilient your soil will become. Plus, you won't have to rely exclusively on bales bought from the store, to protect your soil. Remember the bank account analogy. By making more deposits than withdrawals, you will soon be richer in abundance.