Showing posts with label Thrifty tips. Show all posts

Wednesday, January 9, 2019

What a Miracle

The beginning of a new year, is probably when I like to potter around the house, the most. I'm usually busy, re-organising and cleaning-up after Christmas. The tree and it's sparkling decorations, are always the first to be packed away. Then before you know it, you're washing windows and dusting shelves!

My particular challenge this year, was GREASY surfaces in the kitchen and elsewhere. Enter the magic of Miracle Spray. It's a homemade recipe I gleaned from this blog, and particularly useful for cutting through grease!

What do I mean by grease...?


Exhausting


Well, it's the kind that accumulates, above the rangehood cupboards! This has been building for a few years now, and I was tired of the reminder to trade my rose-coloured glasses, for a lovely shade of brown, instead.

I wonder if this can get any worse? The trusty step-ladder, reveals ALL...


The grime scene


Yes, indeed. It can get worse. The very TOP of the kitchen cabinets, accumulates even more dust, grease, bug carcasses and even food particles! How did that popcorn, get there? Seriously. The stove is directly underneath the cabinets. So it would have accomplished some rather fancy, ricocheting, to land there.

Mummified popcorn, just waiting to be discovered. The wonders a step-ladder will reveal in your home!


Hallelujah!
I've seen the white


And this is why I love, Miracle Spray, so much. It cuts through sticky, dusty and greasy surfaces. It's possible to use regular dishwashing liquid instead, as I've done in the past. But your bucket of water, becomes incredibly sudsy, afterwards.

A spritz of Miracles Spray, however, and not only does the cloth cut-through all that mess, but your bucket of water (to rinse the cloth) remains watery, instead of overflowing with suds. Which means, you don't have to change your bucket of water as often.


 Grime sins, are no more!


While regular dishwashing liquid, will achieve the same result, there's less mess to clean the tools, you're actually using to clean with. The cloth in particular, can get quite manky. So clean water for rinsing, is important.

The cleaning tools I used in this application, was a bucket of warm water, Miracle Spray and a cleaning cloth, or rag. Something that can at least handle, the caking of greasy gunk all over it. Some heavy cotton, flannel, or in my case, a microfibre cloth. I don't buy microfibre myself, but these were given to us when someone was doing a clean-out, of their kitchen supplies.


Transformation


These are my kitchen cabinets now, which look as good, as the day they were installed. So much cleaner. At least for another year or two. Grime always finds it's way back! I suppose that's the blessing of having a working kitchen though. All that home cooking, inevitably leads to mess. I wouldn't have it, any other way.

Miracle Spray, has other applications around the home too, which are just as easy to deal with, when the cleaning supplies are out...


In plain sight


Do your light switches, end up with as much dirty marks around them, as ours seem to collect? Natural oils, mixed with a good helping of dirt! Being a live, electrical switch however, I never spray liquid directly on it. Spray the cloth instead. The grime is still removed in a few seconds.

There are even more jobs for my cleaning kit and mojo, to tackle though.


Almost finished shedding


Time to give the ceiling fans some love. I didn't get a photo of what they looked like, "before" I started cleaning. This was only the remnants, I had yet to finish off. But just imagine these white blades, had sprouted a thick, brown, furry coat. All over! No wonder they were slowing down, with all that fuzzy drag.

Ideally, I should have cleaned them before Summer, but I always get so busy with the Christmas plans instead.


Ready for takeoff


Now I have my white, ceiling fans back - and I didn't have to get covered in suds to do it! They sound like a jet plane again, when starting up. Aerodynamic. I'll save the fluffy coat, for next winter. No doubt, it will re-sprout!

On the blog I gleaned the Miracle Spray from, it claims to remove stickers as well. Frankly, I had the perfect test subject, for that theory too...


Stuck on you


My son and our coffee table, are inseparable. He loves to create all sorts of lego, on it, play board games, and of course, the obligatory stickers. Which I absolutely told him NOT to stick to anything but paper! I was cross at the time, but didn't let it rise to the surface. I mean, I could just rip them back, off. Right?

Wrong! Now my son's stickers, were inseparable from the table too...


It really IS a Miracle...Spray


That was, until I sprayed my trusty homemade cleaner on it, and left for a few minutes. It does actually remove stickers, plus, that all important gummy residue. It states in the blog I linked this recipe from, not to spray on wooden surfaces. This was my exception though.

I'm not sure why it cannot be used on wooden surfaces, as I regularly use eucalyptus oil to clean mine. Maybe the washing soda will dry it out, and make the wood brittle, over time? I'd stick with the recommendation to avoid using on wooden surfaces. But I'm sure a one-off, desperate measure, can be forgiven. I mean, it was either the Miracle Spray, or the paint scraper!


Ready to play


Back to business as usual, at the coffee table again - minus the stickers. You'll be happy to note, that no coffee tables were actually harmed in the filming of this process. Even the lego managed to stay in tact! I'd like to thank my bare feet, for avoiding any random pieces of lego on the floor though. Sometimes you get lucky.

Have you tried the Miracle Spray at home? Any interesting applications I haven't thought of yet?


Monday, June 12, 2017

Recycle waste

I'm always on a journey of discovery - learning new ways to deal with old problems. I like to extend potting soil I purchase, for propagation and plants I keep in containers.

I use coffee grounds, from my husband's work, to help in this endeavour. I've also been known to use sand and compost too. All of which, can set like concrete if it dries out. Which means, dead plants.

I found a solution, in a waste product I have to deal with every few weeks...


Vacant for cleaning


We once had two guinea pigs, but one passed away, last year. Now we just have the remaining one to look after. She lives inside for the most part, and I bring fresh greens, a couple of times a day. We buy wood shavings from the local produce store, to line the bottom of the cage. Which I then have to clean out, every few weeks.

Previously, I dumped the spent shavings in the compost, but we gave up making compost in piles. We prefer to place all our food scraps, either in the chicken coop, the worm farm, or in the banana circle. But then one day, I decided to experiment with this waste product, in a different way....


What is this?


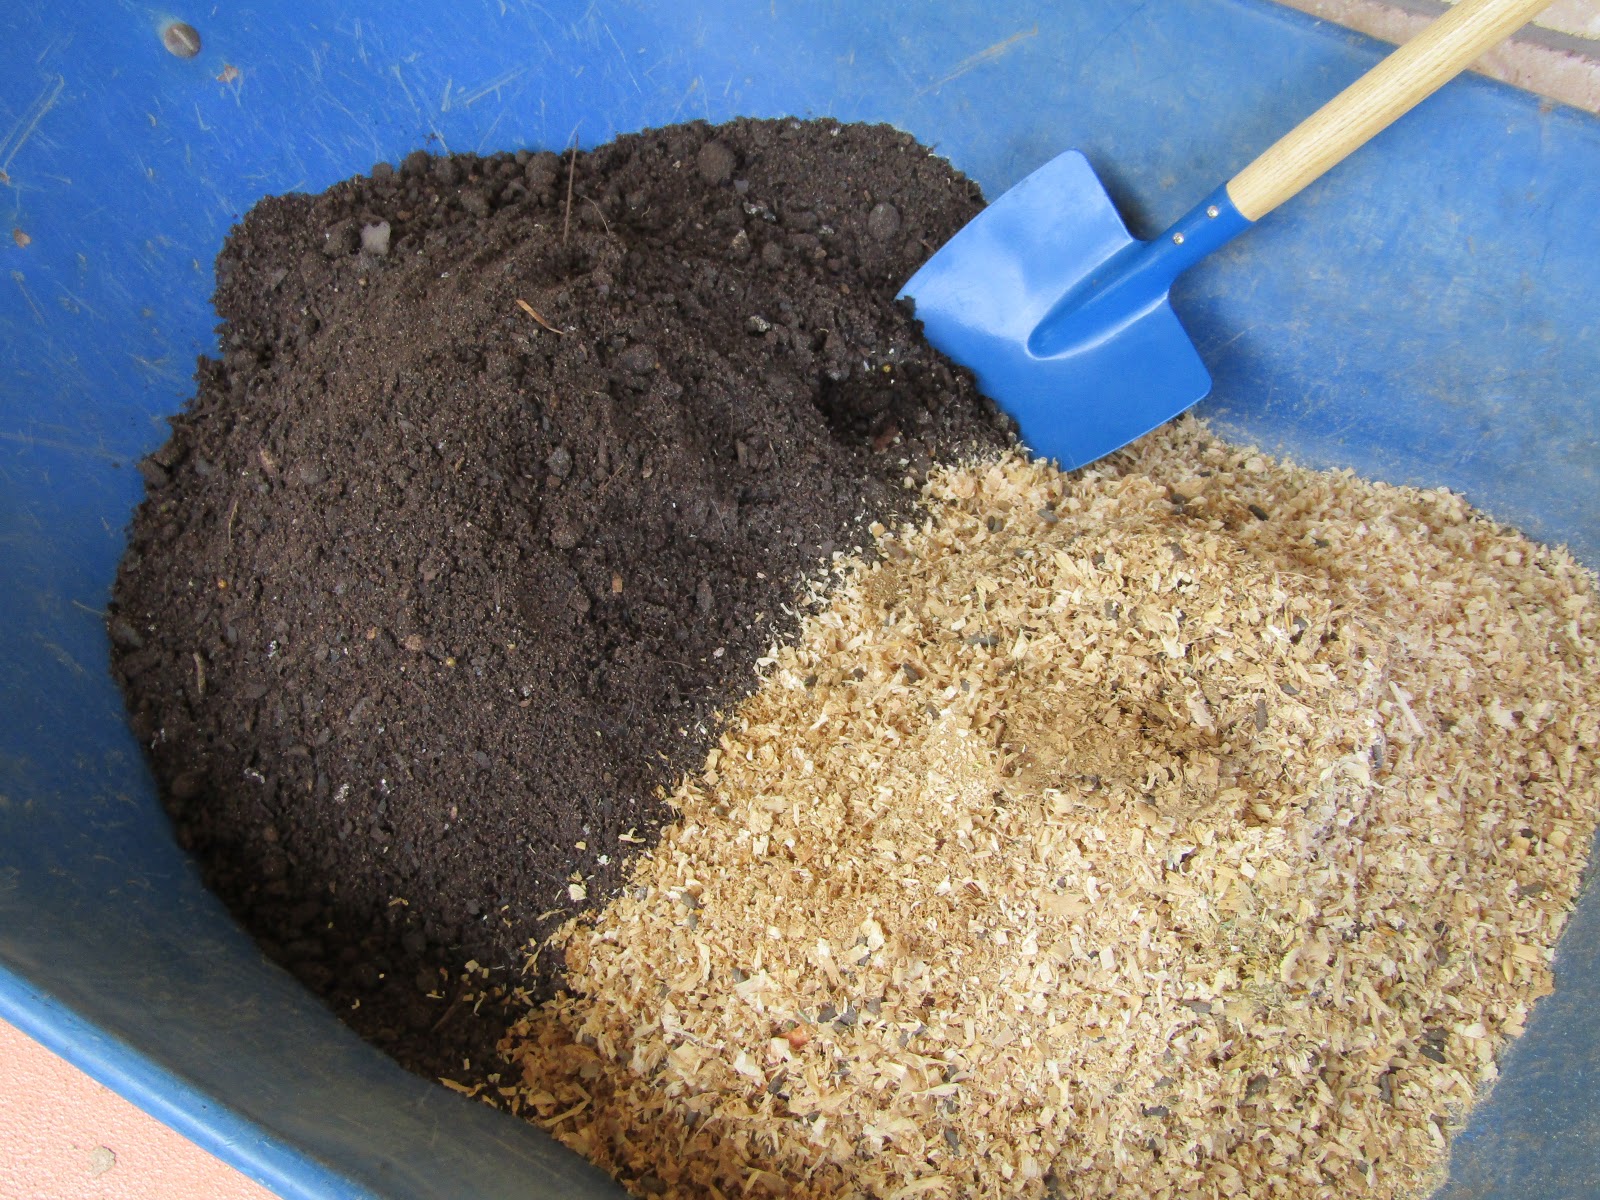
It's a terrific soil extender, for my potting mix. I had about 15 litres of a bag left, which I already extended with coffee grounds and old bark - sitting in a pile for years. But it was also setting like concrete, when it wasn't kept moist. Most plants like to have damp soil, but not drenched, so I had to fluff the mix up with something else.

I used about half of what was in the cage, to match how much potting mix I had. Then I mixed it all together. A wheelbarrow came in handy, for ease of mixing, and so did my son's smaller shovel (a Christmas gift, for gardeners in the making).


Ready to use


I stumbled on this trick, several months ago, and it keeps the moisture in the soil, without needing to be drenched all the time. Plus it doesn't set like concrete, should it dry a little - which can be damaging to finer plant roots.

Finally, I get nuggets of guinea pig poo, and guinea pig hair, as slow release fertiliser. So I'm pretty happy to have discovered this new way of recycling waste. I like how it's performing in the pots too - the plants are doing so much better.

Effectively though, the money I spend on the guinea pig food and shavings, are extended into my nursery and potting culture. I don't have to buy as much potting mix now, or any slow-release fertiliser. Nor do I use as much water. Incremental savings add up over time. It makes sense to simplify what we buy in, to do as many jobs as possible, on it's way out.

Do you have any secret ingredients, you use to extend potting mix, or a useful way to recycle waste from the home?


Monday, February 6, 2017

Colour project

I was inspired recently, to brighten up a few areas in our home. We have a blank canvas with slightly off-white, walls. I've never been one for bright colours in large quantities, but am partial to splashes of colour in the right place.

They're referred to as accents, and that was the focus of my room makeover. This post is not about the entire room - just a particular aspect I'm adding to it. I needed something to fit a narrow section of wall. So what about a simple picture?


Click image to enlarge


I went through my framing supplies, and discovered a picture either my mum found, (or I did) at a second-hand shop. It had $3 written on the back. It doesn't have any glass, and the frame isn't designed to include glass anyway. It would suffice for the project I had in mind.

But I needed to change a few things about it first...


Two pieces


I needed to paint both the frame and the backing board, white. For reasons, which will become clearer, later. The little metal latches at the back, simply pulled back with a butter knife, allowing me to remove the backing board entirely. Goodbye - "afternoon at the beach", and hello to...um...something new.


Tools


Newspaper was mandatory, as a splash cover on the bench. I could get as messy as I liked, without worrying about it. The tools were simple. A paintbrush, a roller and a flat-head screwdriver.

That roller has been with me for well over a decade. It helped paint some of our former house, before this one. It's great for getting around tight spaces, where a big roller would just be too cumbersome. Only I discovered recently, the foam roller had disintegrated. Fortunately, a trip to my hardware store, found replacement foam rollers - much to my delight! I love that little roller and glad to have it back in action.


White paint?


The flat-head screwdriver, was for lifting the lid off an ancient can of paint. It's lasted many years. But it was in a poor state, when I finally broke through the rusted seal. It was more like putty, than paint. There was a rubbery skin on the top I had to break through too, but inside I found a workable medium.

I scooped what I needed into a spare glass jar, added water, and stirred well!


First coat


The paint went on smoothly, if only a little thinner. The first coat went on but actually took four coats, in total. And two of those were white gesso from my art supplies cupboard. It's thicker and has more tooth for paint to grip on.

But I had my background and frame done within the day. Which allowed me to move onto the next step:


Taping over

I wanted something very simple in this room. The feature was going to be the colour, not so much what the image was meant to represent. So I took some masking tap, and put it down on the board, to cover the areas I wanted to stay white.

I found a picture online, of a Monstera deliciosa, or fruit salad plant. I used it as inspiration (you can see it in the background) for my taped experiment.


Ready to roll


Once I was happy with the design, I poured the paint into my rolling pan. Isn't it a beautiful colour? It's called Cool Aloe, and is from the Accent range at Mitre 10. I've used this colour elsewhere in the same room, and I needed to carry some of it over to a different wall - hence the picture idea. This is a sample pot, so very inexpensive - under $10

First coat


Then it was just a matter of rolling the colour, over the board. I needed two coats, with two hours for the coat to dry in between. Luckily, I had a busy day that day, or I would have been highly impatient, to start removing that masking tape!


Partial reveal


The tape did it's job well. Almost too well. It was a little challenging to pull some of it away. To get the shapes I did, I had to tear the tape and place it on, several layers think. I wanted that ragged edge look, which I achieved, but it was a little fidgety to get it all off.

Then it was just a matter of fitting new hooks to the picture frame, so I could hang it portrait style - instead of landscape.


Done and hung


It fitted perfectly, into that narrow space on the wall. I didn't mind how it looked rustic or imperfect either. That was the whole point. It was introducing colour, more than it was introducing shapes. It made the plain walls a little more interesting to look at.

For this project, I paid under $10 for the paint, and replacement foam rollers. The room I'm doing up, also has other equally, inexpensive updates. I wanted a change after 10 years of blank canvas walls, and this was fun to create. It also used up supplies I had in storage and put them to good use.

I look forward to doing a full room reveal in the near future.

Thursday, July 7, 2016

Choko virtuoso

The humble choko, otherwise known as the Chayote, shares the same family as cucumbers, squash and melons. Choko tends to be loved by some people, hated by others, but mostly, ignored by the masses. That's because it's not a very exciting vegetable, despite its many benefits.


Sprouting choko for growing, not eating


It's major downside, is that it's quite bland in flavour. Plus it has a gummy resin, which dries on your skin, when peeling. Using kitchen gloves, avoids this problem, and the resin is harmless. Its just a nuisance to get off.

The upside of choko, outweighs these minor issues in comparison. As a crop, they're incredibly easy to grow. They tolerate drought, once established and will survive frost. They will die back, but regrow with the warm weather again. What's more, they are prolific producers.


Choko vine - 2014


It's an old tradition in Australia, to grow a choko vine, over the chicken coop. I've personally done this in the past, and regret having to remove the vine, when I renovated the chicken coop, back in 2015. They really help to cool the temperature down, for your chickens during summer. Plus its reminiscent of the jungle environment, where chickens originated from. So you will have some content chickens.

The very best asset of owning a choko vine however, is they're great at bulking up meals, for very little effort and cost.


Choko & fruit tart - 2012


I have made Choko & fruit tart before, and you couldn't tell it had choko in it. Because the beauty of having such a bland vegetable as choko, is how it will take the flavours of the dish, without imposing its own flavour. So it tastes, just like the sweetened apple and cinnamon, of the original recipe. The choko just makes your flavourful ingredients, stretch a little further. Very economical.

I've also made Choko Chutney (all choko) and Fruit chutney (substituting choko for other fruit). This relatively cheap condiment, substitutes tomato and barbeque sauce, on my meat dishes and fried eggs. It's spicier than barbecue sauce and you won't ever miss bland, tomato sauce again.


 A small selection of the single batch


Because your choko vines will bless you with so many fruit, you can make chutney quantities in bulk too. I regularly use it to flavour my curry and casserole dishes, without having to worry about what a 500ml bottle cost. Plus, I keep reusing the jars, by making preserves - so less waste to deal with.

The humble choko, deserves a revival in everyone's back yard. Just learn to appreciate its many qualities, rather than focusing on the minor downsides. If you want to learn how to stretch your pennies in meal planning, you simply have to grow a choko vine in your back yard.

Recently I made a curry, with choko. Remember the couple I told you about, a few days ago? This used some choko from their vines, which they kindly gifted.


Dinner recently


Can you see the choko, amongst the other vegetables? You won't taste it either, because it takes on the flavour of spicy curry. If you would like to know, how I made this curry, with a bunch of leftovers and some bad fruit, read on.


Ingredients


We always have leftover meat and vegetables from roast dinner. We like to make other meals with the leftovers - curry being my absolute favourite. Because you can get away with throwing almost anything in it, and still have it taste delicious. This is leftover lamb, pumpkin, sweet potato and carrot.

It's best if you can use the smaller, younger, chokos for cooking. As they have less sticky substances on them (you will need a rubber glove when peeling), and they're more tender. The ones we were gifted recently, were perfect.


Diced choko and onion


The larger your choko, try boiling the diced pieces in water for 20 minutes, before starting any cooking process with it. Because they are much tougher. I peeled my three small to medium sized chokos. They were diced slightly larger than the onion. Both went into the frying pan at the same time.


Frying choko and onion


Once the onion was brown, the choko had become a little more translucent. But its nowhere near cooked yet. Choko holds its form, extremely well and takes a great deal of overcooking to make it break up. I have yet to see that happen, I might add, and I've made a lot of chutney.

Next, chop the meat and leftover vegetables up, tossing them in the frying pan for a little bit. Add the curry powder (a heaped tablespoon and a bit - or whatever strength you like), some garlic and a can of coconut cream. You can use regular cream, if its all you have. I also use about a cup (250ml) of my home made, choko chutney. You can use whatever sauce/condiment preferences you have in the pantry. Leftover roasting juice and fat, can also be used instead, if you saved it from the night before.

My favourite curry though, are sweet curries. Which is why I always throw in some extra fruit. Even if it isn't particularly good fruit...


Funny fruit


This pear was starting to rot at the top. Once peeled and cut back however, it was mostly okay. I also put a banana or two in, plus a few handfuls of sultanas. This is my mother's recipe for curry, but really add whatever you need to use up. That's what leftovers are good for.


Ready to simmer


For a touch of fibre, I also add shredded coconut, as the final ingredient. And don't forget the frozen peas. Then you put the lid on, and let it simmer gently for about 45 minutes to an hour. The choko should be cooked and when you eat it, you won't be able to distinguish it from anything else in the pot. It's all curry, so its all good!


So attempt to track down a choko from a friendly neighbour, or just at the fruit store. Spring is only a few months away now. Once your choko sprouts, and the danger of frost is over, your fruit will be ready to go in the ground and smother whatever you plant it near. A trellis, chicken coop, fence or just a pile of garbage you want to hide for the season.

I'm making a new place for a choko, this spring, myself - thanks to our neighbours recent act of generosity.

Choko - a weird, but economical crop to grow for your family's table.


Monday, January 4, 2016

Blocks

 Our very first, Windsor block, retaining wall


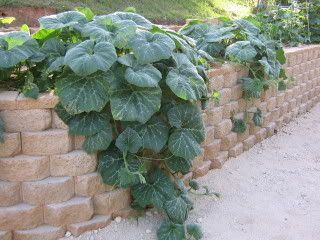
So we've built a few retaining walls at Gully Grove - enabling us to create flat land on our slopes. That first Windsor block wall, was to become our vegetable bed area, and was worth all the effort. Concrete blocks should outlive timber retaining walls, indefinitely. So we still expect it to be standing, long after we've been consigned back to the soil ourselves.

They aren't exactly cheap though. Which is why its taken us many, many, many years, to build the walls we have. But apart from buying them by the pallet, brand new, we've also come across our Windsor blocks, in other ways.


Advertising


We looked through the local classifieds, under building supplies, and found an ad selling 20-30 Windsor blocks, leftover from their garden project in town. It was a simple matter to collect the blocks with a trailer, and they were even kind enough to throw in some building bricks they had leftover from their house build too, for free.


Our second, Windsor block, retaining wall


I think we paid $50 for those blocks, which saved us well over half price, of what we would have paid new. But there's also another way you can buy cheap blocks for retaining walls.

Visit the manufacturer and see if they are selling seconds. We have collected seconds from them previously, to finish other projects we miscalculated how many blocks we needed. What are seconds? Well, I can show you, thanks to our recent wall project.


Spot the difference


Seconds have cosmetic damage, but don't alter their ability to do the job they were designed to do. In the above picture, you can see one side of the brick (right) is smooth and straight. On the left side, however, its jaggered and not straight. The block on the left, had too much of the facing taken off and consequently, sheered off some of the straight edge. You may notice, a little bit remaining down the bottom.


Minor gap


Same bricks, with a slightly elevated view. You can see the blue-metal (aka: gravel) we backfilled between the blocks. This is part of the process for creating drainage in the wall anyway, but it also ensured the damaged brick, could still hold the soil back.

It's an example of what a "second" would look like, if you purchased them from the manufacturer. Others may have chips the customers didn't want and returned them. They still work, they're just a little damaged and can cost less to buy this way.

We didn't buy these seconds, they came in our new pallet of bricks. We could have returned them for better ones, but we decided they would still do the job.


Uneven front, base


These are blocks we did reject though, but it can also give an example of what "seconds" stock, could look like. This block should have a flat base, but some of it has been knocked off. You could easily put this block down in the first course, and it wouldn't be noticed. We discovered this one after the first course was laid however, so couldn't use it in the subsequent courses, which had to sit flat on the block underneath.


Broken off


The block on the far right, has had its ledge taken off. This isn't good to use on any course, because it wouldn't lock into the road base, or any corresponding blocks it was laid on. But some have only a little bit missing on this ledge, and would be sold as a second. So long as most of it is there, it can be used in a wall. If you were to use them in a wall, just space them well, between good blocks.

If you only wanted one course of bricks as a raised bed however, then it shouldn't be a problem to use. Once you go above two courses, it starts to become unsafe. Because that ledge, is part of the engineering of the blocks to hold the weight of the soil back.


No hope for this one


In all the years and times I've laid the first course of bricks, in our walls, this was the first one to split. I barely tapped it with the rubber mallet, and it split in half. Obviously it has a fault in it, and cannot be used at all. But I thought it was worth noting, as its never happened to us before.

If you wanted to build a wall on a budget and have a means to collect small amounts of blocks over time, this is the best way I know how to do it. Scour your local classifieds, maybe even put a wanted add in, and you can visit the manufacturer to see if they have any seconds to sell.

Do you have any suggestions for sourcing second-hand building materials in your area?

Wednesday, May 6, 2015

A new cheat!

Okay, so my husband doesn't have many vices - he's not a drinker, smoker or addicted to 4WD'ing! So I don't like to request his remaining vices be curtailed. They're honestly pretty tame, but can sometimes be expensive for our one income family. I'm always trying to find ways to save money.


A necessary evil

My husband IS a coffee drinker though, and not an ordinary one - he likes Mocha's, which is coffee, plus drinking chocolate. He actually has two different varieties of chocolate powder in his Mocha's. First is, Milo, made from barley, so is more a chocolate malt powder - its cheaper per gram though, because we can buy in bulk. His second powder however, is Cadbury's drinking chocolate, derived from cocoa powder, and decidedly more expensive per gram.

I was filling up the glass jars, near the coffee station recently (from the main tub above) and I thought to myself - there HAS to be a cheaper way. There just has to be! So I looked at the list of ingredients and realised, I could make it cheaper.


New mix


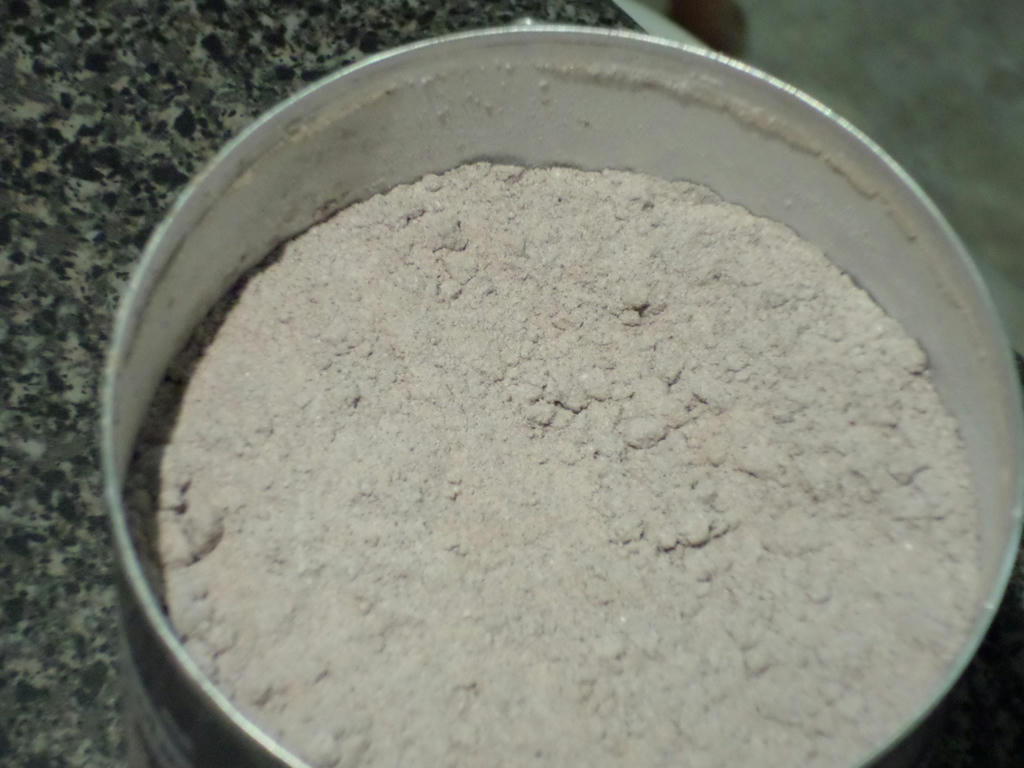
You may be grossed out by this, so please turn away if you are allergic to sugar (fake sugar, at that) as these were the list of ingredients I came up with. It fills that little 400g tub I normally buy from $5 to$7 (or $3 on special, if I'm lucky).

Ingredients:
*2 cups of icing sugar mixture to 1 cup cocoa powder*
Whiz around in a food processor then store.

Crazy right? But now affordable and no worse than the name-brand variety. David tasted it and said it was just as good! When I buy Cadbury's on sale, its 75 cents per 100g. Using normal prices for the other two ingredients, it works out to around 36 cents per 100g. That's saving more than half price. Why normal prices compared to sale prices? Well, I buy a no-name brand for the other two ingredients listed, which never goes on sale, because its the lowest price all the time.

Best thing is though, I don't have to wait for his name-brand drinking chocolate, to go on sale any more. I can always stock those other ingredients in the pantry. Plus I'm re-purposing the old tub to hold my new premix, making it easier to see what it was.


 Coffee station with teaspoons a permanent feature
 ~ because I can save opening drawers


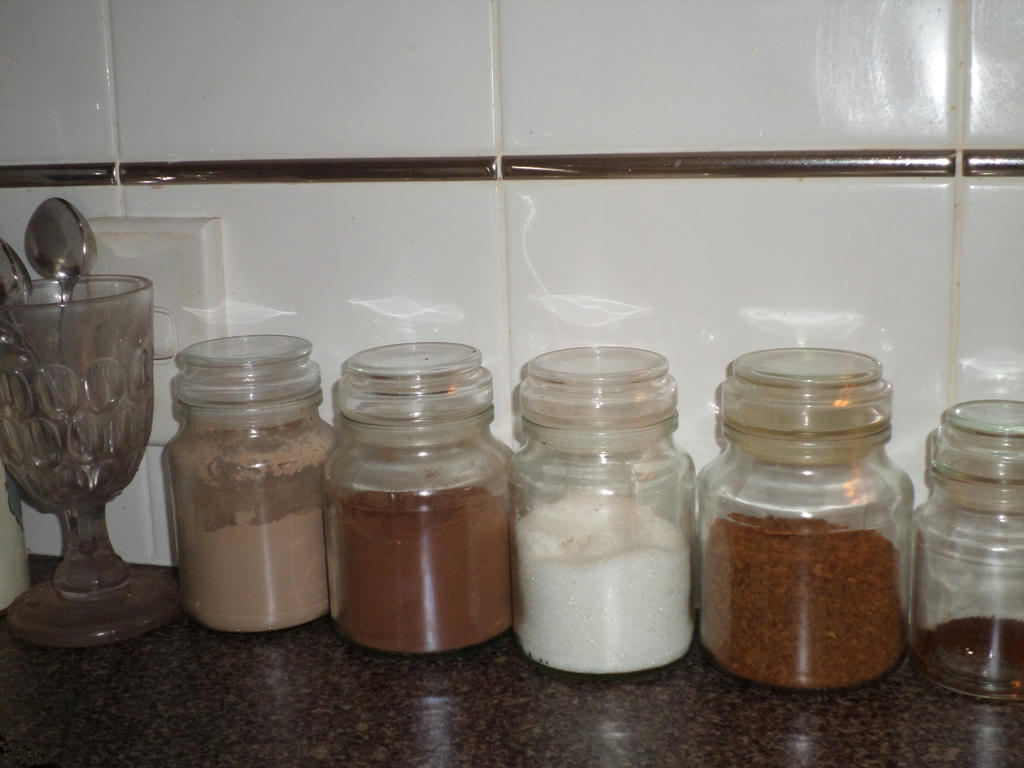
I like to decanter all my coffee brewhaha (Muh-ha-ha) into small repurposed Moccona coffee jars, which take up considerably less room on the kitchen bench, than most specialty storage jars would. And its obvious why. Yes, all those containers are for one cup of Mocha. He likes two teaspoons of coffee too, so we buy decafe to reduce the amount of caffeine he has per cup (smallest container on the end).

The way I look at it though, he has very few vices and I'm proud he'd rather a nice cuppa than a coldie (beer) after work. But I've managed to save just that little bit extra in our food budget too.


PS: if you don't have a food processor, or don't want to use the electricity, grab a plain old sieve and bowl instead, mix with a spoon, then store in your favourite jar.


Sunday, March 29, 2015

Pruning like a forest

So nobody prunes the forest, but natural elements like storms and cyclones can open up the canopy to allow fresh light in. We constantly have trees fall over during our wet season, for example, which is nature pruning itself for the benefit of the overall system. The soil needs something to replenish it by having the plants drop their branches, trees and leaves.


Unearthed


I dug a little more on my swale, and with reports we could have more storms during the week, I thought to find something to cover the soil with. I had a few plants nearby which could do the job.

Enter my pruning like a forest, because by the look of them, it was time for some plants to be rejuvenated as well!


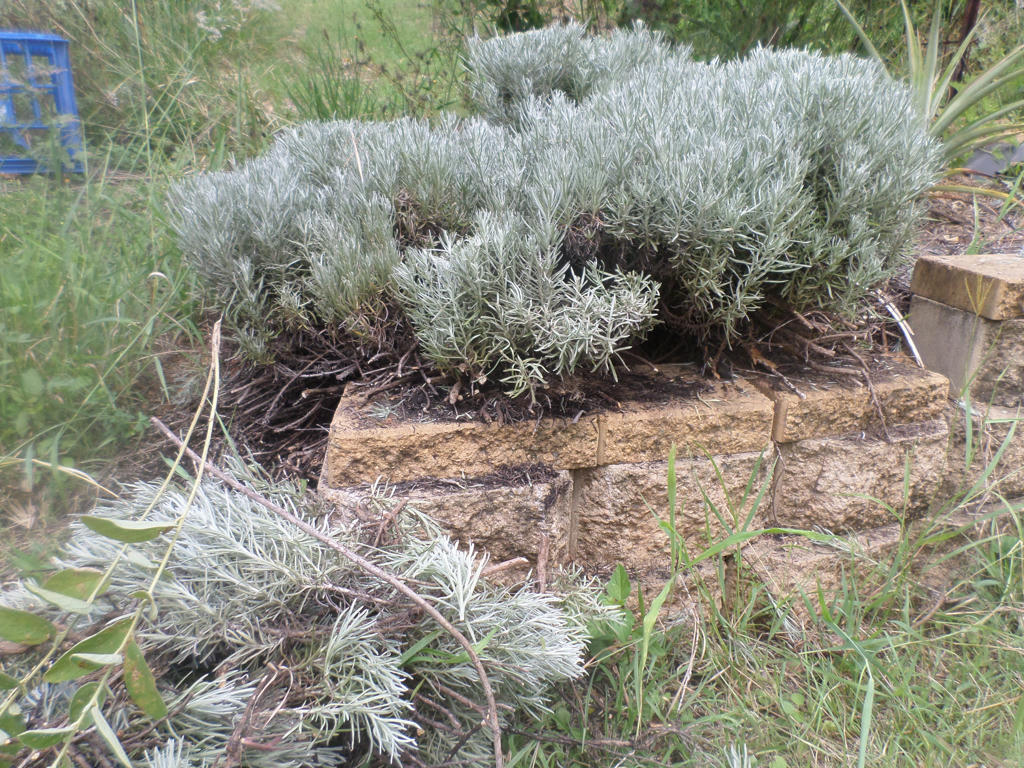
In decline


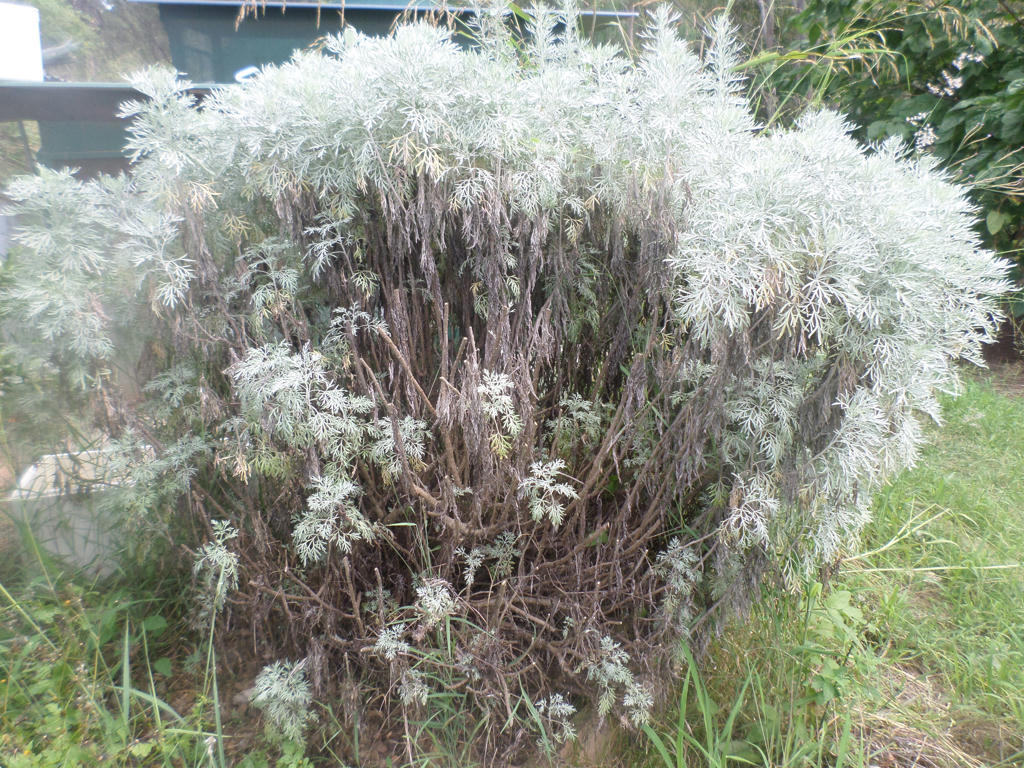
This is Wormwood, or Artemisia absinthium, which I've already started to open the woody shrub up with my secateurs. You can tell when they are ready to be pruned when the leaves start to turn yellow and especially after they've set seed - which mine had already done.


Yellowing and dried leaves


Woody perennials really need to have their canopy cut back or they risk forming deadwood. With no air circulation or light, new growth cannot make its way through the canopy. Add too much moisture during the rainy season, and its perfect for some branches to simply die.

Why wait for that to happen when you can help nature along with the process?


Emerging


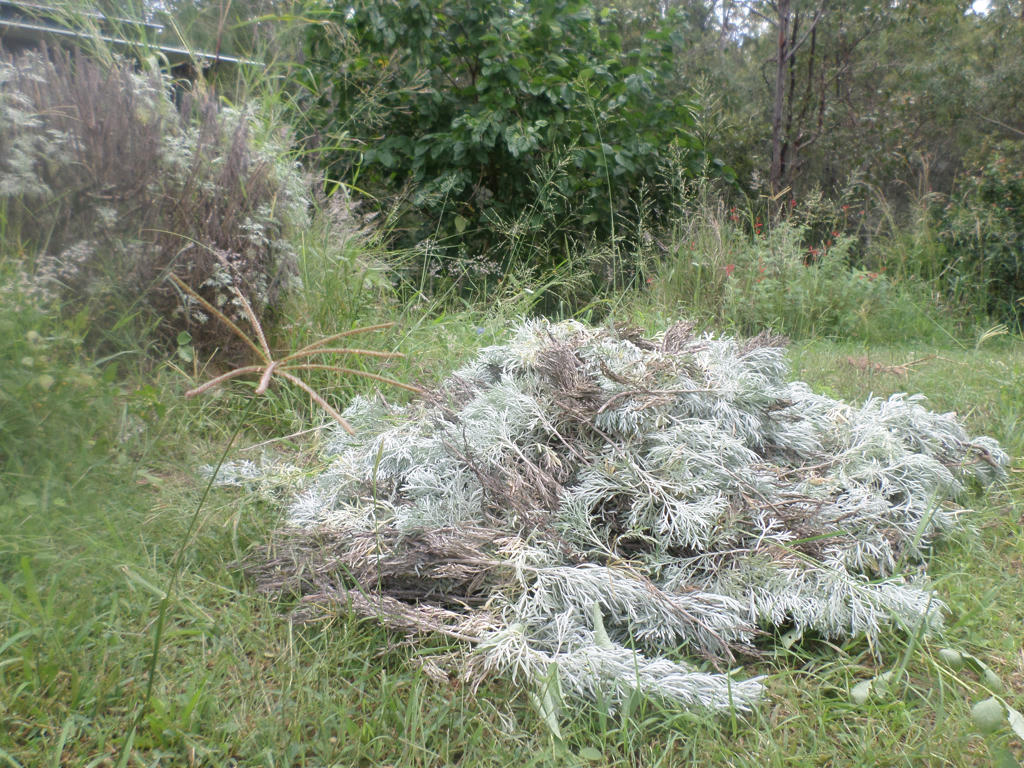
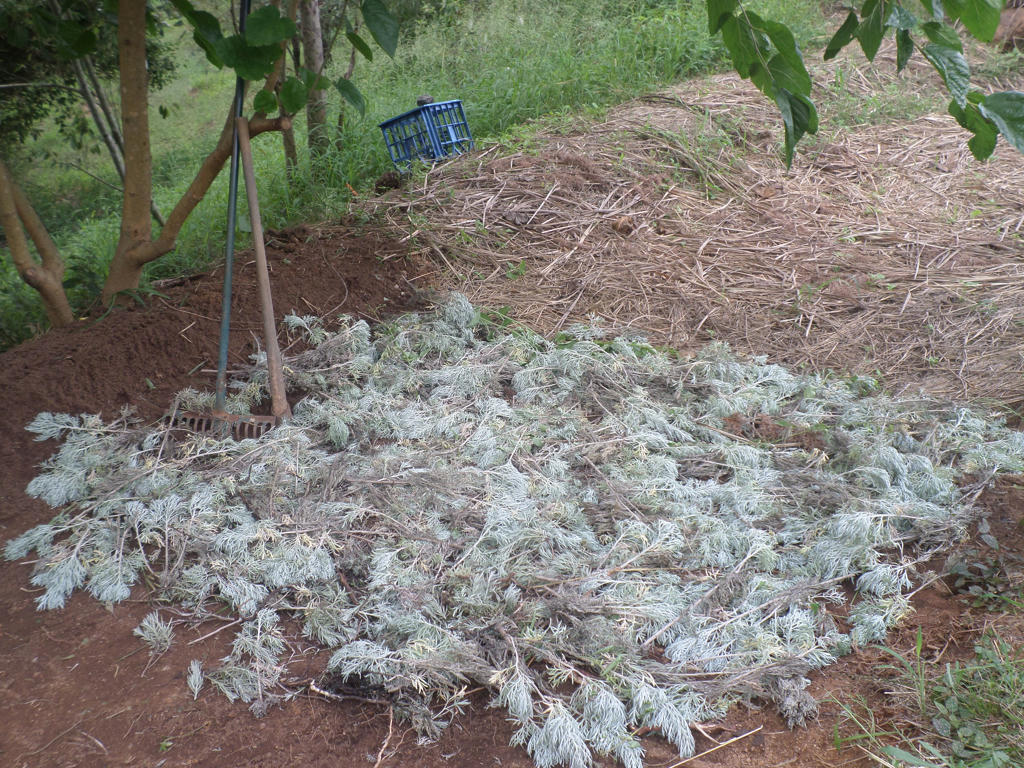
By removing branches, I get sunlight and air to reach the new emerging growth. What's more, I get my free mulch and seeds to throw around where I need them.

It's a win for everyone, and look how close my plant was to the area needing mulching, underneath the mulberry tree.


 Wormwood prunings, and mulberry tree in centre, background


But I didn't stop at the Wormwood, because I also had a curry plant which needed some attention. I love both these plants because they're incredibly hardy in drought, but they're very susceptible to dying from the inside out, if you don't give them enough air circulation.


Curry plant


I get most of my deadwood on the lower branches, because there's the least amount of air circulation between the plant and the hot retaining wall. By giving it a trim, it benefits the plant and I get extra mulch for my time.

If you have lavender, they also benefit from treating them the same way. Plus all these plants smell so lovely when you're working with them!


New swale under the mulberry


Altogether, it was enough material to spread a thin layer over my newly dug soil. It won't take long for the prunings to dry out, then it will be ready for another thin layer of something else I can find to trim.

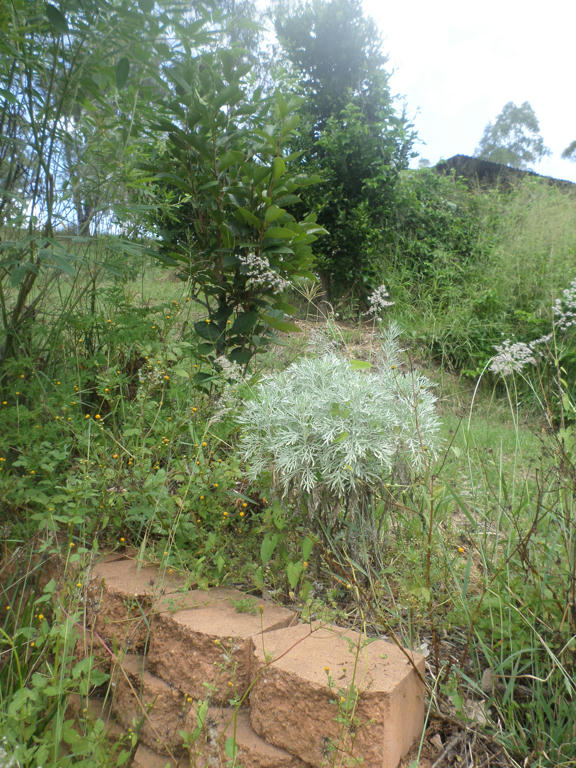
I have made several successful cuttings from the wormwood and they are in the process of getting bigger...


Multiplying


One year in the ground, and its tripled from the size I started with. Wormwood is a fast growing shrub, and definitely part of my chop and drop mulching crew. If you have a hard time growing some of the more prized permaculture plants for chop and drop, like pigeon pea, tagaste and arrowroot, simply because you don't have enough moisture, consider the wormwood, or any water wise plant that will grow in your conditions.

Its not going to benefit the soil as much as other plants (especially nitrogen fixing ones) but its going to grow and provide mulching material for the soil, nonetheless. Having something is better than having nothing.

Next time you're tempted to buy a bale of something for mulch, have a look around your garden and see what needs to be pruned like a forest.