Wednesday, September 16, 2015

Somewhat of an odyssey

I had a general plan of what I wanted to achieve for this growing season. The first was to get the old vegetable beds, back in operation. The second, was to restore the beloved choko vine, near the chicken coop.


Hilltop 2015


The renovations of Hilltop chicken coop, required we rip the old vine out. But before putting in the new vine, I had to deal with the immediate space around the chicken coop. We tried putting down small bricks previously, as garden edging, but being so low and we hardly ever got up there with the mower, it was easy for the grass to take over.

So it was time to employ a different design, with the resources available.


Getting started


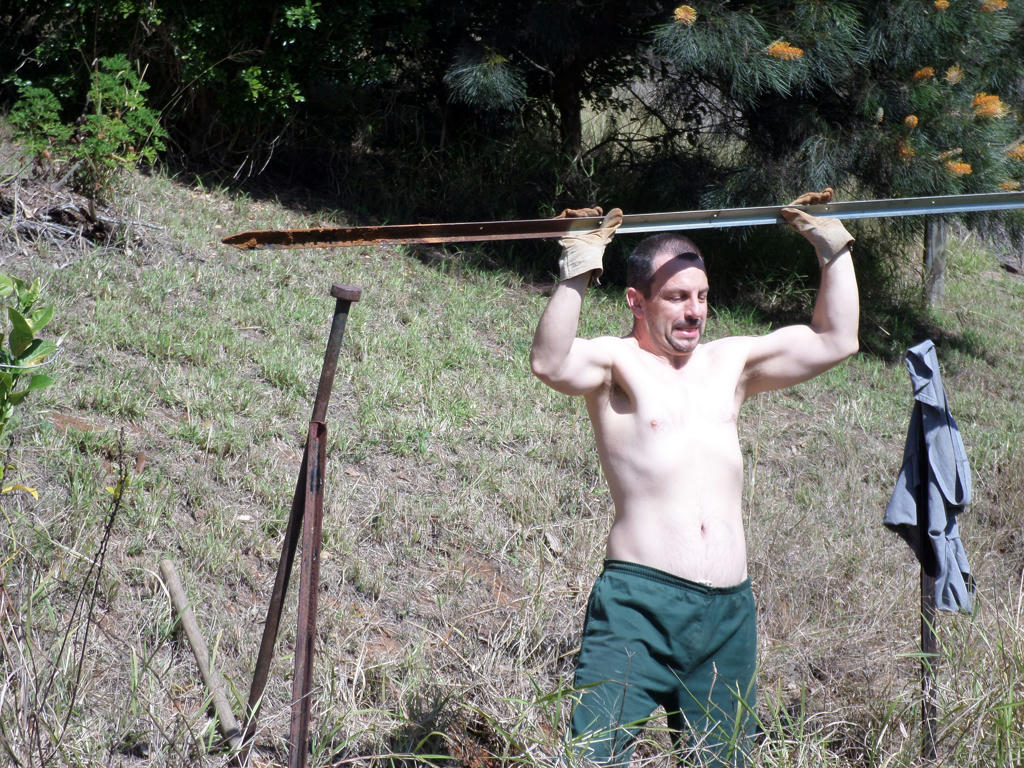
First task, was to clean the area around the run section. I removed the huge tufts of grass with the mattock, and moved the scrap, roofing-iron out, which I stored against the coop. It offered some wind and sun protection for the chickens, but it was never meant to be permanent.

The roofing iron was a skip bin find, thanks to David. It was the sections left over from cutting the angles, to fit the gables of a roof. They were all odd shapes, perhaps of no use to a professional builder - too time consuming - but I had an angle grinder, and an idea!


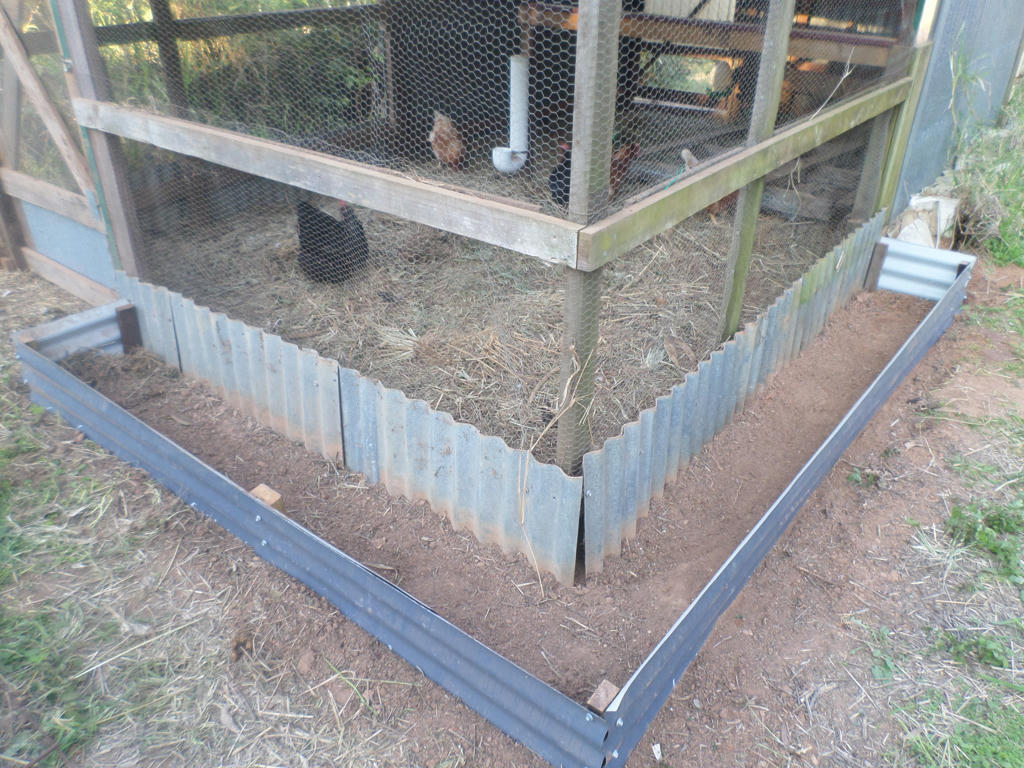
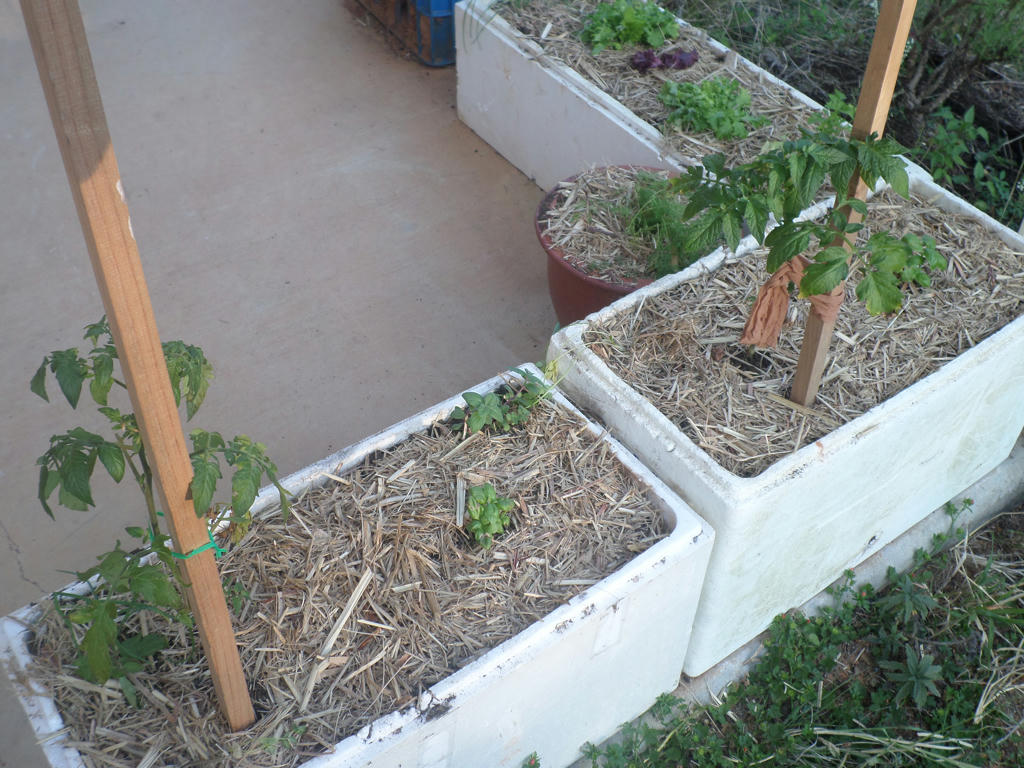
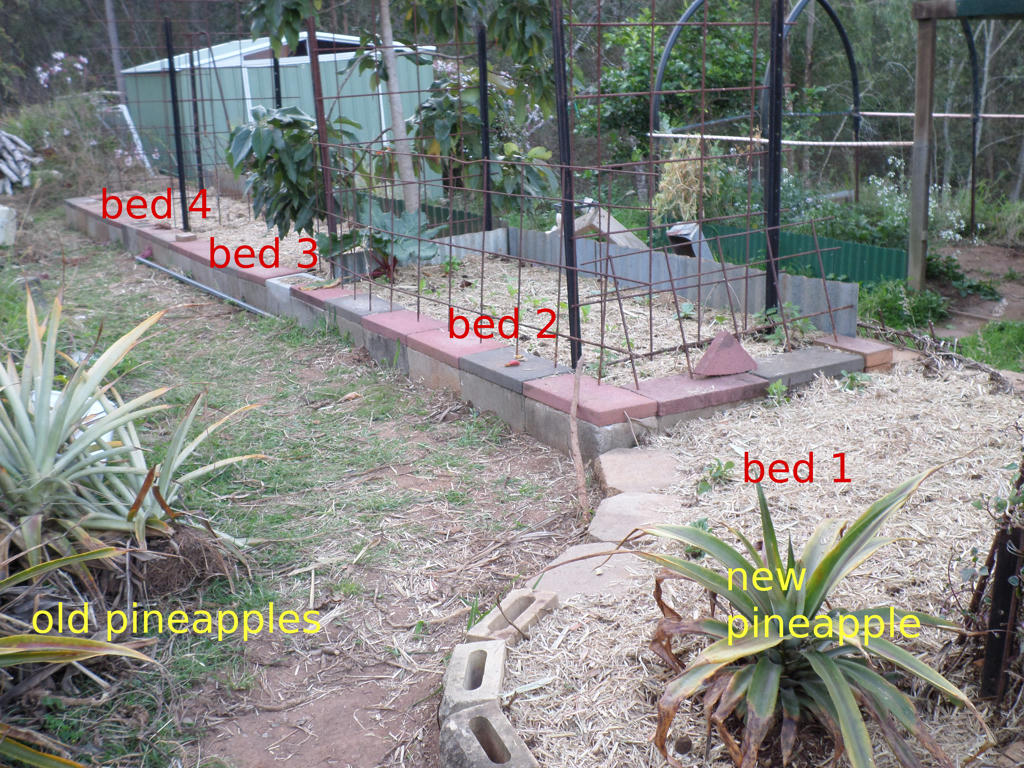
Boxed and raised growing area


Of course, it was a simple idea - but in practice, I had to find adequate pockets of time, someone else could mind the toddler. Because I wasn't going to switch on the angle grinder, without being able to hear what little gardeners in the making, were up to.

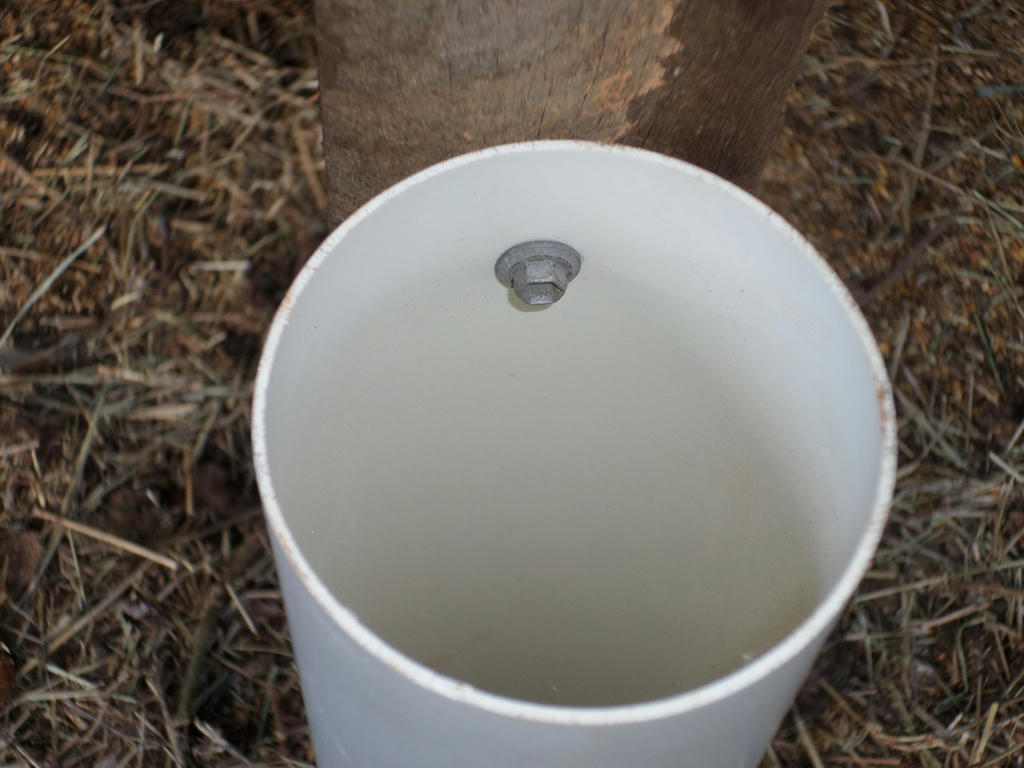
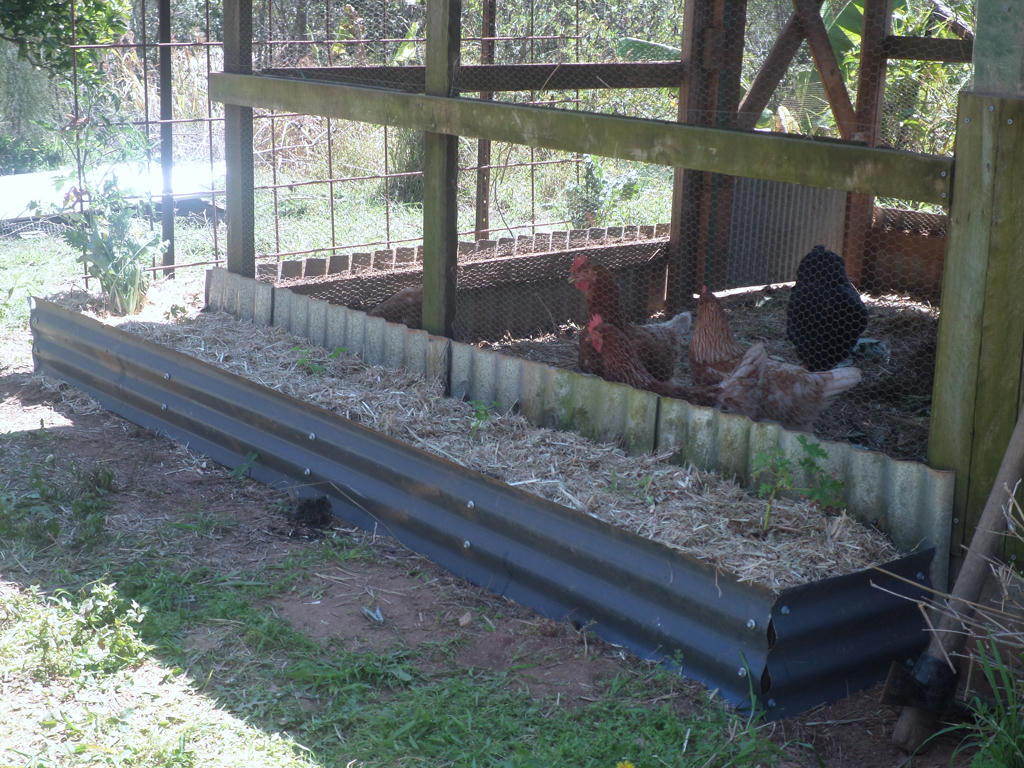
With Dad and big Sis, helping on alternate days, I was able to measure up and cut all the roofing iron, to build the raised planting box. I hammered hardwood stakes into the ground, to keep the tin in position. Missing, at the time I took the above image, were three other stakes, placed for wall support.


Not quite finished


I got a little excited when I finally finished the box! David said it looked like something you'd buy in a kit from the garden centre. But I had the satisfaction of knowing, we were using recycled materials at no cost (other than the hardwood stakes). Worth all the effort.

Then, of course, there was the issue of the trellis, for the choko to climb.


A couple of seasons ago


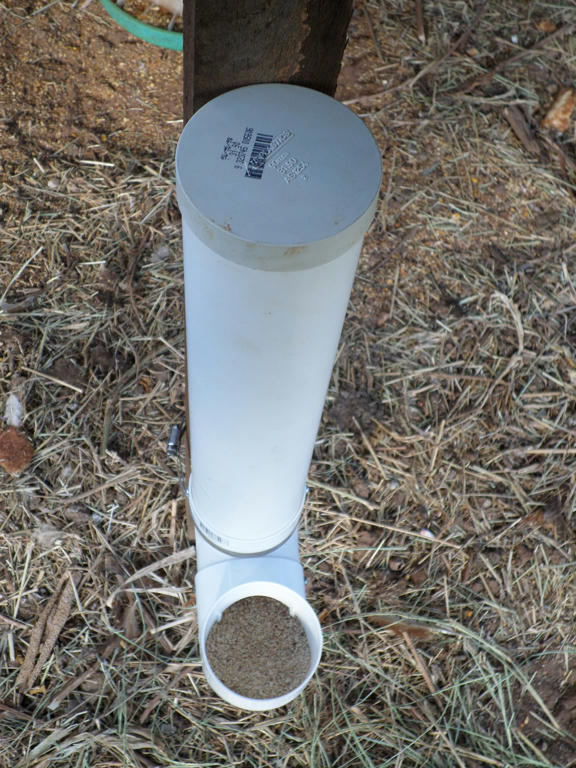
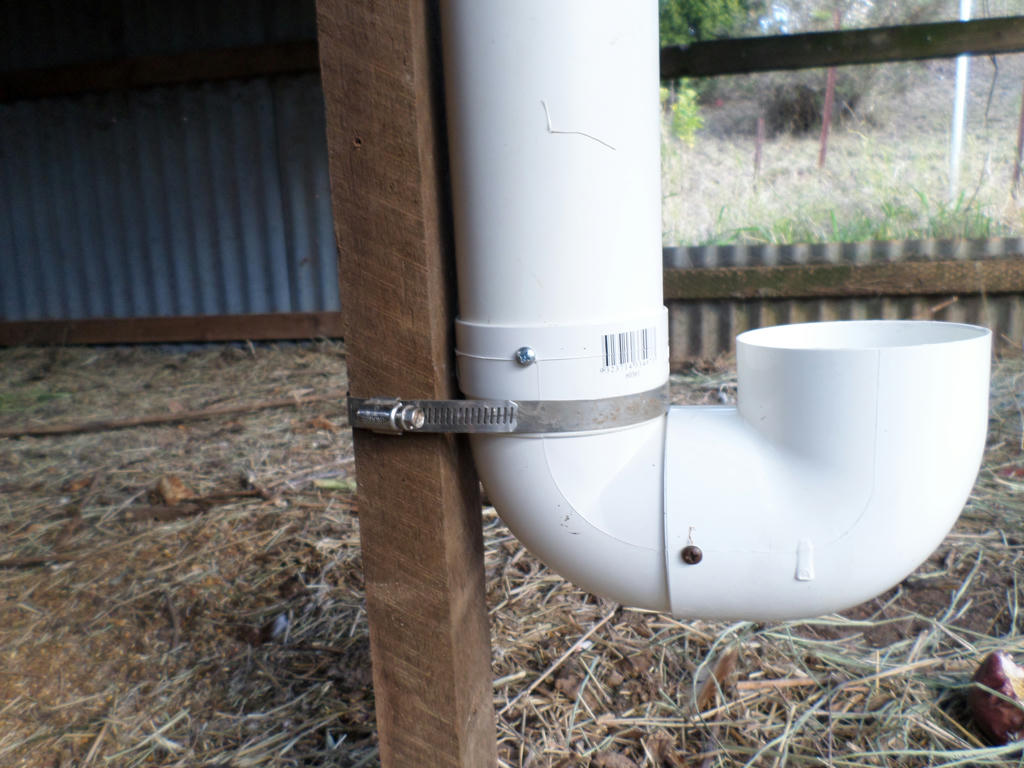
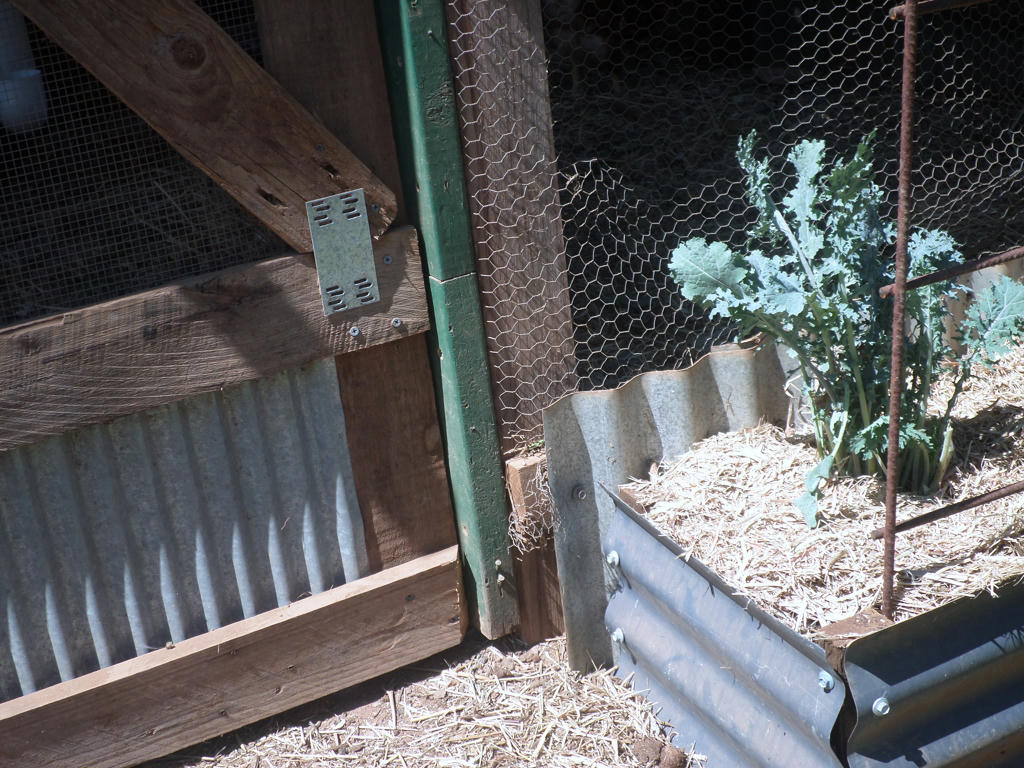
I reused the original concrete rebar (formerly over the run) which now has roofing iron, in its place. The rebar, was left over from our house build, and would be perfect as a vertical growing trellis. I just had to cut it to fit the box.

This western side, really needs the shade during summer.


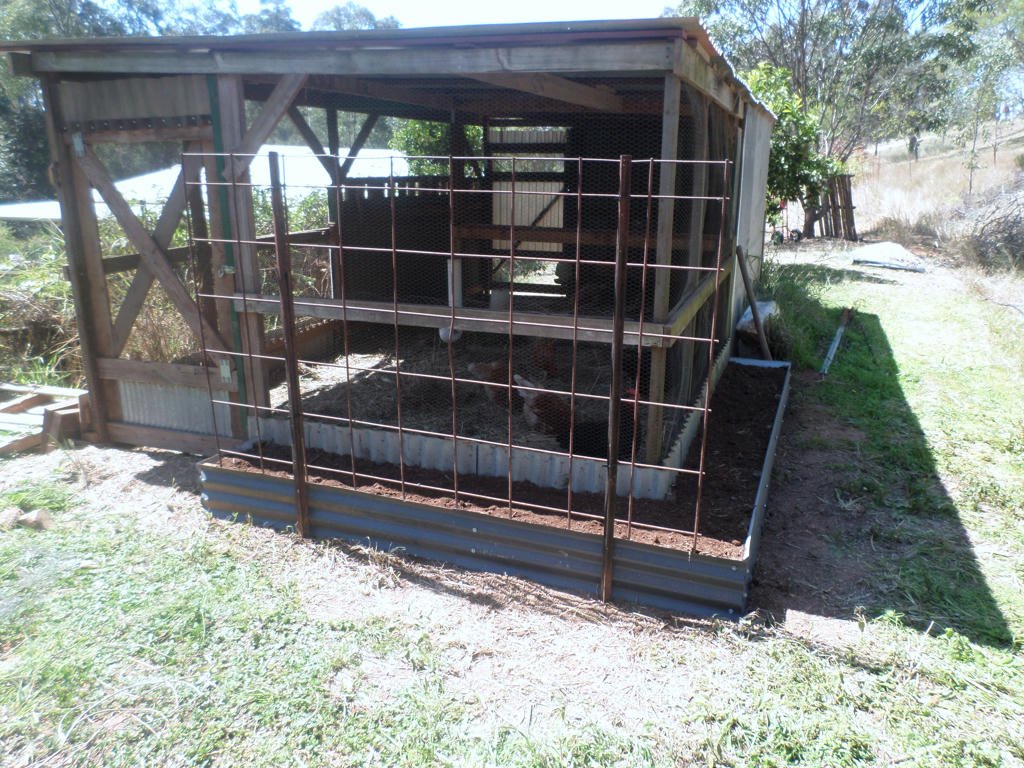
Trellis support for vine


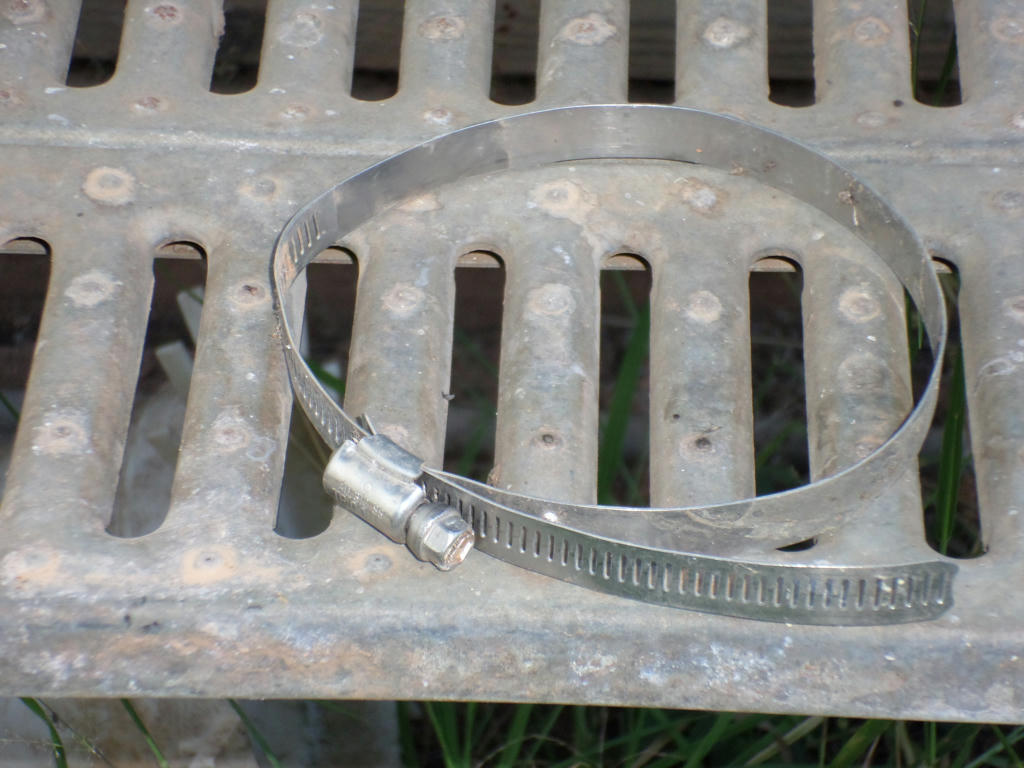
Thanks to David's efforts, pulling star pickets out of the ground, recently, I didn't have to purchase supports for the trellis either. I attached the rebar to the star pickets, using simple plastic cable ties. These were left from building the run on Middle Ridge, all those years ago. And they haven't decayed in the sun, in that time either - roughly seven years ago.


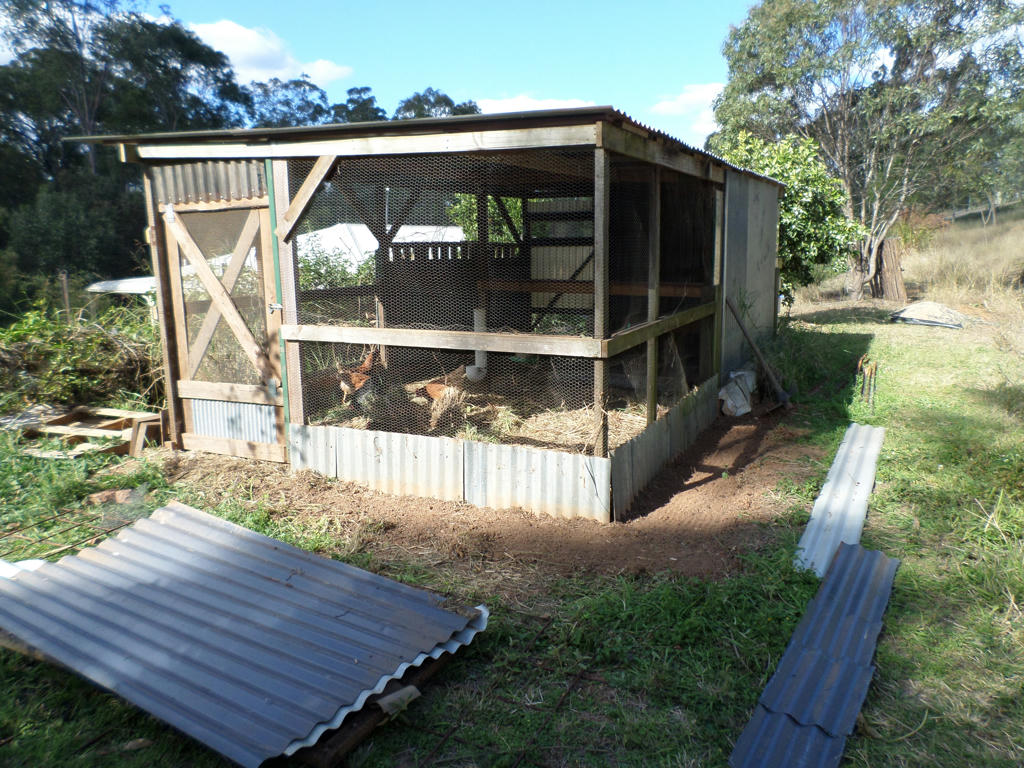
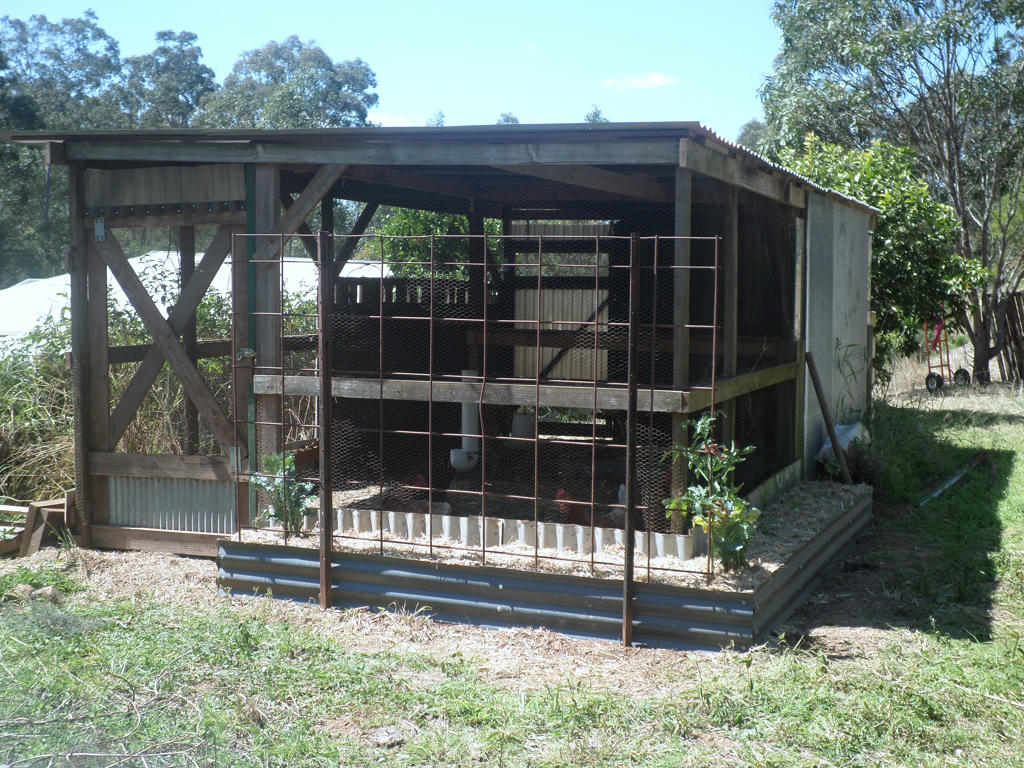
Newly constructed 2009 - Hilltop chicken coop


Hilltop chicken coop, is about one year younger than its now retired, sister coop, Middle Ridge. The picture above, was taken of the new run - see the pavers of the original growing area? The rebar on top of the roof, is now the trellis on the raised bed.

Visit this link, if you want to take a nostalgic look at the original Hilltop.


Hilltop 2015


Welcome back to the present day again! I'm sure this won't be adequate space for the choko vine, as it will ramble everywhere. But that's part of the jungle environment I'm going for. Even though my chickens have to live in a permanent box, for their own safety, I can still provide nature right at the edges for them.

I know, living in a rectangular box myself, having nature right on the very edges, has a calming (and cooling) effect too.
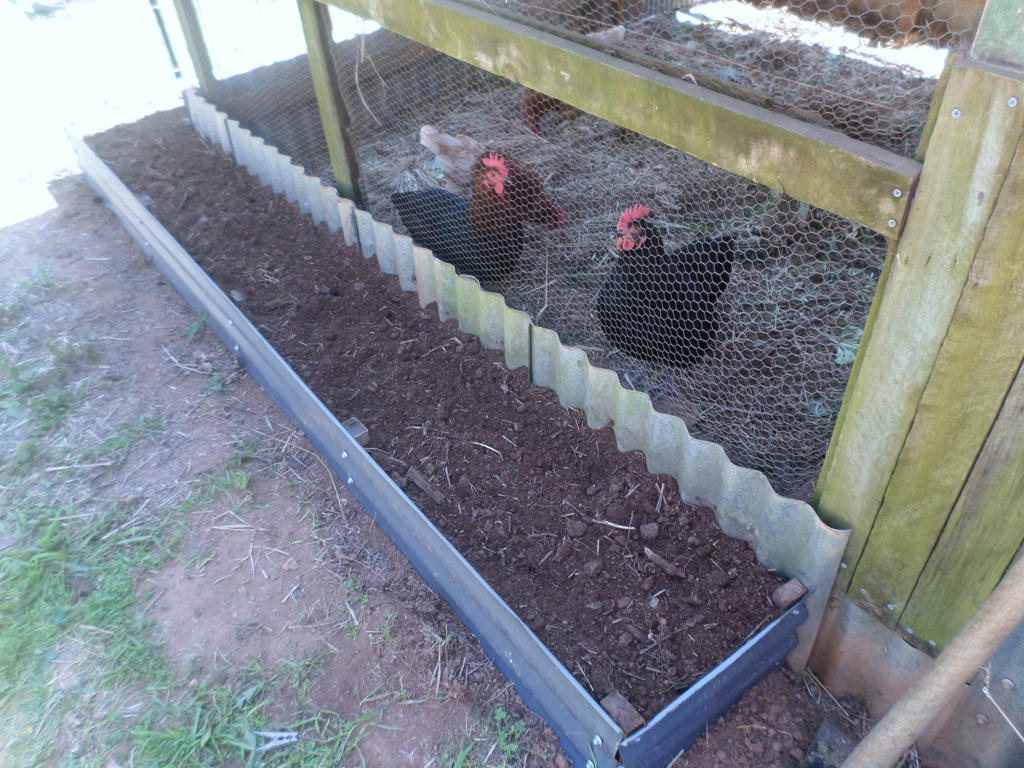
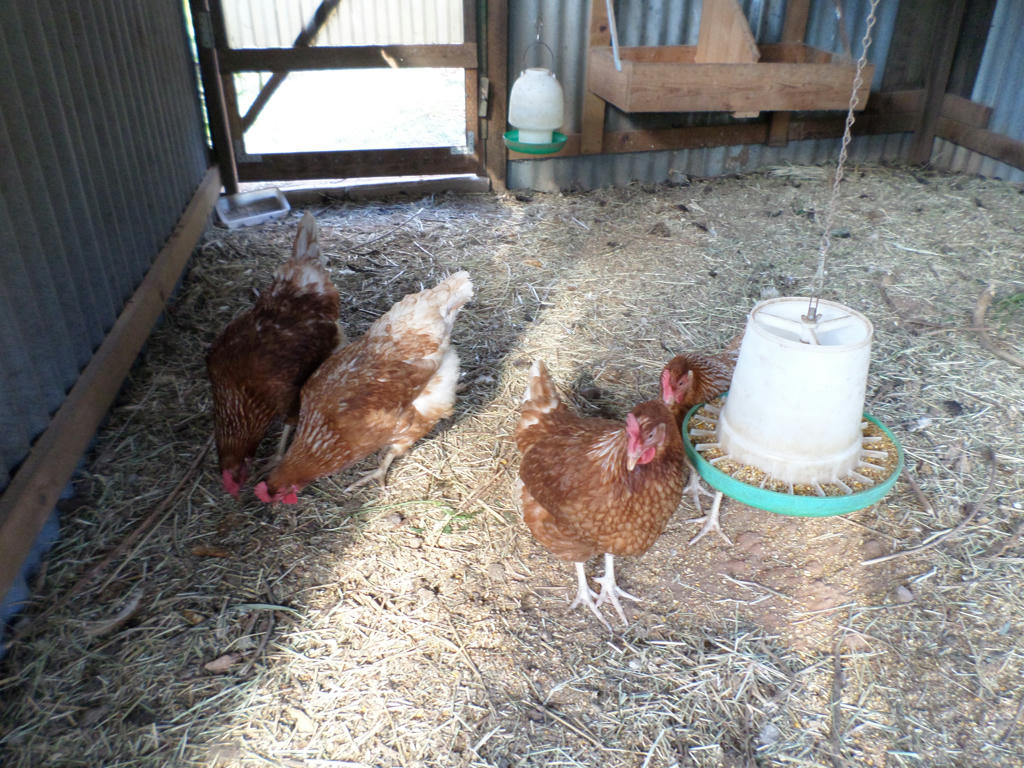
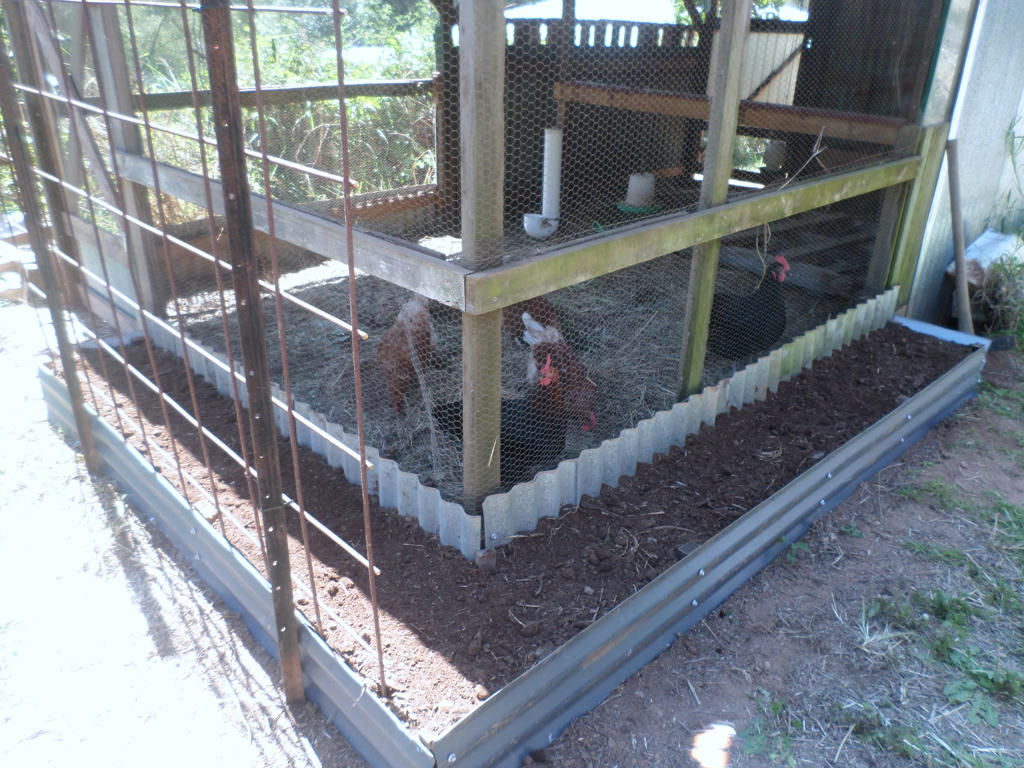

Curious chickens


In order to plant though, I first had to source soil. I made up barrows, of mixed coffee grounds from David's workplace (6 x 10 litre tubs worth) with dirt from the old, since retired, Middle Ridge, chicken coop.

It took 6 barrows, to fill the beds.
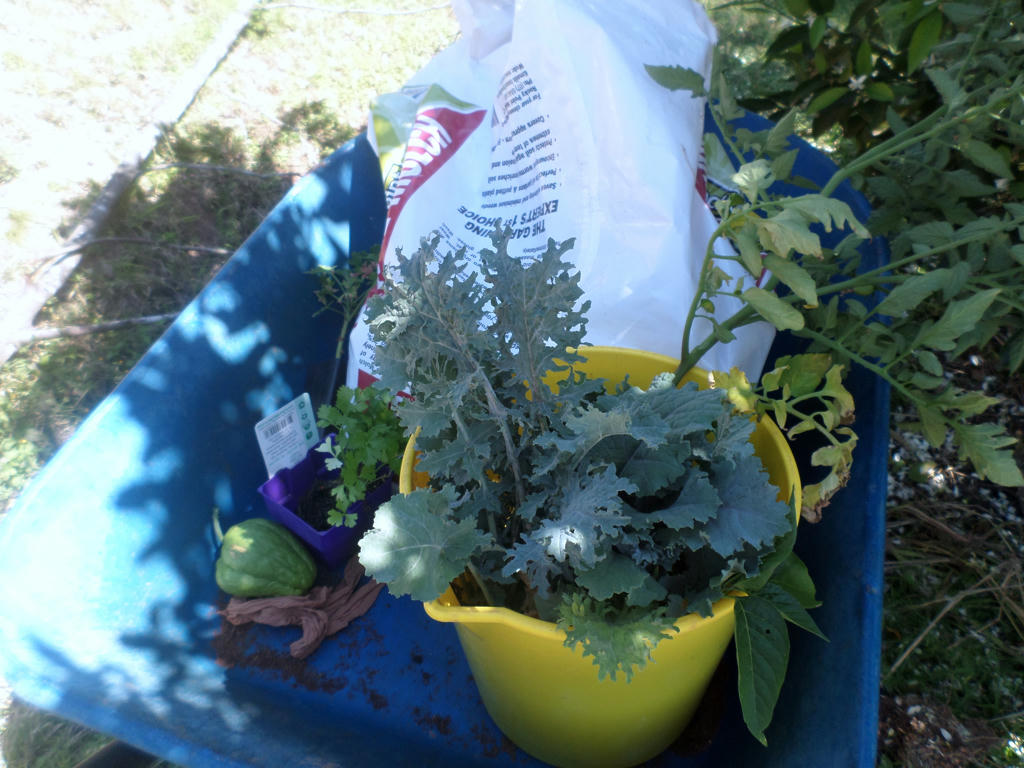

Planting material


All that needed to be done now, was to plant out the space - and what kind of obsessed gardener in Spring would I be, if I didn't have excess plants to go?

The only things I purchased in the barrow, was the choko fruit and leftover celeriac, from what I planted in the main vegetable beds. Oh, and the sugarcane mulch.

The kale, and large tomato plant, I removed from the growing area in Middle Ridge. I needed the soil anyway, so they had to come out.
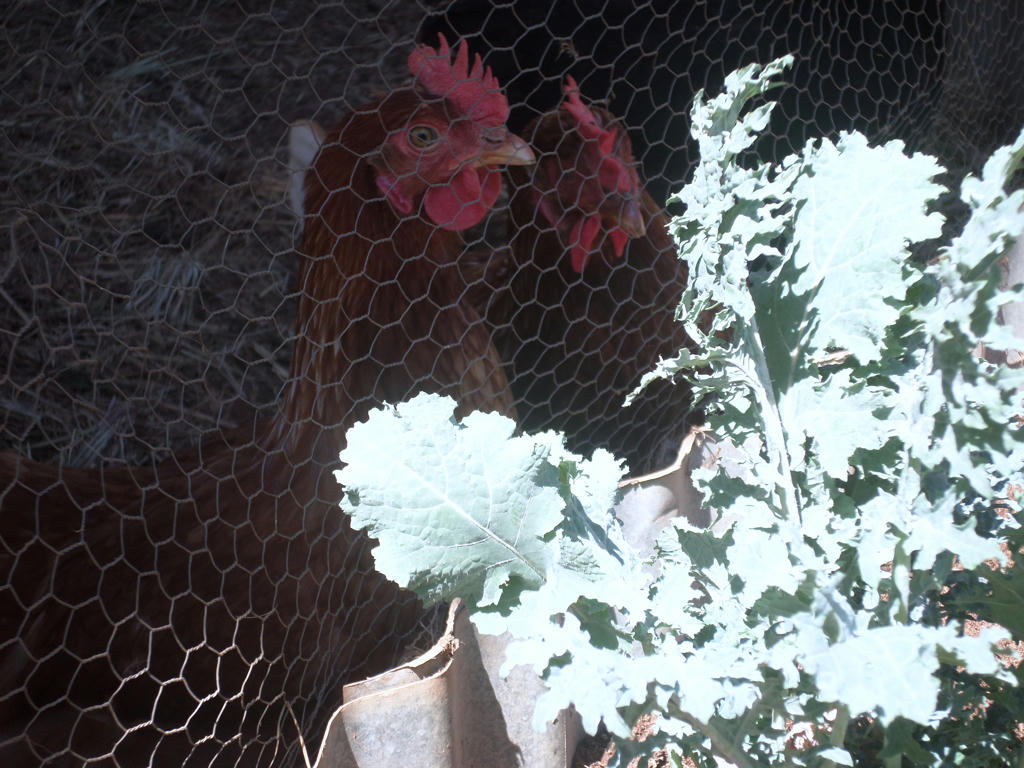
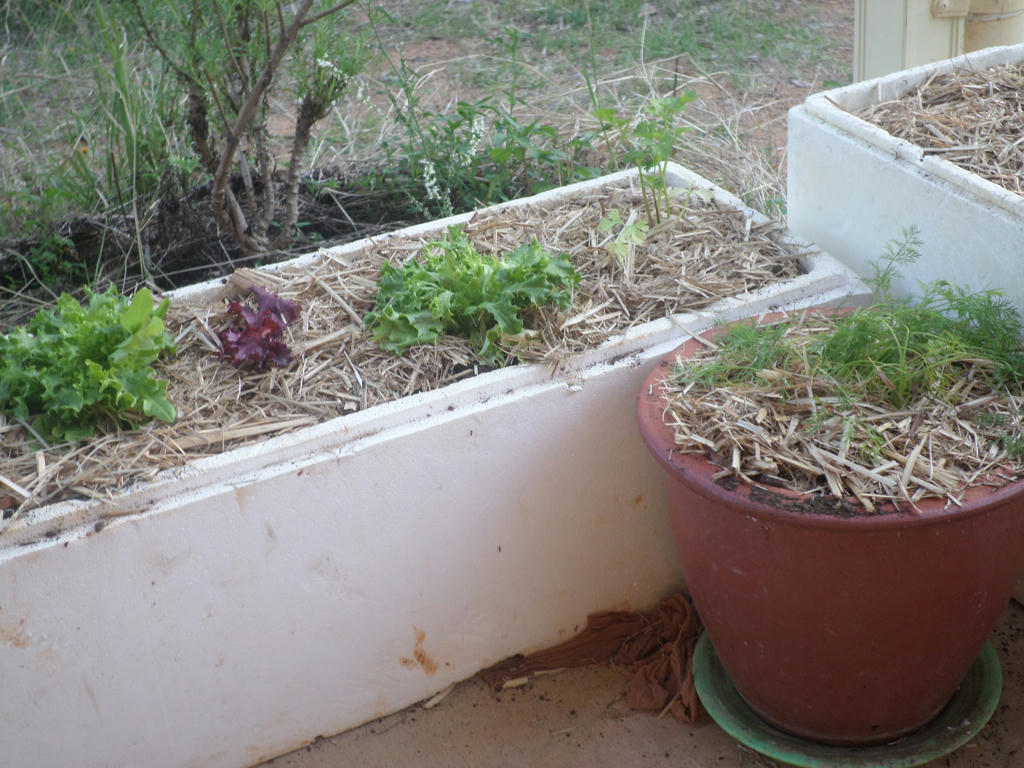

Perplexed residents


And weren't the girls excited to see me plant the kale so close! All four of the new hens charged at the chicken wire, and wondered why I wasn't hand feeding them, as per usual. Some beaks were left out of joint, and I may be voted out of the hen house, if they don't forgive me soon.
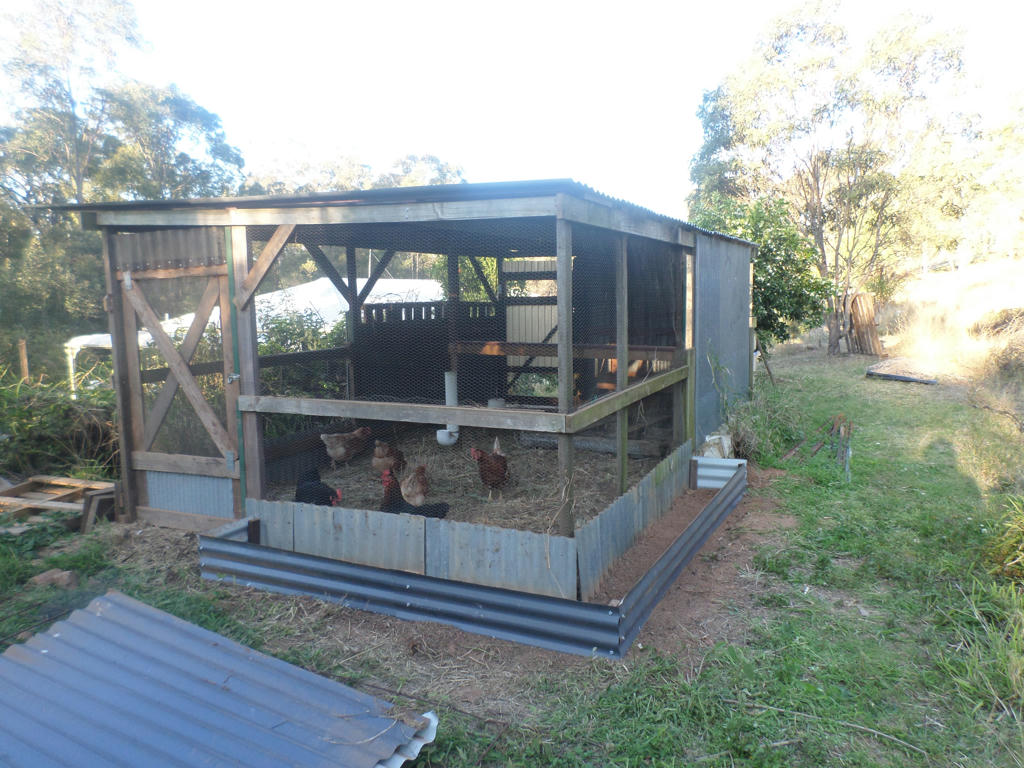

Using the space


This is what its all about though - a better design. Easy pickings for my hens, and for me, the keeper of chickens. I don't have to walk down the hill to pick their kale any more, because its right at their doorstep!

No doubt, it will get caught in the tangle of choko vine, as it grows, but I'm sure the kale will be thankful for the shade during summer.


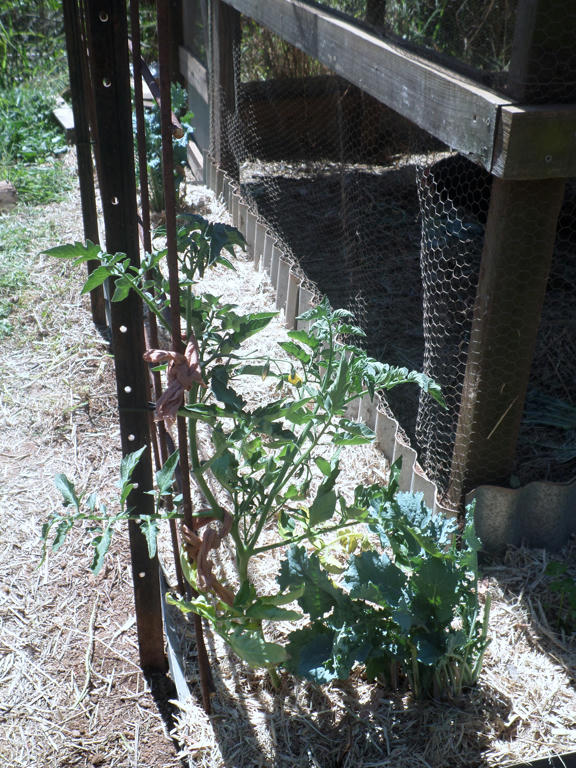
Transplants from Middle Ridge


What I love about volunteer tomatoes - is there are always so many to choose from when you want them. I'm growing this one up the side of the trellis - thank you pantyhose! It will also be smothered by the choko vine (along with even more kale I planted) but they will all be better for it.

Jungles, lose less moisture to evaporation, and create a greater cooling effect in the surrounding environment. Just what my hens need, living in a partially enclosed metal house.


South facing bed


At the back of the coop, I planted the leftover celeriac, and hopefully some sunflower seeds - if the opportunistic bush rats, don't dig them up like everywhere else.

Right at the end, which is closest to the roosting post (inside the coop) is a herb called Lemon Scented Geranium, or Pellargonium Citronellum.
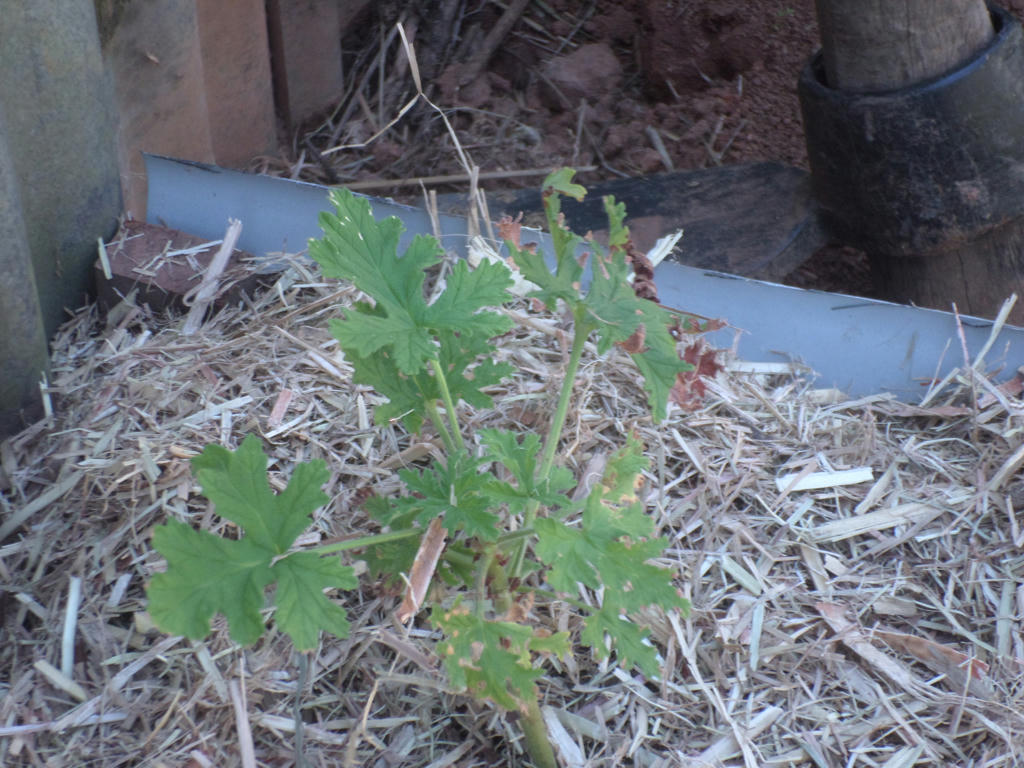

Scented Geranium


It will hopefully, deter some pests, as its reputed to do. I will plant some wormwood, to deter pests also, when I can strike another cutting. I kept these two herbs near Middle Ridge coop, when it was operational. Tradition required I keep it going at Hilltop, now I have the growing space.

You might think I'm a little crazy, to go to the extremes I have with this particular chicken coop. And this latest raised garden bed caper, would be no exception.


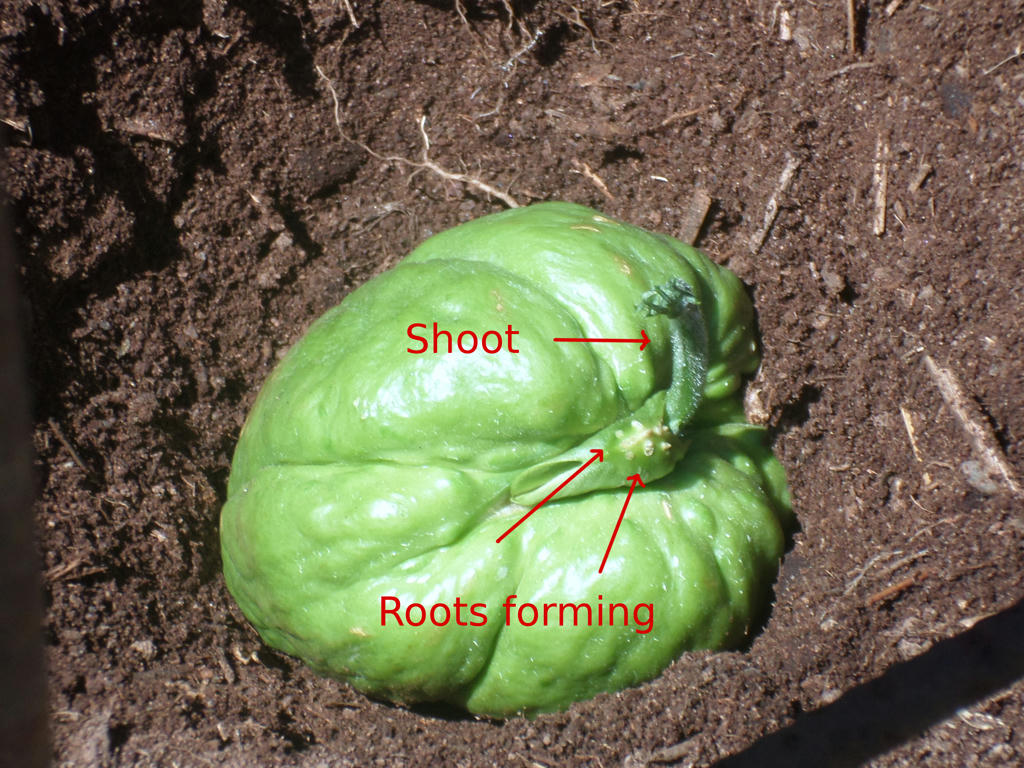
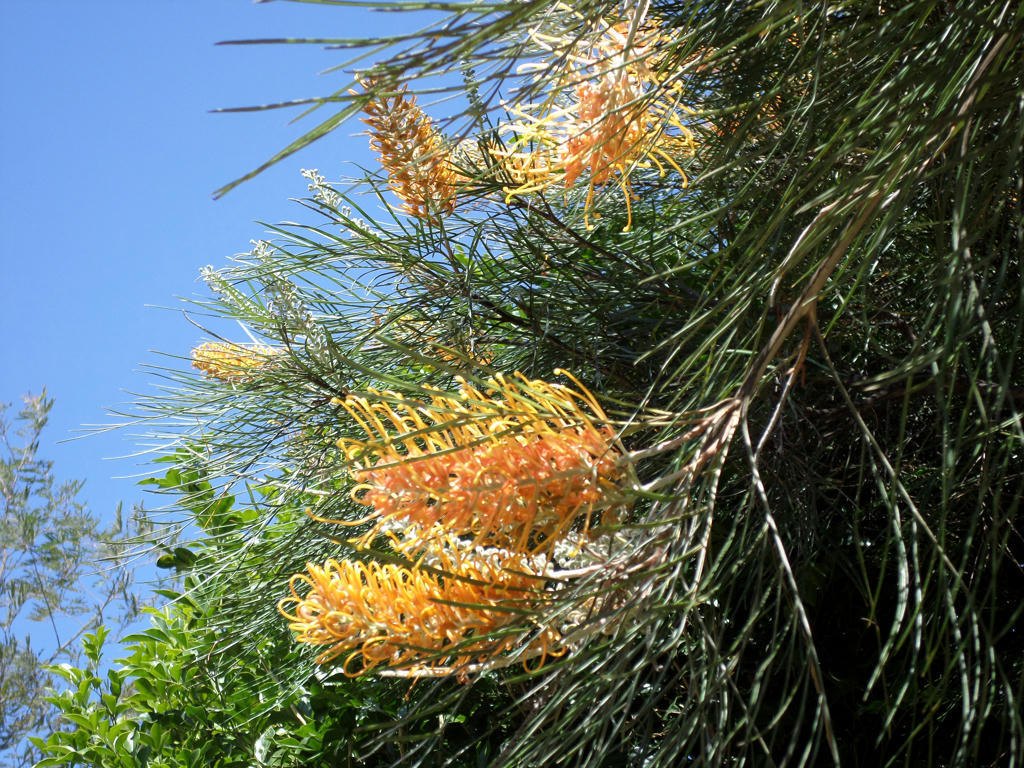
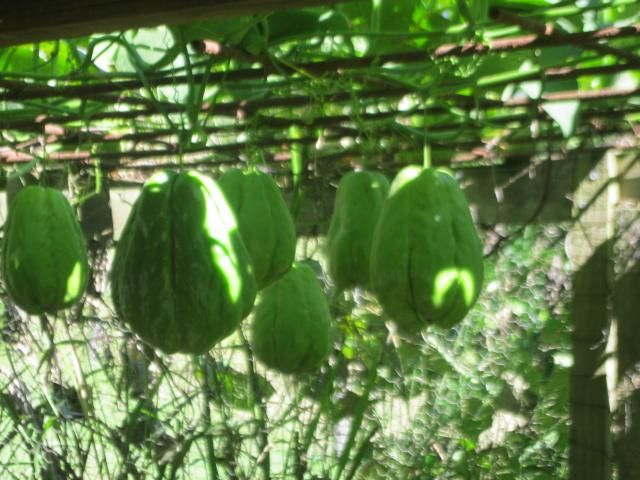
How a choko germinates


To prove how crazy, I actually am - this is why I did it. The humble choko. I blame my mother, because in my youth she kept a choko vine in the backyard. Then tempted me with delicious homemade choko chutney, on my sandwiches. Once you get a taste of that, you go a little balmy - to the point you will turn the world on its axis, for a choko vine of your very own.

The ceremonial planting of the choko fruit, with the captive audience watching close by, just made the madness, all the more dignified. It's the details which matter.


Ready to grow!


So be sure to have your choko sprout (mine was about 3cms long) before planting, and cover in the earth, with the shoot poking out. You want the dirt in contact to where the roots will form, but you also want the shoot poking out of the ground.

Then you too can tempt your family and friends, with a lifelong obsession with choko vine growing. Chicken coops are optional, as my mother's vine grew over the side of some ugly wire fencing. Although, it was technically shading the quail's run, mum had also built for me - where I grew generations of pint-sized poultry.

Hmmm, there's a pattern here.
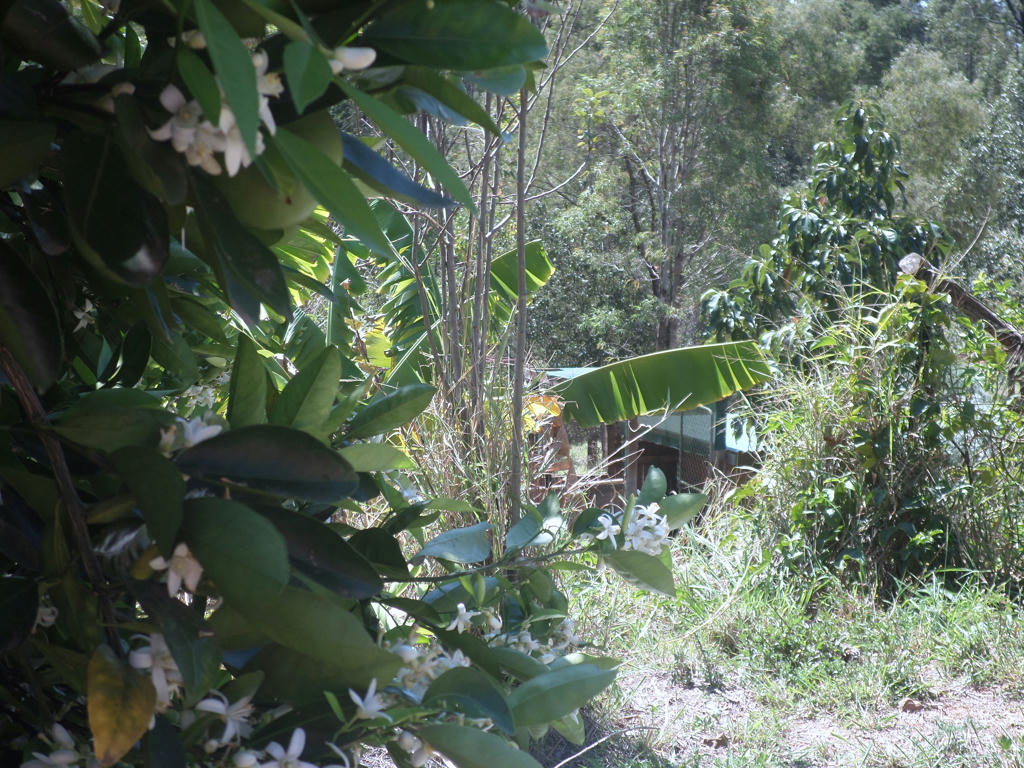

Look carefully


Meanwhile, did I tell you about the avocado, banana, orange and passionfruit?

I probably have, on different occasions, but as I was retreating to the shade of the orange tree recently, to take the last photos of the coop - I suddenly saw them all together.

The orange tree (left) and passionfruit vine (growing on the fence post - amongst the grass) are all on the same level as Hilltop chicken coop. The banana (middle) and avocado (right) are on the lower section, where the vegetable beds are.

There are the bare branches of an apple tree in the middle also, but I suspect the golden delicious died, and its the rootstock which has regrown. It is still welcome as a shade tree.
 

Wee orange in the background - 2009
Now a tree, taller than me


As I listened to the bees smothering the orange tree, and getting drunk on orange blossoms, myself - I suddenly saw what I've been doing with my life, for the past eight years. I know I tell you this all the time, but here it was - a garden. I've been building a garden.

As the trees get bigger, they will join together to build a canopy. And I will finally have that Grove, I've been dreaming about. The very namesake of my blog. So a jungle laden choko vine, is hardly out of place.

May this journey be a reminder, to all those who toil, believing what they're building is not quite up to the job. It can always be revisited, modified, designed better, added too and just plain crammed with plants. Everything is made better with plants. Those tiny steps though, are just the beginning.


Tuesday, September 15, 2015

More recycling ideas

 3 Litre milk bottle


Back when I made my chicken poop scooper, out of an old milk bottle, I left the remainder on the bench, as a reminder. I didn't have a clue how to use it, but figured something would manifest as soon as something was needed.

And something did manifest...


A seedling tray


I had some lettuce seeds I needed to sprout, but it's always challenging to sprinkle the seed into tiny pots. But there was my milk bottle sitting on the counter, inviting me to experiment with it. So I cut the side open, and used it as a seedling tray.

It's so much easier to sprinkle the seeds on the surface now, and the high sides mean, a little humidity is created when I mist the soil. For fine seeds which need to stay moist before germinating, I found this new device, extremely handy!

I will transplant these lettuce seedlings into their permanent place, once the second leaves develop.

I challenge you all to keep one item of your recycling, on the kitchen bench, until you find a new purpose for it. You may surprise yourselves, as I did. I would have always struggled with sprinkling tiny seeds into tiny pots, had I not kept that milk bottle out, in plain sight.

I just poked three holes in the bottom, and it was ready to go!


Sunday, September 13, 2015

The edible corner

I'm a sucker for an empty space, and I simply love to plant stuff. So while I might have cleared, four new beds in my vegetable garden recently, that was no reason to ignore an opportunity to bring plants closer to the house.


If you have a verandah or patio, do use it for growing edibles. I've crammed in some parsley, basil, mint, spring onion, Mexican coriander, lettuce, celeriac, dill, and nasturtiums, along with some volunteer tomatoes, I transplanted from the garden. I seriously don't think I'll ever be rid of volunteer tomatoes, even if I wanted to be rid of them - which I don't.


I've used a mixture of styrafoam boxes, and clay pots. The green saucer is an old butter plate that got chipped. I can't use it for serving food on any more, but it makes a great water catcher, to prevent staining the concrete. Don't mind the pantyhose in the corner either - I chopped some for staking the tomatoes with. I'll need the extras, as the plants get taller.

I hope to add some more clay pots soon. I have empty ones sitting around the place, and can't bare the thought of nothing growing in them!

As it's on the western side of the house, I also need to erect some shade cloth. Especially since I want to grow lettuce here, without them bolting to seed. I also plan to utilise the chicken manure to make a tea from. There's one already on the brew, because potted, edible plants, really need the extra fertiliser.

At this rate, I think I'm going to run out of things to do in the garden soon.

Is that even possible?


Friday, September 11, 2015

Out the back

Out the back of Hilltop chicken coop, before it was even built, was our first attempt at building compost bins. They were just pallets and star pickets. Crude, but mostly effective.


Former compost bin


There were two problems with this design however. Firstly, it was too far away from the house, and secondly, we'd always get compost stuck in parts of the pallet, which we couldn't get out. So we eventually abandoned the bins, dismantled them and built elsewhere.

When I say dismantle, I mean, except for the star pickets.


Star pickets (and David), left...Hilltop (and Peter), right.
Click to enlarge


As anyone knows, who has tried to remove star pickets, its somewhat physically challenging. Especially when the ground sets like concrete. So we left them in place for many, many, many, years. That is, until recently.

I had plans for this area, so managed to pull out one star picket, by myself. Then I decided to employ the big guns, aka, David.

He did war with the six other pickets, and I'm glad to say, he finally won!


Arrrrrrgah!
You will not curse the ground with your metal barbs, again!


Except, I plan to use the star pickets a few metres over, next to Hilltop. It will hold up the trellis, for my new choko vine to climb up. Gee, I hope we don't plan to move the chicken coop, any time soon. Hell would have to freeze over first, but even then - the star pickets will remain!

What I needed to clear the area for however, is to grow chicken feed. I've planted some Buckwheat, French millet, Barley, Amaranth and Sunflower seeds and covered with a fine sprinkling of mulch. I just need the rain to help the germination process along.

In the meantime, I hope the large family of quails which frequent this area, don't find them!


Grevillea, Honey Gem


In the background of the last two images, is a beautiful Grevillea. One of the first plants we actually put in the ground. It's in full flower at the moment, and all the nectar feeding birds and bees, just love it!

It was a lovely Spring day in the yard together, and I hope the rains grace us with their presence, some time soon. 


Tuesday, September 8, 2015

Bed rest

After much toil, I think I can finally put my new beds to rest. Or should that be, I can now rest, while my new garden beds kick into production? Because its been quite a lot of work indeed!


Click to enlarge


What started with just one bed, initially, then two, I've finally finished at four. These will be my main vegetable production beds. At least for this year.

Inspired by the avocado tree, which will now be staying, I plan to mix perennials, with annuals, so there will always be something in the ground. I can pull out the annuals, but the perennials will always be there.

I also had to change out my pineapples, as I recently discovered they only flower once, and you have to put in a new pineapple top. I had one plant, flower several times, only to discover it was the suckers that flowered.

These haven't produced for over 12 months, so it was time to retire them and plant anew!

I'm glad to have my vegetable beds back now, and I hope to get much out of them.


Wednesday, September 2, 2015

The grit bit

After finishing my renovation of Hilltop chicken coop, back in April this year, there were always going to be jobs I needed to finish up. Like where to put the shell grit? I had procrastinated for years, literally, even though I bought a large bag of it to use in my coops.

I originally put the grit in shallow dishes, that would be overturned the next day, and and I wouldn't refill them. Not good chicken practice, if you want your layers to give decent eggs and stay healthy.

I had the materials to make a permanent shell grit station (left over from plumbing projects on the house) I just had to organise everything, and make it happen.


Almost complete


This is the finished unit, filled with shell grit. I used two 90 degree elbows, and an off-cut of 90mm pipe. Plus some other bibs and bobs to attach it all. Now, finally, I have a place to store the grit where the chickens cannot overturn it.


Finished


This is the same unit, only with a cap on top, so no curious rodents or insects can fall into it. I accidentally bought that piece and never thought I'd find a use for it. Must have a psychic radar or perhaps just a happy accident.


Attached to post


I attached the unit to the post, using a roofing iron screw. Only the rubber washer was placed between the wood and plastic (instead of against the screw head) to create a small gap. This allowed me to get the cap on and off.

I drilled the hole into the unit, before attaching it to the post, and then used a socket wrench to tighten the screw.


Last piece


How to attached the lower section to the post however? I found a handy device, we will have to replace later, as we use it for emergency plumbing. From memory, I think its called an adjustable clamp.


Secured


It allowed me to wrap it around the post to stabalise the lower section. Because I didn't entirely trust those chickens, not to knock this unit around either. Better to be safe, than risk excessive wear on the single screw, used to attach it to the post.

Notice how its low enough to the ground, so the chickens can access it? I also used small metal screws to attach the PVC piping and elbows together, to avoid the chemical plumbing cement. 

Given I already had the materials here, it didn't take long to put together. It was ridiculously easy, and insane that I didn't do it sooner!


New


Other news at Hilltop, is we have four new layers. These are the ISA brown type. If you remember when I first moved the old layers into Hilltop, there was a single ISA brown named Ginger, that found her way to our coop from the neighbours. Unfortunately, she had to be dispatched recently, in our cull of older hens.

This was a decision based on her breed, but only as it stood in our established flock. She was introduced as a single hen, so became the lowest in the pecking order. There were (at the time) four other hens who would constantly chase her away from the food. She was getting fed, but not enough for her breeds requirements. So she started to eat the eggs out of desperation. It was the one thing she could eat, that the other hens weren't interested in once they laid them.

When we knew we were planning to buy new layers, we knew Ginger couldn't stay - it would just create more competition. We also removed some older layers from the flock who had injuries (one a limp leg and another was waning).


Older but still valued


The two older hens on the left, are the two remaining hens from our original flock, which we decided to keep. They are both laying at present and can hold their own against the four new additions. These are the last of the chicks we have bred and raised here.

I would like to breed and raise more chickens in the future, but I need to have time to dedicate to that end. So its on the cards, just not at present. In the meantime, the ISA Browns have been purchased to continue egg production.

While the older hens don't lay daily, we can still convert their feed to fertility, which is a good reason to keep older hens too.

So that's what's happening in Hilltop chicken coop for now.