Showing posts with label Propagation. Show all posts

Wednesday, September 8, 2021

Prop boxes

Growing plants & making new ones


I was going to share my propagation boxes, once I finished the first month. To track progress during that time. However, after receiving a question in the comments section of my last post, I thought, why not share what I know to date? Like, where I first learned about prop boxes, different growing mediums to use, etc.

Monday, September 6, 2021

Winter Hiatus - Hello Spring!


Plant alter


So I missed winter, on my blog completely! It's been a peculiar year of big changes. We're on the last push to finalise David's family estate, and our eldest moved into town with some friends. So many things had to be rearranged, moved, stored and eventually used. It's an ongoing process. This is some of what I've been up to lately, in our new outside area.

Wednesday, April 15, 2020

Patterns in nature

Aloe vera, currently in flower


While contemplating my recent series on developing healthy immunity, the pandemic was not far from my mind. Just as I had to learn what diabetes was, and why it effected me, I would cast the same discernment over the current strain of coronavirus. It's the only way to understand what exactly, we're dealing with. What I have learned, isn't really discussed in the mainstream.

Saturday, October 5, 2019

Free things

Peekaboo...


David surprised me last week, when he came home from work. The aged care facility he's employed by, had some plants and containers to discard. Or at least, no-one wanted to look after them any more. There were some mature specimens, inside the pots, and even a metal owl companion, found it's way with some succulents.

Wednesday, May 9, 2018

May mornings & mulberries

May is always a busy time of year for us. Both our kids have their birthdays. That's why I've been quiet on my blog, lately. Otherwise, ferreting my little surprises away, and making gifts all round. But I wanted to take time, this morning, to write. As I was inspired by a few things.


Like...the sun dipping underneath our verandah, as it always does, this time of year. May. The last month of autumn. When the morning sun comes in like this, I know winter is not far away. Maybe I needed the reminder, because I've been so busy otherwise.

I tip my hat to the tea-cups, sunlight and the lull of a May morning. Yes, I see you there, and; appreciate the reminder.


I also noticed, on my way to feeding the chickens, the last vestiges of the rain that fell, all day yesterday, and overnight. The thick droplets clung to the foliage, like the shiny treasures they are. Our parched ground, so needed their company.

After feeding the chickens, I wandered down to the birdbath, at the bottom of the gully. And on my way, heard a succession of those droplets, like a chorus of wee Christmas bells, falling to the ground. I tried to dodge the low hanging branches, to avoid wetting my camera. As there was something, I wanted to share with you all.


Our bird bath, is a tithe to the animals and landscape, for sharing their space with us. We always keep it full. Do you see the wonderful treasure, which has planted itself, nearby? A wee, mulberry seedling.

A kurrawong, or brush turkey, was responsible perhaps? Taking a drink and having a splash about, after dining on our mulberries in Spring. The moist ground, combined with rich manure and fermented seed, made a little miracle for me to be in awe of.

I will keep the delightful treasure, and as it grows - the mulberry will eventually dwarf the birdbath. May mornings, and mulberries. Thank you for reminding me, things will always happen at their appointed time. No matter how busy, or stressed, I get.


Saturday, June 17, 2017

Dividing

One of my favourite ways to propagate, is dividing an existing plant. You don't have to worry about roots striking, or death by transpiration. It's just breaking down, one big plant, into a number of smaller ones.

I did this, back in April, when I needed to stablise the earth around our new water tank.


Before


After


Three, Purple, Pygmy Grasses, became six! Very easy to do. But not all divisions are that straight forward! Take Lemon Grass, for example...

I wrestled to dig up, 2 established clumps, which had grown in red clay. It took me three hours!! Not just to dig up, but to divide into numerous other plants. Boy, those suckers are tough!


First hugel-bed (foreground) second bed (background)


You can sure bet, when you're taking that long to dig up and divide a plant, you're going to make it extend as much as possible. From two plants, I now have nine, large clumps. Plus, a few more smaller ones, which fell off the main clump. They were put into pots. In total, I expect to get 13 clumps, out of just two plants.

The purpose of dividing the Lemon Grass, was to provide more mulching material, in our troubled, north facing slope. It's clay, it gets sun all year and it needs MORE chop and drop material, than the former two clumps provided.


Third hugel-bed (background)


Knowing how bad the clay was, we decided to suck up, more of our fallen and felled trees, into hugelkultur mounds. David and I are getting real good at building these now. We've constructed 3 separate beds on our north facing slope, to hold the clumps of lemon grass.

You can see in the above image, we also used the tree bark, from the large eucalyptus trees, we had felled, last year. This was to prevent brush turkey's from digging up our new mounds. It will also make temporary lizard habitat, before the grasses grow in again.

We've had so much material from those two trees, and we still haven't used it all up.


Lemon grass re-shooting


When on acreage, everything has to be done to scale. Two clumps may be perfect for a block in town, but for a 40 metre stretch of land, you need a lot more plants, to cover that ground. Even at 13 plants, it still won't be enough. So I'm looking at dividing up another clump, at the end of the vegetable patch.

I'm propagating some more shrubs by cuttings, which I also use for chop and drop material. But I love the simplicity of just being able to divide a clump of something, instead. You can plant them straight away, and have your garden growing quicker.

Do you have a favourite clumping plant, you like to divide, for more? They don't have to be grasses, they can be berry canes, or plants which multiply by runners (ie: strawberry).


Tuesday, May 9, 2017

My passion

One of my great passions in life, is growing plants. Especially through propagation! There's nothing quite like being able to duplicate a plant, many times over, and plant them around the yard. It's kind of magical.

But even more magical, are the plants which show up, of their own accord. It's propagation by nature - and I can appreciate how other animals go about their business (literally) and move seed around for me. Especially after a well-known parent plant, dies.


July 2012 - parent passionfruit vine 
note the silver foliage, of the wormwood (front - centre)


Take the passionfruit vine, in the background of the above picture. It was a splendid producer, with minimal care by us, but it needed more room, than we had beside the chicken coop. So we removed it one year, in preparation to install some new hugelkultur beds in the vegetable area, below.

See part 1 and part 2, of those particular hugelkultur installations.

I attempted to take a few of the remaining fruits, and scatter their seeds around the garden - in hopes more plants would emerge. All but one, didn't make it!


April 2016 - new vine


It was the least likely specimen, I thought would survive, as it came up in an arid area with minimal moisture. I knew it wouldn't survive long, so I relocated it under this acacia tree. I hear these trees are great for allowing passionfruit vines to invade, as they're a nitrogen fixing tree. The passionfruit benefits, as the tree goes into decline - lapping up all that nitrogen near its roots.

I'm happy to say, this vine survived the killer summer temps we had, due to the shade of the hardy native tree. Mulching with coffee grounds and twigs, helped in part, too. I expect this one will be putting out fruit by next growing season. Complete with it's pre-grown, natural trellis.

Much to my surprise however, I found another vine had popped-up in a secret location.


Surprise vine #1


The passionfruits which fell to the ground, on the old vine, were often hauled around the garden, by the brush turkeys or native rats. What seed wasn't dispersed as they were ransacked, were pooped out later. This passionfruit vine, was the result of nature's special propagation tactics - using other animals for seed dispersal.

This is one of the benefits of having brush turkey's in your yard! They pick at your food plants (annoying when they dig them up entirely) and move seed around in their digestive tract. Eventually leaving little nuggets of seeds, waiting for the next rains to germinate them.


Surprise vine #2 - that wormwood again!


Another passionfruit vine emerged from underneath the wormwood bush, near the other one. Which I only noticed, when it's leaves emerged at the top.

So nature managed to illicit several animals, to take the abundance of fruit drop and turn them into several new plants. Two plants, to my one, actually! So I'm happy for the help, and accept the good with the bad as far as living with brush turkey's is concerned. Boy, they can be destructive. But they do play an important part in nature too.

Which is why as much as they annoy me (digging up my seedlings) we find a way to live with them. We're all in this propagation business, together.


Monday, March 13, 2017

Rainy days

We finally received some of that wet stuff, which our land has been quenching for quite some time. There's a collective sigh amongst all the citrus, who are attempting to keep their fruit. More rain is predicted over the next few days, which will be even better.

Because it was a steady, slow, rain though - it was a perfect day, for two exciting activities.


That would be, playing in puddles with bare feet, and for mum, propagating new plants to drink in the rain. I've had this frangipanni cutting, drying off, for just over a week now. Today was perfect weather to pot it up, and let it sit in the rain.

Not long afterwards, I was broadcasting seeds in my wicking boxes, in hopes they would sprout.

Other things to do on rainy days, are internet surfing. How cute is this...


Because I've spent nearly $100 on two different feet for my sewing machine, to make my daughter's birthday quilt - I wanted to know, other useful things I could make via quilting. That's when I found this uber cute caravan, which is actually a sewing machine cover!

I won't be making it, because I already have a machine cover, but the clever things people do with their sewing machines, just need to be shared!

Especially on rainy days...


Sunday, January 29, 2017

Instant forest

I've enjoyed keeping my container plants on the verandah, over the years. My small plants, become quite big and soon graduate to larger containers. What I love most about keeping container plants for several years, is how they become an instant forest, wherever you want to keep them.


Only something happened recently, which made me have to find a new home, suitable for my container plants. Somewhere not too exposed, or too starved of light. We had to clear the verandah recently to complete a large project on it. More about that, umm...later. I don't know how much later, because it could go on for a while.

So where to place all these plants, which were mollycoddled on the verandah?


I had a big mulberry tree, over a swale. Literally, this was the only place I could think to place a verandah full of pots, which wouldn't cook them to death. The leaves will fall closer to winter, but they should hold for several more months.

Hopefully, enough time to have our verandah project finished, and I can place my plants back again.

The exterior of the mulberry however, gives very little indication of what's happening underneath...


Remember what I said about instant forest? Within the hour, I had moved quite a few pots, and some even David had to help lift. Thankfully, we had a little trolley that did most of the leg work though.

It shouldn't have surprised me, this instant garden effect. I mean, that's what container plants do! You can shift them to different places, for different effects. Pile them all together and you get a miniature jungle. But I was so in love with this new arrangement - I wasn't expecting it to look so natural.


The swale was perfect for holding all these containers. I kept a little ally in between the two rows, so I could water them, once a day. Now the weather is starting to cool however, I can probably get away with 2 days between drinks.

The container plants are loving it! They're putting on new growth and I thought it was cool under the mulberry before, but now it's a miniature forest kind of cool. The mulberry is benefiting from the new arrangement too, with the regular watering. The tree canopy, lets in dappled light and the under-story holds in any moisture it can capture.

So if that wasn't enough function stacking, in this particular guild, did I mention my little marcot experiment?


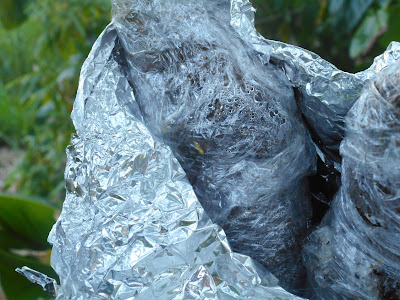
I'm hoping to get three more mulberry trees, by air layering on the branch themselves. Youtube has plenty of videos if you're curious about this method (marcot) as I was. It's pretty easy, once I had the materials together.

The birds have taken a keen interest in the shiny alfoil too. I find peck holes in the medium, and sometimes the alfoil comes away from their constant inspections.


We have success though...see the tiny root showing through the cling wrap? I really love mulberry trees, which is why I love to propagate them. If you have the space, do plant LOTS of mulberries! Or just one if you're limited. It took a few years, but I now have a nursery tree, where I can utilise the cool under-story, the mulberry creates.

Who would have thought that so much could happen under just one tree? I have a swale to help capture the moisture to hydrate the mulberry, a deciduous tree which regulates its canopy cover, according to the climate, a temporary nursery for container plants and it's also a propagating area. Oh yeah, and it also produces delicious fruit!

In permaculture it's called stacking functions, and its one of the reasons I love the design principles permaculture teaches. If you're going to use energy for growing something, try to stack as many functions in and around it, to make the energy used, more efficient. 

Do you have a tree or dedicated area, that does more than just produce one yield (ie: fruit) for you?


Wednesday, November 16, 2016

Pineapple flower

It's been a long time coming, but we finally have another pineapple flowering. They are so pretty with their little purple flowers. Each segment, contains a flower. Now I've read that pineapples don't require much water or nutrients, in order to flower, but I've been growing them long enough to know, that's not entirely true.


My favourite time - fruiting pineapples


They require good drainage, otherwise they will rot and they certainly don't need to be inundated with water. Coming from the Bromeliaceae family, they have adapted to minimal water requirements, through their cleverly designed leaves. However, if you want them to flower, they do have to be kept moist once the heat arrives.

Like any flowering plant, moisture triggers the flowers to bloom. These flowers do not require pollination, in order for the fruit to develop, but it doesn't happen at all, unless there's some moisture present. So if you're going to water your pineapple at all, make sure it gets a drink every now and then, once the heat arrives. This is applicable to my climate, which is predominately dry, in Spring. If you receive reliable rainfall through your warmer months however, then you won't have to do a thing.


Catching organic debris


When I added spent coffee grounds, to the nearby lime tree, this pineapple got some caught in it's leaves too. This is how pineapples feed, along with uptake of nutrients in the roots. But the roots aren't very extensive, so anything you can place in the fronds are beneficial.

If you're going to feed the fronds though, make sure it's free draining material, so it doesn't block the leafs from draining water away. Coffee grounds are a good, free draining material, and I've also dropped a banana peel on it. But best of all, are other leaves. Which is why, the best place to plant a pineapple, is under the drip-line of a tree.


Pineapple - left


I have several pineapples, planted in various inhospitable places around the yard, but this spot under the lime tree, is where we've consistently gotten fruit. This is the second plant I've put in this spot, and it's fruited before some I planted at the same time, as the original plant. Pineapples can survive harsh conditions, but the trick is to get them to flower.

Which is why under the lime tree, is the sweet spot we've discovered for growing pineapples. We've let nature do the fertilising, along with the cooler micro-climate under the tree, to help retain moisture. Just don't be overly kind to your pineapples, and feed them heavy fertilisers. It will burn them. Slow releasing, organic materials are best.


Newest propagated pineapple tops


The three pineapple tops I propagated recently, are doing well. The centre of the crown are a deep green colour, and will start producing new leafs soon. It's the centre of a pineapple, that indicates the pineapple's condition. Deep green and it has enough moisture. If it starts going yellow however, then you're killing it with too much moisture. It's rotting. Take it out of the pot, and let the roots dry out a bit, and consider if your potting material is free draining enough.

If the length of the leafs are starting to turn red, then they need some nutrients. Give them some organic material and a weak tea of your choosing (worm, weed or manure). If the centre of the pineapple crown is turning red however, then it's getting ready to send up fruit, so don't worry in that case.

In about six months we should be ready to pick our pineapple to eat. So late autumn. It takes a long time to produce fruit from a pineapple top (anywhere from 18 to 24 months) but for sheer neglect purposes, these are a reliable producer. Especially when tree, drip lines, are involved. The hardest part is in the waiting. Pineapples, pretty much take care of themselves.


Tuesday, October 4, 2016

Propagating pineapples

Pineapples would have to be one of the easiest plants to propagate. And they should be, considering they're related to the bromeliad family. In other words, they maintain a lot of moisture in their stems and/or leaves. But being easy to propagate, doesn't mean they're immune to killing without the appropriate considerations.

If you're someone who takes a while to complete tasks, then chances are, you'll be successful at propagating pineapples. And here's why...


 Propagation material


First of all, we start with the pineapple top, or sometimes called the crown. Technically, it's the bracts, or rosette of leaves, which grow in a spiral on top of the pineapple fruit. It's these bracts, we need to propagate the plant with.

At the fruit store recently, we purchased a triple header - meaning it sprouted three separate rosettes, from the one pineapple fruit. It was a good investment, as we planned to get three plants out of it. First, we chopped the top from the fruit, and it sat on the bench for a week and a bit. I honestly can't remember how long. Pineapple tops last for ages.


A little too soft


Now YOU don't have to leave them on the bench, for that long. It's just something which happens around here. By the time we got to it, the flesh left on the crown, was so soft, it was extremely easy to pull out the core. But you don't want to keep the flesh on the crown indefinitely. As this can grow mould and rot the parts you want to sprout roots from. So plan to remove all yellow pineapple flesh, prior to propagating.


Dividing


You can skip this step if you only have one rosette to deal with, but if you have more, simply pull them apart with your hands. Or a knife, if that's easier. The fibrous core is what we want to sprout roots from, and they need a little extra treatment to do so successfully.


Less is more


The rosette on the left has been treated, by removing any yellow flesh, and pulling off the leaves, one by one. So you're left with a fibrous rhizome and a few leaves. This rhizome, is what gets planted under the soil to sprout roots and grow subsequent new leaves. So don't worry about losing too many leaves in this process.

In fact, I try and take off as many leaves as possible, because it helps to keep the plant upright, before the roots have a chance to secure the soil. Otherwise you end up with tops that fall out, or lean too much. Especially if they're exposed to the wind outside.


 Prepared


These are the three pineapple tops, freshly prepared and ready to go into the soil. Now you can prepare the tops like this, right after you eat the pineapple, or whenever you get around it - like we do. However, there's another step before it can make contact with moisture. Which is to leave it to dry, for at least three days. This is so the fresh rhizome you've just created, has a chance to callous over.


Ready to plant


These are the same pineapple tops, after three days. They're now healed over, and won't grow mould or fungi, which could rot them, when they come in contact with the damp soil.

Which is why you should also plant them in a free-draining potting mix. Watering them only when the soil needs it. Pineapples actually need very little water to grow. In fact, I would say too much water is probably what kills most pineapple propagation attempts.

Their leaves also cannot handle strong fertiliser, so never feel like you must pamper your pineapples. The best fertility to give a pineapple, is to position them near other plants, which will drop leaf mulch. Or provide your own mulch, with the odd banana skin or other organic matter on the soil.


 2011


In an agreeable climate (they prefer subtropical conditions) they can fruit within 24 months. Maybe that's a long time to wait, but have you ever tried fresh pineapple? Sweet sunshine in your mouth, and so tender, you can even eat the core! That's why I keep propagating pineapples. When we tried our first in 2011, I was destined to continue propagating them.

If you don't have a subtropical climate, you could try experimenting with micro-climates, using heat sinks, such as north facing walls or any kind of rock structure. If you're fortunate to have a greenhouse, even better!

Happy propagating, and may all your pineapples, grow fat and sweet.

Saturday, April 16, 2016

Round two

Once upon a time, I ordered six Vetiver plants, to grow as a hedge. The purpose was to use it, to stop erosion down in our gully. But also to provide mulch when pruned back. It was going to be great! I planted out five plants though, and after the first deluge, they were completely covered in silt and didn't recover. But I had one left!

I nurtured that plant for up to twelve months, by continuing to pot it into larger pots. Then, one day, I ran out of larger pots and it was forced to contend with limited space and irregular watering. I really should have dealt with it sooner, but yesterday I decided it had to be propagated.


It did extremely well for the conditions I gave it towards the end. There were masses of brown leaves, but it was mostly green growth underneath. I guess the reason I put it off for so long, was wondering how I was going to pull apart, a root bound pot - knowing the reputation vetiver has for impenetrable root systems.

I started with a big knife to attempt to divide the plant at first. But all it did was slice the leaves off the rhyzome, and separated them from the roots. So I ditched the knife, removed all the soil I could from the roots, and gently pried each section away from the next. It was easy, once the roots were detached from the soil.


After dividing them up, removing the dead leaves and trimming the roots, I soaked them in a seaweed solution (Seasol). I was happy to discover my vetiver grass, was more alive than dead. It certainly lives up to its reputation, as being one of the toughest plants in the world.


After potting them into individual forestry tubes, I ended up with 24 plants in total. Here's hoping when I plant out round two, I can position it a little better than previously. I will have to keep back a couple of plants though, like I had the sense to do with the last batch - just in case.

I really want need a vetiver hedge, as it can be a handy tool for preventing soil erosion. Our soil shouldn't be leaving the property. Plus I want need all that free mulch material, from its annual haircut. Without these things, our land has a hard time replenishing itself, and then we have a harder time managing it.

So fingers crossed for round two!


Monday, March 21, 2016

Autumn means

It's autumn, so the temperatures are dropping and its time to get propagating again. Doing this in autumn means, I'll have cuttings ready for planting in spring. The reduced evaporation, also means the chances of cuttings, successfully striking, are greatly improved.


Rosemary - centre


It's been a few years since I've done rosemary, but I've decided to try and get some more in the ground, for bee food. Its a favourite for them it seems. Plus its extremely hardy in our climate. An excellent hedge and windbreak too.


Various cuttings


I've also taken some more pineapple sage, as with their fragrant red flowers, it's another bee favourite. I've also taken some lavender, daisies and pepino cuttings too. I want to plant the pepino in my hugelkultur bed, along with some bananas we propagated earlier.


Propagating larger plants


These four dwarf Ducasse bananas, have gotten much bigger, since we cut them from the parent plant. We also have another three banana trees, out of shot. So there's plenty of propagation material to find places for in the garden. A pumpkin has also sprouted from the compost I had in the wheelbarrow too!

But now for something new I'm trying this year...


Mulberry cuttings


I'm attempting to strike mulberry trees, in water with a dash of Seasol for nutrients. I initially read about it here. Scroll down the bottom, for the water technique. It's very simple.

After several days sitting in the water, I'm happy to report...


Click to enlarge


There appears to be roots forming, albeit, tiny ones. I have to change the water every week, to ensure there's a fresh supply of oxygen and mould doesn't start developing on the stems. I hope these will transplant well into potting mix after the roots get a little longer, and stronger.

I only managed to strike one mulberry cutting in soil, last year, out of a whole bunch. So I'm hoping this new technique, will be more successful. I love mulberries trees. They grow so quick in our hostile environment, feed themselves every year with a leaf drop, and simply make it cooler, wherever they are planted.

So here's hoping I get some success from this year's propagation attempts.


Tuesday, September 15, 2015

More recycling ideas

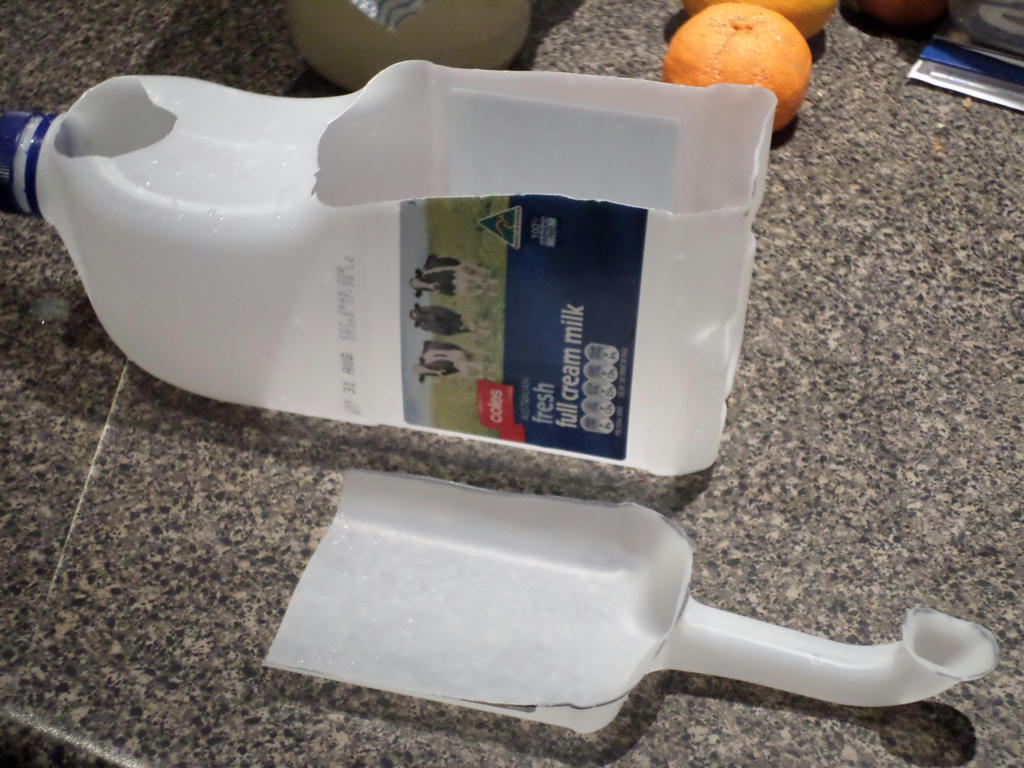
 3 Litre milk bottle


Back when I made my chicken poop scooper, out of an old milk bottle, I left the remainder on the bench, as a reminder. I didn't have a clue how to use it, but figured something would manifest as soon as something was needed.

And something did manifest...


A seedling tray


I had some lettuce seeds I needed to sprout, but it's always challenging to sprinkle the seed into tiny pots. But there was my milk bottle sitting on the counter, inviting me to experiment with it. So I cut the side open, and used it as a seedling tray.

It's so much easier to sprinkle the seeds on the surface now, and the high sides mean, a little humidity is created when I mist the soil. For fine seeds which need to stay moist before germinating, I found this new device, extremely handy!

I will transplant these lettuce seedlings into their permanent place, once the second leaves develop.

I challenge you all to keep one item of your recycling, on the kitchen bench, until you find a new purpose for it. You may surprise yourselves, as I did. I would have always struggled with sprinkling tiny seeds into tiny pots, had I not kept that milk bottle out, in plain sight.

I just poked three holes in the bottom, and it was ready to go!


Sunday, June 28, 2015

The happy accident

I struggle with growing flowers. I don't  know why. Perhaps lack of experience? Or perhaps because they're too fussy? Either way, I don't really strive to incorporate flowers in my garden as anything more than the side-effect of plants I can manage to get to survive in our conditions.

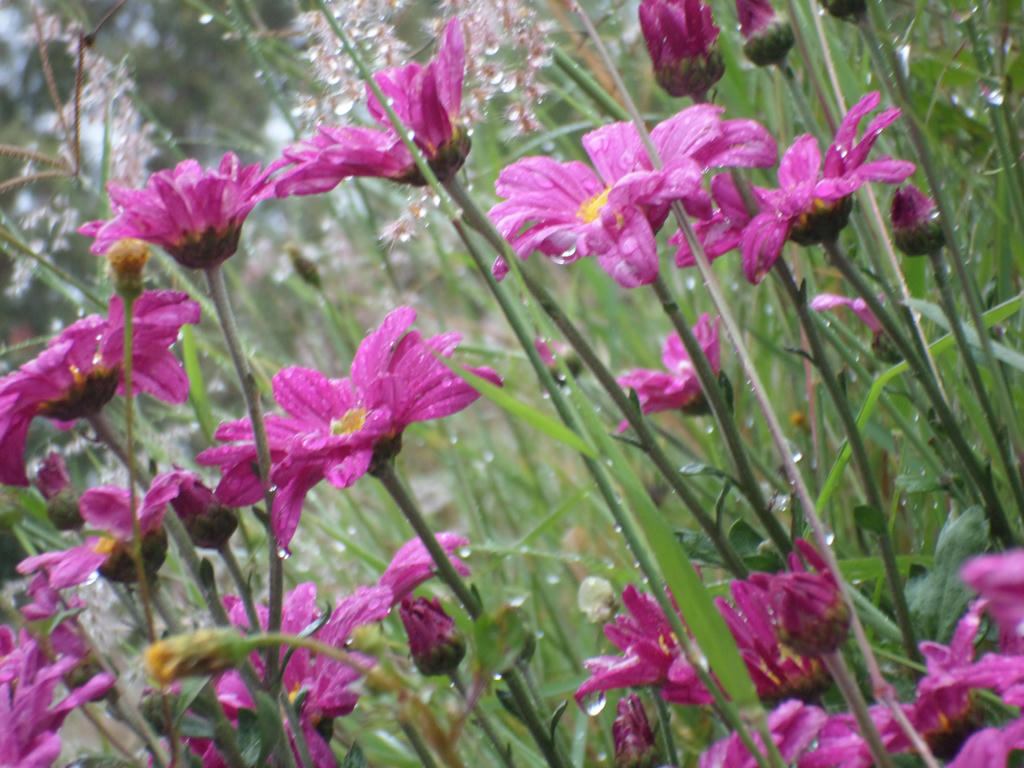
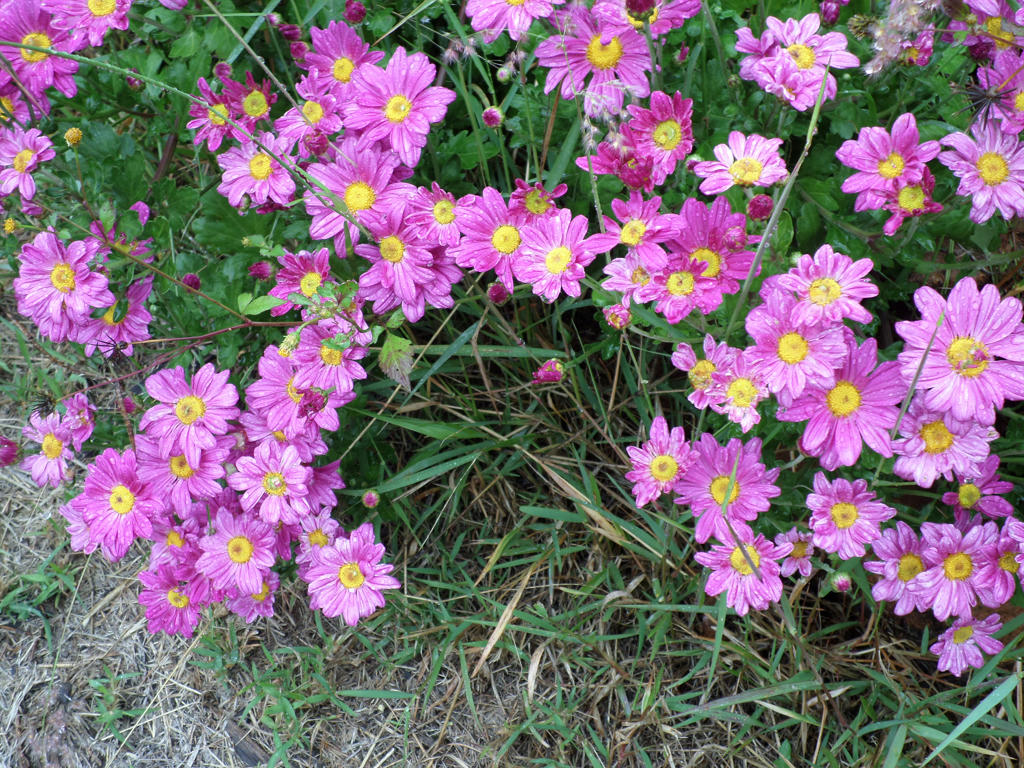
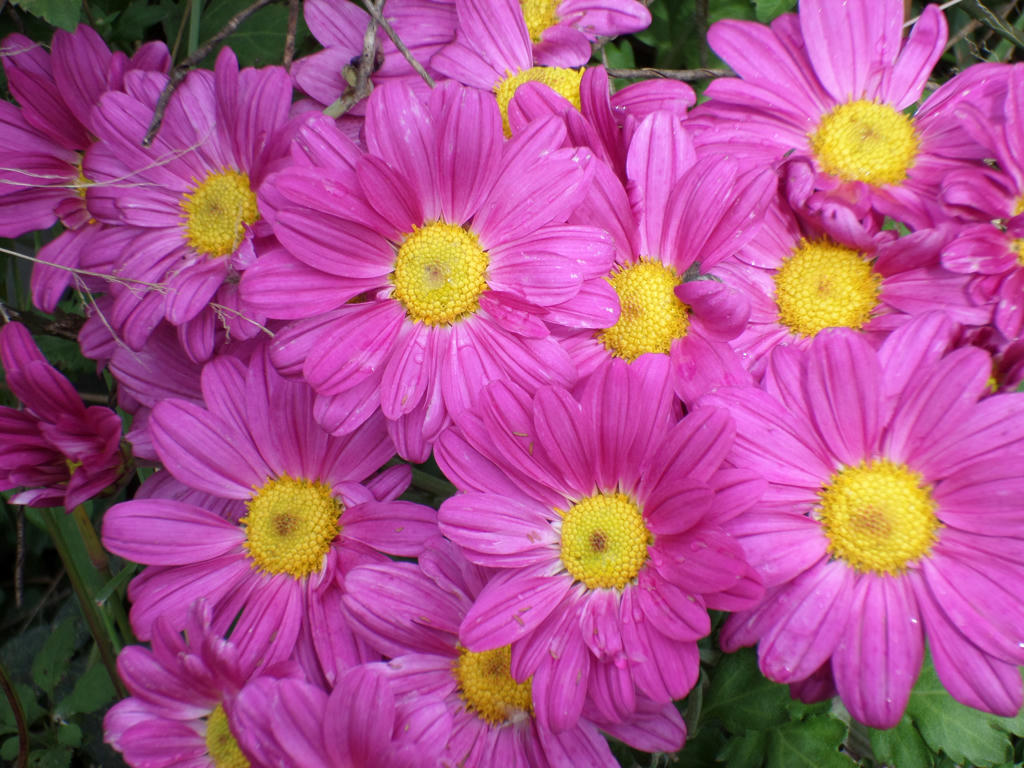
So I was pleasantly surprised when Chrysanthemums found their way into my garden. And quite by accident too! I couldn't have planned it better if I tried. In fact, I did try! My husband bought me a bouquet of flowers, and when I initially trimmed them to put in the vase, I tried to strike the prunings. Unfortunately, they proceeded to rot in the medium I planted them in. The rest of the flowers sat for weeks in the vase, with just the perfect amount of water underneath a tiny bud. When I went to toss the spent bouquet in the compost, I saw these tiny little roots begging for me to plant them.

So I did, and it grew!


Not only did it grow, but it thrived! They received insufficient water, and had to compete with weeds in poor soil too. These propagated Chrysanthemums played the underdog for quite a while. The tall stems, fell over and sprawled across the ground, but the buds still turned their heads to the sunlight. And when they bloomed, they did it en mass.


I know why people try to plant flowers now. They seem to smile at you, when you walk into the garden. They call you over to have a natter, all the time shinning a neon sign that says - haven't I just made your day, and don't you want to plant more of me?


Flowers may not speak English, by they certainly have the visual display and aromas, down pat. They know how to attract attention, and get emotional creatures such as us, to spread them around the place. Not to mention the bees which go crazy over their blooms. I had both native bees and European varieties, taking a keen interest.

If  you want a bloomer that can handle some neglect, consider the Chrysanthemum. I don't have any experience with the double blooms in ground, but the single blooms have proven they're hardy enough to stay. You will find they grow tall and lanky, and they may require some support. I just let mine flop over, and when all the buds flowered, it looked like a carpet of pink.

Do you have a favourite, no fuss flower, that will grow in your conditions?


Tuesday, April 21, 2015

On the run

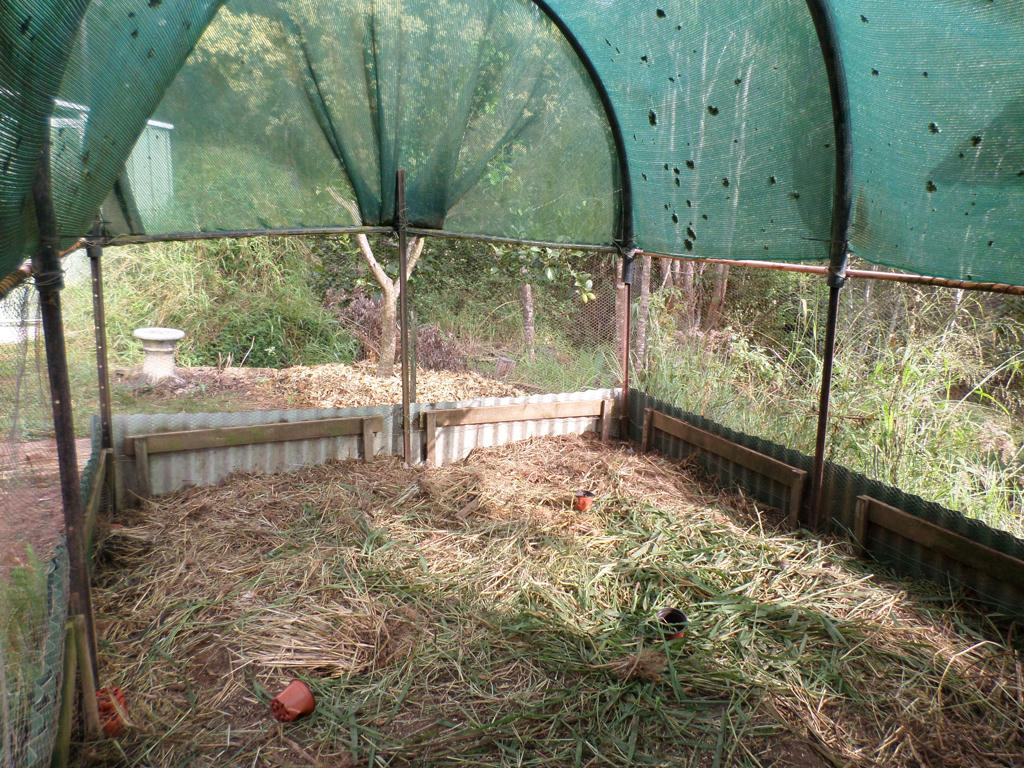
Several hours after moving the residents to their new accommodations in Hilltop Coop, I got stuck into their old abode. I was going to use this shaded run as a propagation area for plants, but have since decided it had a more important purpose.


The run (before)


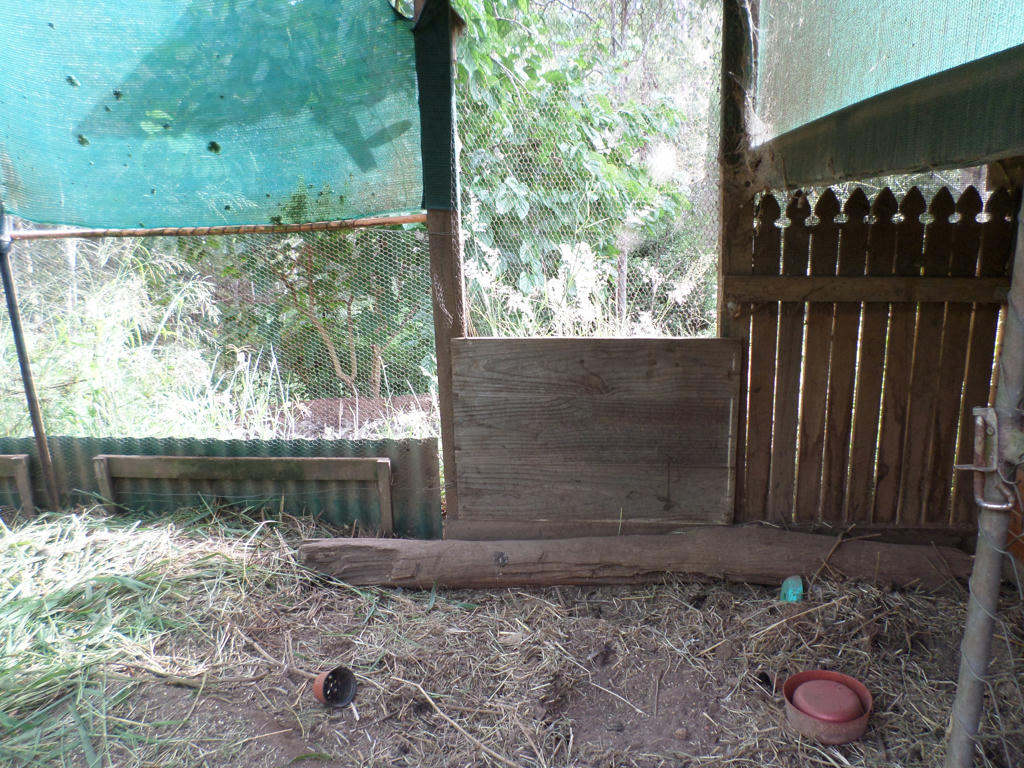
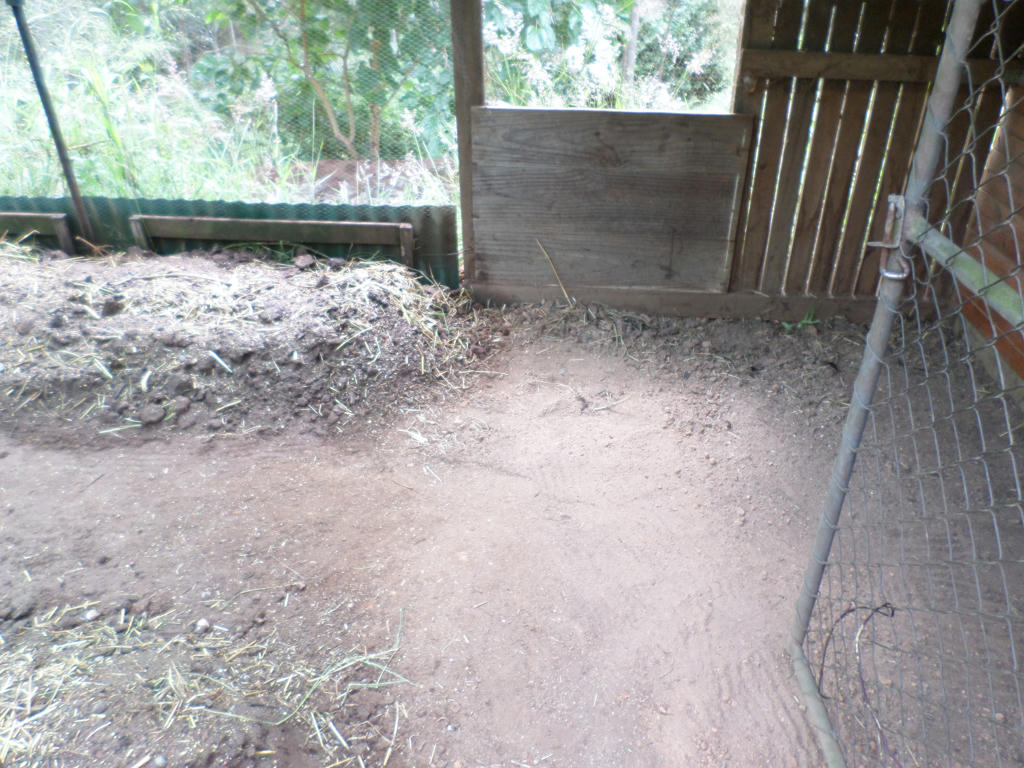
After evicting the former residents, the run was pretty messy - grass, dirt, poop and some old pots, which held micro greens we fed to the chickens. It all needed to go!


Under cover (before)


There was a log which served as a perch (once) which got dragged out and will be used in a garden bed, somewhere. But for a better look at the outside of Middle Ridge, I found an old picture...


Newly constructed


It's cobbled together - a shade house, tall roofed areas and short roofed areas. I liked it at the time, but there were some design flaws I look forward to renovating at a later date. Right now though, I need to put all that chicken fertility to good use - rather than have it run down hill and feed the mulberry tree!


The run (after)


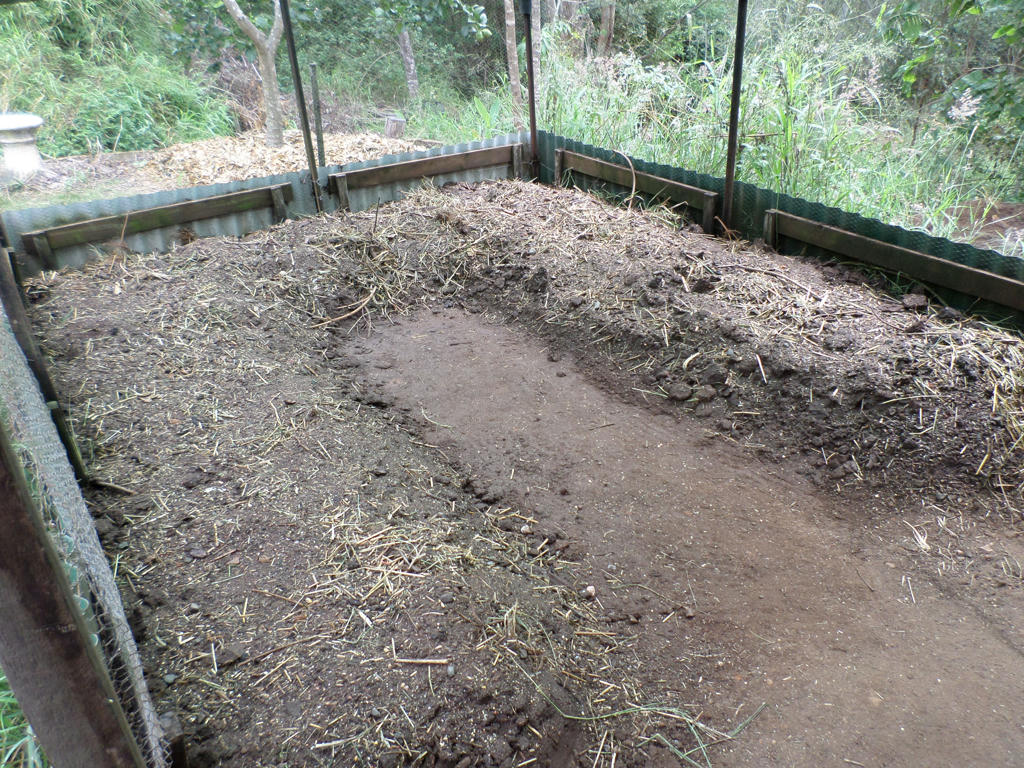
So with a shovel, mattock and rake, I heaped up the soil around the edges and made some vegetable beds. There's approximately 6 metres squared, and I intend to us it all! As the winter sun lowers, it will dip under the shade cloth and enter the run directly. I should get frost protection, and because there's a door, I get animal protection too.

I never designed Middle Ridge for this purpose, but it seems crazy not to convert it to such a purpose now.


Under cover (after)


I still have some space in the tall roofed area, which I'll probably allocate to propagation. I'm still organising what shelves I can fit in this space.

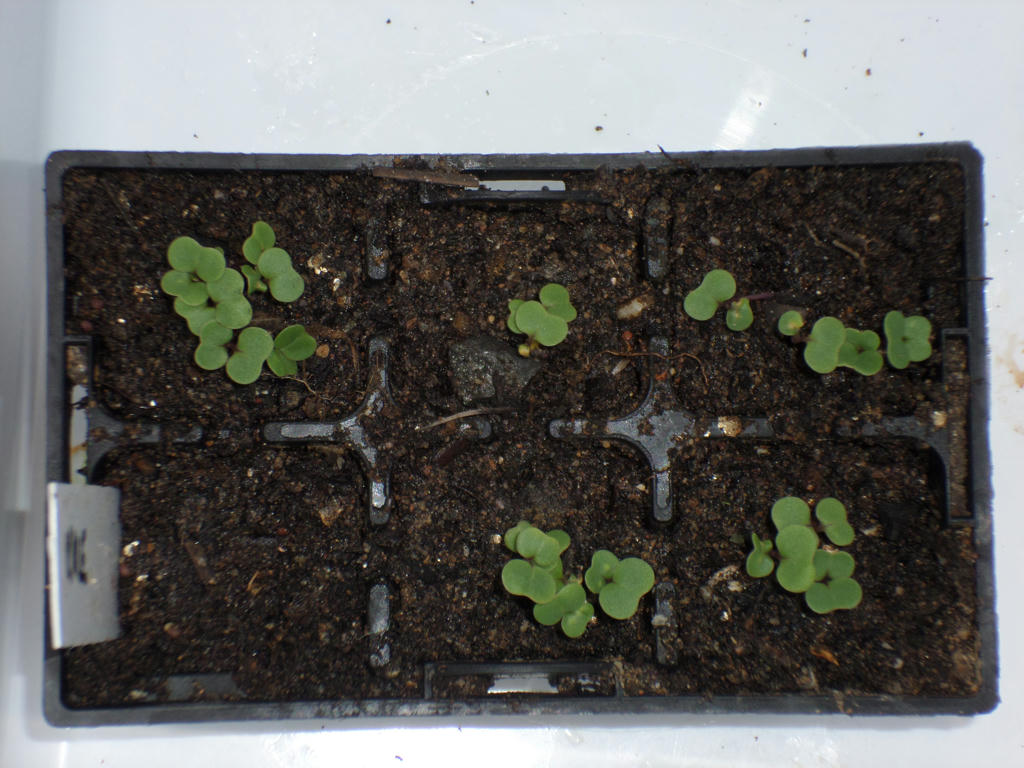
I won't be able to plant in the new beds for a few weeks yet, but I already have some seedlings on the go, thanks to Farmer Liz, at 8 acres. We did a trade and her kale seeds came up really quickly.


Walking stick kale (I believe)


I also have some of her Lacy Lady Peas, which are just starting to emerge too. I have to be careful I don't kill them with my tendency to over water, and trying to be vigilant on that score! I noticed it first with the empty cell, a single kale emerged but withered quickly due to wet extremes.

I will be extra careful now, because I really want to have some wins growing vegetables. This new set-up is probably the closest I'm going to get to optimum conditions, and I need those seedlings to grow!

As always, there's more to this renovation than present, but all will be revealed in good time.