Showing posts with label Vegetable garden. Show all posts

Friday, July 5, 2019

Update on Compost

New structure, next to the bridge


I first introduced our new compost gully, on the other website, over a month ago. You would have seen it posted on this blog, just yesterday though. I wanted to update, how we're still tweaking the design using more sapling trunks. David installed a teepee structure, to help support the pumpkin vine. It's still growing quite well, during winter. I think the warmth from the compost breaking down, helps.

Tuesday, January 22, 2019

Finally!

If there's one thing I try and grow, every year, it's spaghetti squash. This year I struggled to get them out of the ground, because the bush rats and mice, were eating the seeds. For those that did survive, night marauders, would behead the plants by morning, and the remaining stalk would be dead by midday.

I did manage to get a few vines to maturity. Far less than I'm used to, but at least now I had a fighting chance at getting fruit. I kept what little water I had, up to them, so the blessed things would flower. Which they finally did. Oh, but only male flowers. For weeks. So I tip-pruned to encourage more female flowers, but for some reason they rotted before being able to open.

I had all but given up, recently. Seems I wouldn't be manually fertilising any female flowers, this year - as none of them were surviving. Then the other day, while out in the garden...


Fruit


...low and behold, I discovered a lonely fruit, hiding behind the leafs. FINALLY!! The bees must have been doing their job, in the early morning. I'm hoping once the weather cools in autumn, I may get a second flush of flowers, that will do much better. I suspect it's the constant heat, which is stressing the plants.

Looks to be no rain forecast (again) and a long stretch of hot days ahead. Compared to previous summers, the temperatures are much lower (like under 40 degrees Celsius - but not, by much). So I am at least grateful for those small mercies. Like a lone fruit of spaghetti squash, that overcame the odds too.

I hope the rest of your gardens are weathering the elements, well.


Thursday, November 22, 2018

Devloping delights

Strawberry season is gone, the mulberry is half way through producing, and I thought I would share a few more fruiting delights, currently in production.


A promise of something...but what?


I think this is a Loganberry flower. Or a youngberry. It's a thornless bramble berry, nonetheless. Once it ripens, I can tell for sure!


Hanging in there


Another pineapple, is emerging from the crown. This fellow needs a good feed, because red leaves on a pineapple, is an indication they're starving. I will have to spray the plant with a bit of seaweed solution, and Epsom salts.


Several clusters


The Pink Thai, cherry tomatoes grown in my container, kitchen garden, are coming along nicely. No splitting and no signs of disease, of yet. These are the biggest I've seen these cherry tomatoes grow!


 Tiny but spicy


Hot Tabasco peppers are emerging, and will be ready to make my delicious Chilli jam, in the new year I hope. If prolific enough, I'll have some to dry as well. This particular plant, is in it's second year of production. I'm impressed by how little water it requires, to bear a lot of fruit.


So many


The Tahitian Lime was absolutely hammered by the dry spell, a few months earlier. But is now bursting with fruit again. As are the rest of our citrus trees.

For the size of my garden, I don't have much in production at the moment, but I'm still looking forward to tasting it all. I'm expecting new plants to arrive in the mail soon. Who knows if they will live to make it to the blog, lol?

Right now though, my garden is enjoying a slow soaking rain, which has set in today.


Saturday, March 24, 2018

Organic reshuffle

I shut down my vegetable patch, during the worst of the heat: but with the cool of autumn recently (sweet mercy!) it drew me back into the garden again. All to see what I could achieve, with what survived. I call it pottering around the garden, with no set agenda.


 Hugelkultur bed (1)


After much lallygagging, I noticed some failed experiments, could easily be reconstituted with the resources left behind. The stack of sugarcane mulch I piled around my potatoes, for example. It wasn't doing much, since harvesting the meager crop. Somewhat like another failed potato experiment, below...


What to do?


This terracotta pot, was filled to the brim with sugarcane mulch too. But it wasn't growing any potatoes now - just breaking down into a soggy mess. I had plans for all that mulch, to avoid purchasing more.


Barren


Another resource, I noticed was going to waste, was the old compost in the wicking boxes. They were shelved for taking down, and replacing with another hugelkultur bed - as they seem to do marginally better.

All these misplaced resources, were going to help address some shortfalls, in another hugelkultur bed.


Repaired, for an autumn garden
~ early March 


Hugelkultur bed (3) was only built last winter, so it had some settling to do over the growing season. As I pottered around that particular bed, recently, I noticed a few sunken pockets of soil. They could easily be filled with the old compost, from the failed wicking boxes.

Then I re-mulched, with the spent sugarcane from the potato experiments. Above, is what it looked like, in early March. This is what it looks like now, at the end of the same month...


Late March


The herbs I cut-back, regrew quickly. I also transplanted some herbs, that weren't doing so well, in other hugelkultur beds. Then I planted some pumpkin seeds, saved from a mini pumpkin, purchased at the farmer's market. The fact they're so small, should see me harvest something before the cool of winter arrives, in earnest. Fingers crossed.

I also planted other seeds saved, rather than have them go to waste in the cupboard. I haven't spent any extra money. See what lallygagging in the garden, gets you?

Then there was the terracotta pot...I had plans to make-over, as well.


Seeds


I planted some Lacy Lady peas, in the newly filled pot. I also cut down some long, thornless, banksia rose, canes - intruding on a walkway. They would make suitable posts, to support the peas as they grow.


 Bringing it all together


I tied the canes together, with some old bale, twine. Then several weeks later, this happened...


Germinated


Some peas emerged, to embellish the bottom of the tepee. I don't know how successful my organic reshuffle, will be. All I know is, I reused some resources that weren't doing much else. Failed experiments, are nature's own organic reshuffle too. All with the intended purpose, of growing new things.

I'd like to think, my pottering around the garden, will lead to some edible food. Maybe I did some good? I don't know. Time will tell. That's what prevailing conditions will decide, ultimately. I have to throw my hat into the ring, however, to find out.

I won't be growing anything, next summer, however. It seems to be the season of barbecued greens! Even under the shade.


Thursday, March 1, 2018

Favourite squash

I'm not a huge squash fan, and I must confess to being confused about the whole difference between a squash and a pumpkin thing. Because unlike the USA, who are the largest producers of pumpkins - in Australia, we actually name some of our squash, pumpkins (aka: the Butternut pumpkin).

But there is one squash that bucked the trend, and absolutely turned my head. It said: "hey, I grow well in your climate, and you can eliminate kitchen gadgets, that turn vegetables into noodles!"

SOLD!


Literally...I saw these selling at Betros for $6.99 each!
~ luckily, I managed to grow several of my own


I am, of course, talking about the spaghetti squash. Nature's own, vegetable noodles - wrapped in skin, that will break down in the compost. No plastic bags required. The magic that happens when cooked however, is how their flesh breaks apart, to resemble delicious spaghetti. Only they don't contain gluten, or much carbohydrate. Which means, if you're trying to avoid bloat, plastic wrap, or food allergies, this is an excellent substitute for pasta.

When I say, easy to grow in my climate: there are some conditions which make them fair better.


Hilltop Chicken Coop


The best position, I found, was beside the chicken coop. Why? Because it gets the run-off from the roof, and is shaded in the morning. So during long hot, summer days, it receives a little less baking time. I also planted the squash near a pigeon pea tree, so it's likely feeding off some nitrogen, at the root zone.

The above, is what the squash looked like after summer. All the vines I planted elsewhere: died, however. It has to do with our block retaining walls, which is another post for another day! With summer temperatures, reaching a top of 43 degrees Celsius, however, it pays to find the right spot for your vines to grow.

Tip: they like to have their vines out in full sun, but their roots kept cool, during summer. This is recommended for a hot growing season, climate only.


 New fruit


With the heat of summer, mostly behind us though, and some soaking autumn rains - the squash has kicked back into production. How's that for hardy? We don't get much of a winter here, either, so we'll most likely have this squash on our dinner table too.

I only grew 5 spaghetti squash in total, from around 10 vines, planted. So not a good yield this year, on numbers alone. But they did have to produce on the natural elements, alone too. Minimal water was given, during the heat of summer. I just didn't have it to spare. So they didn't even get watered during the worst of it.


A seed nursery, of sorts


The 5 spaghetti squash I mentioned earlier, however, was more like 4 and a half! This little one, was considered a runt. So it was left under the verandah, in a half-hearted, "what are we going to do with it", kind of way? During those consecutive days, ranging from 41-43 degrees Celsius, however, nature thought it made a pretty good greenhouse for the seeds to sprout!

So not only did we salvage this squash, for our dinner (how I came to open it up) but the chickens also received, some sprouted seeds for breakfast!

If you have a hot climate, or can manufacture one through radiant heat sources,  the spaghetti squash should do well. Just remember, if you don't have much supplemental water to give during summer, you might want to plant MORE vines, than you think you'll need. If you save your seeds too, you can be liberal spreading them around. I've had no problem saving seeds. In fact, I hope to breed a really tough variety!

I wonder, do you get confused about the difference between a squash and a pumpkin?


Tuesday, November 28, 2017

Shady places

Continuing the theme of accumulative work, there's a relatively new project we've been working on lately. It does involve a retaining wall, but not building one! Thankfully. It's the retaining wall, below our hugelkultur beds.

During the warmer months, those blocks, heat up something terrible. Hardly anything grows in the beds. While the avocado tree sprouted near the wall, is helping reduce SOME radiant heat from reaching the blocks - it's certainly not enough to cover the span of wall, during the day.


Avocado (left) shade sail (above)


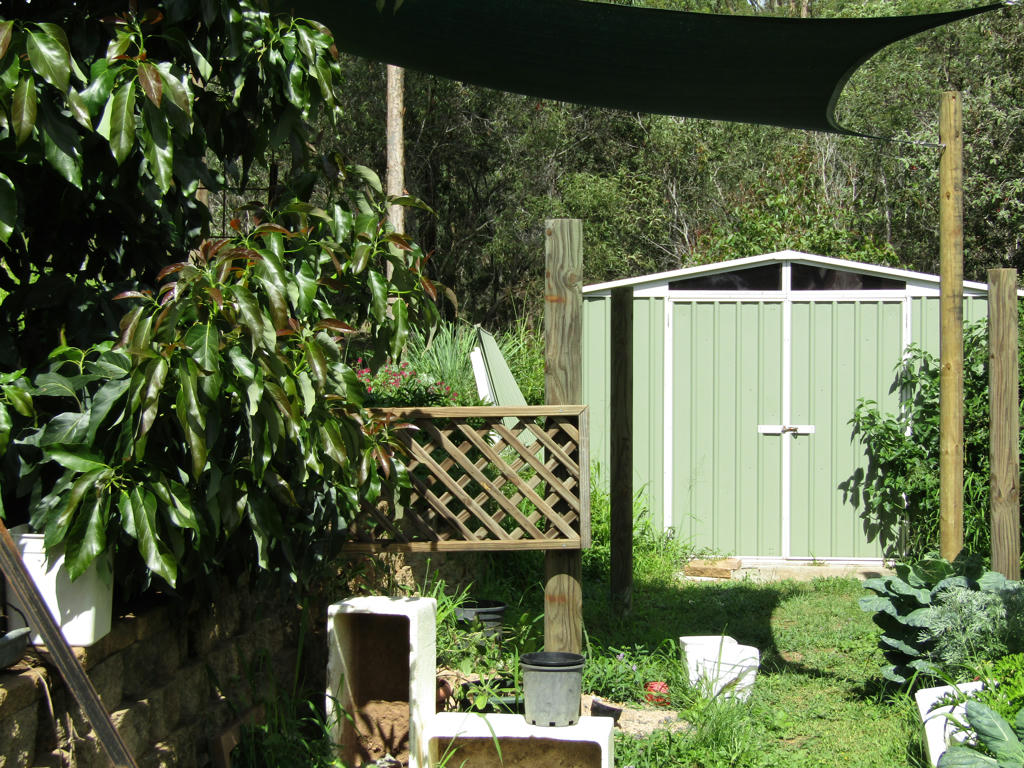
So we installed some treated timber posts, and a single, 3.4 x 3.4 metre, shade sail. During sumer, when the sun is high, it will shade approximately 3 metres of wall. But it will always creep in, on the east and west side, as the sun rises and sets.

To mitigate this, we're building screens on half the sides. You can see the lattice, installed recently. It was a gift originally, and I was tired of storing, instead of using. While it's not entirely big enough, I intend to add some mesh above it, with a pot underneath, to grow climbers over. That should provide better shade cover. I will do something similar on the west-facing side.

While it looks kinda junky right now, everything in the image above, has a purpose. The styrafoam boxes under the lattice, are shading a couple of pots I have potatoes and jerusalem artichokes, growing in. The plastic pot, on the styrafoam box, has a rock in it, to stop the box from blowing away. The white buckets in the middle, catches the rain which drops from the shade cloth. I then ferry that water, to the hugelkultur beds.


Best pepinos I've ever grown, over the retaining wall ~
now receives morning shade from the sail


The goal here is to create more micro-climate, for growing plants. Mostly edible ones. Also, to use the man-made infrastructure, as a means of capturing energy where I need it (ie: water harvesting) or deflect energy where I don't - radiant heat.

It's another work in progress, as funds and time become available. I intend to use more recycled materials to complete this shady area. In the meantime, we make do with boxes, buckets and other bits and pieces we can find. It's kind of ugly, but progressing us towards meeting our goal of more food production. Which is kind of great!


Monday, November 6, 2017

Observing the edges

The most recent hugelkultur bed installed, was placed underneath a block retaining wall. It has several advantages in this position. Firstly, it's a heat sink for winter sun - meaning I can extend my growing season. Secondly, the hugel bed shades part of the wall, creating a cooling effect, in summer - on that side of the bed.


Grass, partially cut


For every benefit however, there's a deficit to consider on any particular "edge". In this case, we had grass growing directly above the wall. David normally cuts it with the brush-cutter, but during summer when the rain is about, it can grow really fast! If it sets seed, it can end up sprouting between the wall and hugel bed. Making access to pull it, much harder.

So I got my trusty (manual) hedge trimmers out, and cut the grass back, directly behind the bed. It took about 20 minutes all up. That's only because I was actually doing something with the grass, afterwards.


Using the cut resource


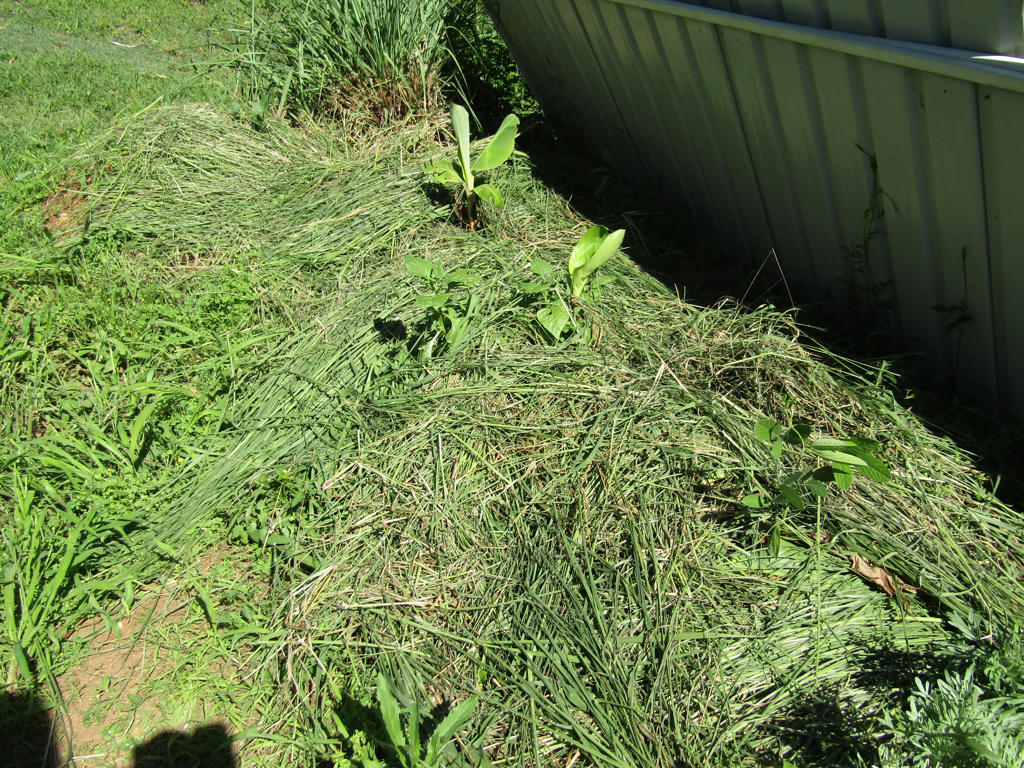
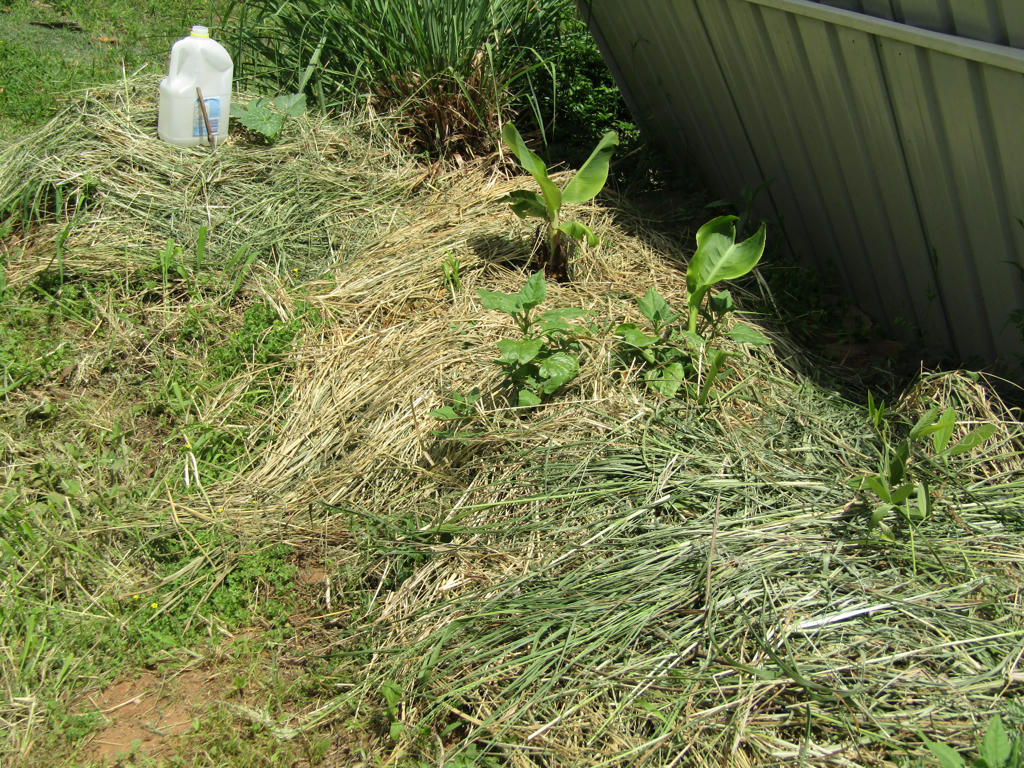
Close by, I also have in-ground hugel beds, which I mulched with the recently-cut grass. The same treatment was given last Autumn, so the remnants of that old mulch, was still on the surface. Meaning, as the new grass dries, there shouldn't be much nitrogen drawn from the soil. So it's a good idea to reapply mulch, before the old one breaks down completely.

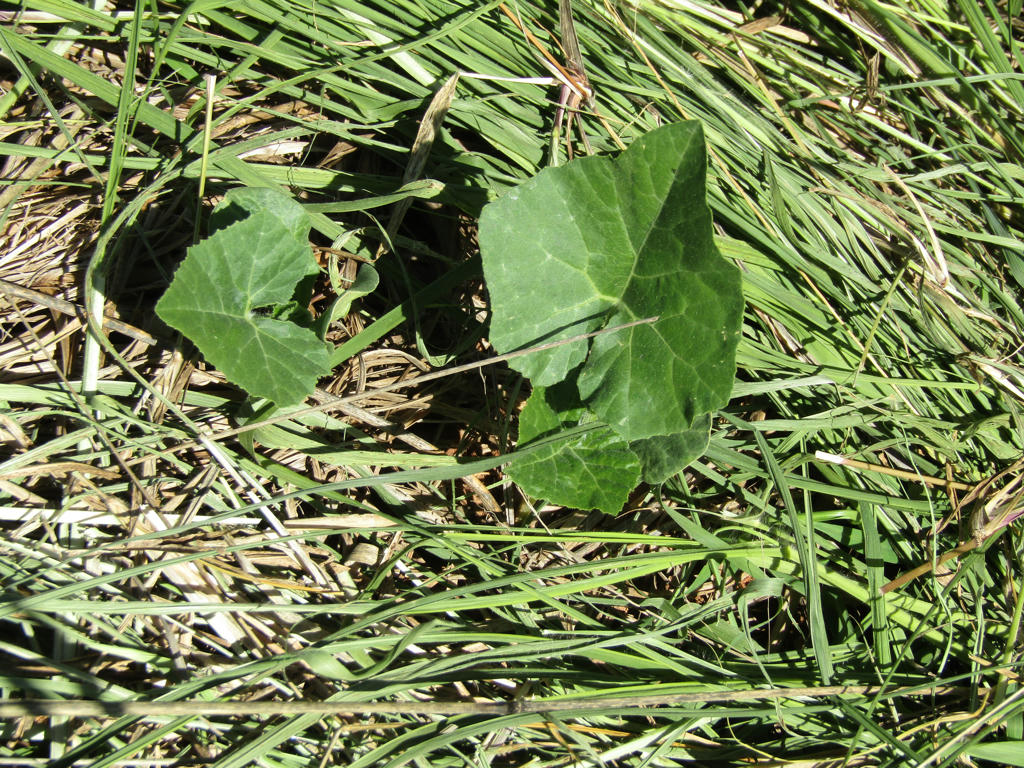
The banana, arrowroot, pigeon pea tree, and newly sprouted pumpkin vines, didn't seem to mind. In fact, the more regularly I do this, the better the soil is becoming.


Faithful "Kent" pumpkin, does well in our garden


Fruiting plants, such as these pumpkins, do much better with a continual food supply, throughout the growing season. I noticed the leafs of these new pumpkin vines, responded immediately, to the addition of mulch.

Their leafs can handle strong sunlight, so long as their roots are kept cool. If I keep adding the grass mulch, as a form of garden maintenance and attempting to keep the snakes at bay, my fruiting plants, can only benefit.


Sustainable resource


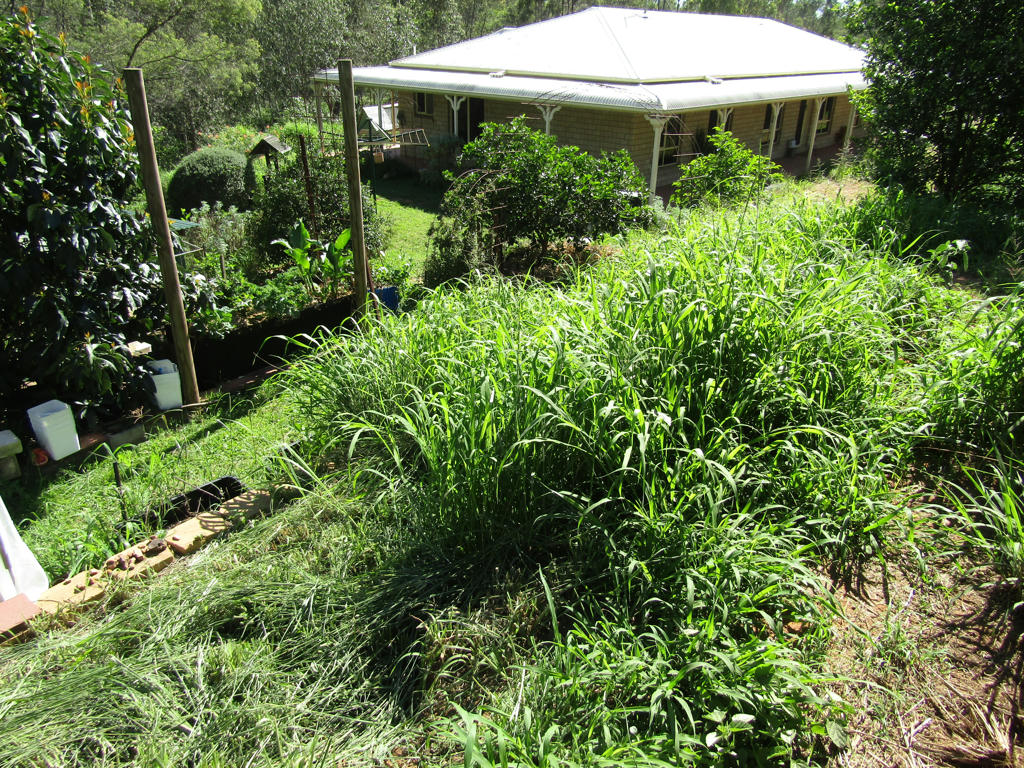
As long as the rain makes an appearance throughout summer, I shouldn't run out of grass mulch, either. I took the picture above, from the same level as Hilltop chicken coop. You can see where I cut the grass with the hand sheers.

David was able to come through, several days later, to brush-cut the remaining grass. It was quicker, but also flung the grass right where I didn't want it to be - between the wall and bed.


two vintages of mulch


The yellow mulch, was from my hand trimming efforts, and the greener mulch, was applied several days later, after David cut down the rest. I've noticed since the rain has arrived, my energy levels in the garden have escalated. I'm out there all the time, interacting with it the growing systems.

It must be what small birds must feel like, when the rain comes and the grass grows too. It's time to get busy and make a nest. In this case, the nest, is my garden. I may not need long grass on the retaining wall, but I could use it lower down the slope.


No more grass seeds - for now


Permaculture principle #11, asks us to consider USING edges and valuing the marginal. In this particular instance, where the block wall & raised bed (infrastructure) meet the natural elements, the grass seeds will of course, attempt to exploit that niche in between the infrastructure. That's how nature uses edges.

In order to make my maintenance easier, and (hopefully) less snake friendly, I choose to exploit that same edge, to benefit my growing systems. There's TOO MUCH grass for me to control, so there will always be seeds floating around the system. But I can use them as a resource, in the areas I absolutely need to keep grass maintained. Then placing that resource where it can do the most good.

I have another trick up my sleeve, dealing with this particular edge. But I need time for that strategy to mature. In the meantime, contemplate the edges in your own garden, and see where a potential problem can become a potential solution.


Friday, November 3, 2017

Raising the ceiling

In my last post, I linked to a brush with fate, in my vegetable garden. Or simply, how to invite brush turkeys to dinner, by watering. They like to dig up ground which is moist. Because it's easier to dig and attracts soil life to consume.


Turkey scratching in my hugel bed


Well, I finally managed to do something about the situation. I purchased some moth netting from the hardware store, with the intention of covering my hugel bed. I had a plan, but it required my husband's help, retrieving other building materials from the jungle (aka: outside storage area).

In the meantime though, I hung the netting over the bed, with just the blue milk crate, to hold off the plants. It succeeded at deterring turkeys, but was inadvertently killing the plants underneath. I'd successfully put a lid on a very full saucepan, and the plants were cooking.


Metal rebar


David was finally able to help me (between rain storms) retrieve some long rebar, from an overgrown thicket. Using the angle grinder, I cut one 6m piece, into four - making them 1.5m long. Then hammered each, into the four corners of the hugelkultur bed, by 20-30cms.

I had scraps of other building materials, to put onto the upright rebar...


Archways, and wilting silverbeet


Old water pipe, leftover from the original house build, was something I wanted to find a purpose for (instead of storage). So was the rebar, for that matter. I'd been wondering, how to use those 6m lengths for about a decade! Now they're helping me grow food.

Back to the water pipe though - I merely cut enough length, to create an arch across the bed, at both ends. It required a handsaw to cut the pipe, being so thick. Which made it perfect for holding the arch shape. I don't have to worry about flopping over.


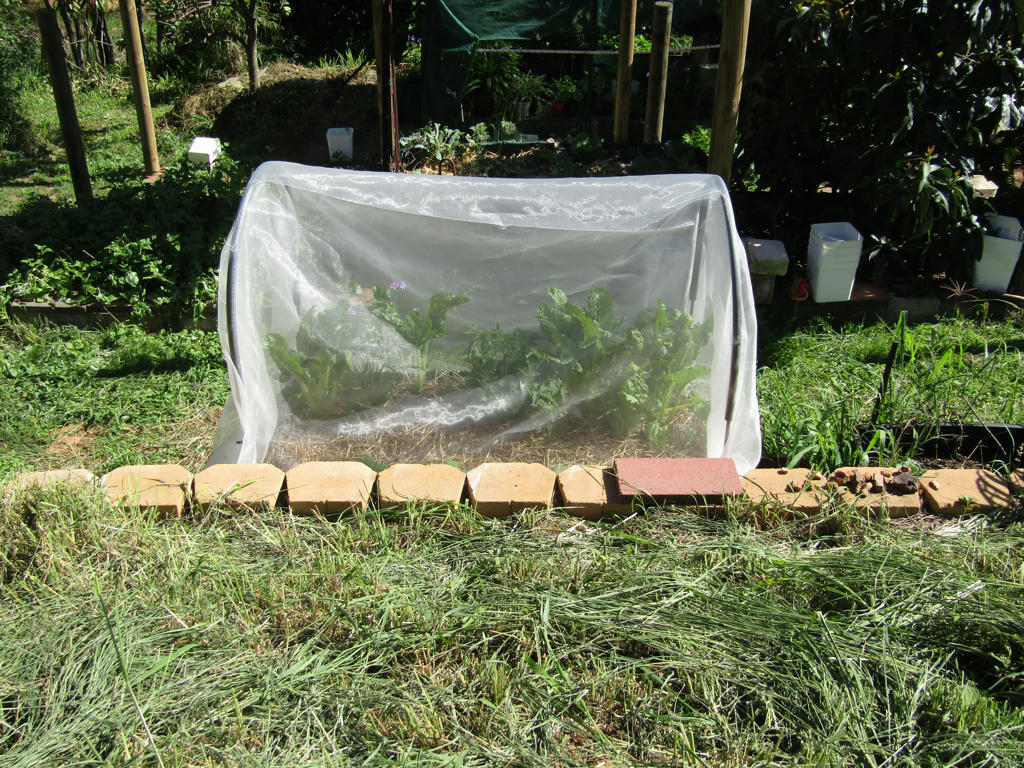
Protected


Then it was just a matter, of draping the netting over the archways. I purchased 5 metres of netting, which was sufficient, to cover all sides of the bed.


Metal clip


To secure the netting, I first started with regular bulldog clips, attached to the rebar. Being metal however, I knew they'd rust over time, and possibly discolour the netting. So after a week, I replaced them with plastic ones, found at Bunnings Hardware.


Plastic clip


Now, the inside has a lot more filtered light, and air flow, which is allowing the plants to thrive. Making it so far, the best performer from all my hugel beds.


October 23 - first erected


November 3 - twenty days, later


The silverbeet has gone gangbusters. And while the netting doesn't keep absolutely all insect critters out - it reduces them significantly. PLUS, I don't get turkey damage, which is the main goal for this particular infrastructure.

I'm considering doing something similar with the other two beds. Now we've retrieved the rebar from the undergrowth, it won't take long. 

This particular bed has some other challenges, which needed addressing. Aptly covered by Permaculture principle #11 - use edges and value the marginal.

But more about that next time.


Tuesday, August 29, 2017

Brush with fate

Or how to have a brush, with Brush Turkeys. Here's the incriminating evidence of one of their recent visits.


Roots exposed


They've dug up the oregano, I was attempting to establish on the retaining wall. The roots have been exposed and the soil is drying out. Now, the tenacious scratching of the brush turkey, would be a valuable tool in rainforest. But in my moisture deprived garden, they hone-in on everything watered.

Which is not only bad for the plants, but it's also a waste of water. When there's little abundance to go around, it becomes a rather frustrating predicament. It's a case of first in, first served - but we have to wait longer, for vegetables to be ready.


Ground - zero.
Brush turkeys - 5 now, is it?


I just knew when I watered the raised hugel beds, yesterday, I was ringing the dinner bell. They've already killed the beetroot and capsicum plants I germinated from seed. The latest damage was my cherry tomatoes. The milk crate, above, saved the ocra though. Which is precisely why I put it there.

I was hoping the brush turkey's wouldn't find it desirable to scratch in such a narrow space, between the crate and edge - but they proved me wrong. The truth is, I've been a little lazy, dealing with this brush turkey carnage. I know it won't end, until I put up a permanent barrier. I've just been lazy about making that happen.

It looks like I might have to buy seedling plants, with some size to them, until I can get barriers up. So I won't miss out on the spring growth spurt, due very soon. I'll sprout my remaining seeds, again, in autumn.


Seedling, lock-up


Luckily, I have my enclosed nursery, to protect seedlings from the blight of brush turkey's. They do this to my garden, when it hasn't rained for a while. We haven't received any serious rain for months. They're attracted to all the wet areas, because that's where all the bug-action happens. Plus, it's a lot easier to scratch damp ground, than dried.

So it's VERY frustrating in the garden, right now. I know I'm losing money every time they kill my plants. We chase them off, whenever we see them. But they're oh-so clever. They know our routine. If David gets his way, he'll start hunting them for turkey pie.

But I know the deal. I know what they do. It's my responsibility to protect the things I want to grow, as a way to live with the brush turkeys. They're a part of the landscape, just as we are.

Do you have to live with plant assassins, in your garden too?


Wednesday, August 23, 2017

Pay to learn

So I've been eating herbs from our garden a lot, with whatever I can pair them with. I love herbs, because they often make the meal! They're even great in smoothies. I'm grateful I don't have to buy how much herbs, I actually use. That would cost a lot of money.

But when it comes to growing vegetables, that's another story. I recently harvested some food from the garden, and was lucky to come away with anything at all.


I got two sweet potatoes (Japanese variety) and two heads of cauliflower. The purple head, was about to flower, so I picked the green head too. It was about the size of a tennis ball. Of all the brassicas I planted (brussel sprouts, cauliflower and cabbage) this small offering, was all I gleaned.

I may be lucky to see some brussel sprouts, if they don't bolt to seed. The warmer weather is making most of the brassicas go to flower. In winter.


The two sweet potatoes from the hugelkultur bed, were large, at least. There's more, still in the bed too. I have no problem growing this particular Japanese variety. They tolerate more weather extremes (heat and cold) than the traditional orange varieties. So if you're having problems growing sweet potato, look for this white fleshed, purple skinned, variety.

So let's get real about this whole, GROWING, vegetable deal. I technically "lost" money, on what I spent, setting up the hugelkultur beds, and buying seeds and seedlings. But that's only if I was comparing it to the vegetable yield, alone. On the other hand, I paid myself to learn to grow edibles better.

It's fine to read a book or blog post, about how to grow vegetables, but at some point you've got to just invest the money, and practice. Getting a bounty is the bonus, and ultimate objective - but there's a huge learning process involved in succeeding. The sooner you can get started, the sooner you can turn the odds of success in your favour.

I know what these hugelkultur beds, need to succeed now. I just have to gather the materials and build more infrastructure. As I don't have a very forgiving environment, with reliable rainfall. That's the number one lesson, I would tell people to do, before embarking on growing edibles. Secure their water supply, first. Second is, make shade. At least for this continent.

In the end, I made a delicious leek and cauliflower soup, with some of the ingredients above. So not a bad deal, after all.


Sunday, March 26, 2017

Edible integration

When I wrote about what survived in my garden, through the heatwave recently, there was something I forgot to mention. Can you see it?


Hugelkultur bed #1 ~ avocado in background


This side of the hugelkultur bed, has always grown the lushest. I theorise, it has to do with the avocado tree, next to it. I control the growth of the avocado, so the shade doesn't overpower the bed. What is given in return however, is protection from the harsh afternoon sun - and much, much more.

We often think of plants as requiring moisture, and they do. But we don't always comprehend as readily, how they create moisture through transpiration, through their leaves. Studies have shown that transpiration from plants alone, accounts for roughly 10 percent of the moisture, in the atmosphere. So this little group of plants, worked together, to retain what moisture was drawn from the soil.

Bare patches in the garden, only grow larger, in the heat. Which is why food forests make a lot of sense! There's not a lot of bare patches in a forest.


 Avocado tree - between two hugelkultur beds


I don't strictly have a food forest, but in my vegetable patch, I'm experimenting with introducing trees and shrubs for buffering. We know how the tree, helped the plants in the hugelkultur bed, but the door swings both ways too. Having raised hugelkultur beds, on either side of this avocado tree, helped protect its roots from the harsh sun. 

Can you see the damaged leaves, above? The avocado, suffered from sunburn through the heatwave. Some leaves are still on the tree, but many simply died and fell to the bottom. All part of the natural cycle. What was interesting to observe, was how fewer leaves dropped in comparison to prior years. Plus, how quickly the tree recovered with new growth, when the weather normalised again.

I've had this tree sustain more damage, just from a regular summer, when it had flat, mulched, soil around it. So the tree has benefited from the raised hugelkultur beds, and the plants have benefited from the afternoon shade of the tree. This is clearly the sweet spot, in this edible garden.


Hugelkultur bed #1


Same hugelkultur bed (opposite side) and the only other plants to survive, were the Arrowroot and Basil. Arrowroot is another perennial, which I grow for mulching material. It's thick rhizome roots, can adequately protect them from weather extremes. The basil, evidently survived in the shade of it.

The patterns I am noticing is how the annuals only survive, in the wake of the perennials. Annuals quickly get wiped-out, otherwise. They just don't have the biological means, for coping. Everything I have demonstrated in my garden, didn't have shade-cloth erected, or much additional water added. Not enough to replace, what the heat withdrew, weeks on end. So what has survived, is almost everything nature could throw at it.


 Hugelkultur beds, back in Spring (before the heatwave)
~ installing beds: part 1 and part 2


I'm starting to view my edible areas in a different way. When it's not strictly a vegetable bed, and not strictly an orchard, but an integrated system instead, the plants work together to protect themselves. Of course, you can introduce shade-cloth for mutual benefit, and install irrigation. Perennials are an extra buffer though, and a natural life saver if you don't have artificial interventions.

Elementary really, but I grew up in the land of edible segregation. Glad I'm revising that position, more so, every year.

Do you integrate your annuals with perennials?


Saturday, March 25, 2017

Planting again

You've probably noticed an absence of property posts lately. That's primarily because of the heatwave, we experienced at the end of summer. It literally killed a lot of plants, and I didn't want to write, until I knew the full extent of the damage.

On the opposite end of the spectrum though, we've had rain for the past few weeks now. We've had very few days, it hasn't been raining. Some plants that were on their way out, were given a sudden reprieve.


Wicking box #3
cops the western afternoon sun


Not surprisingly, most of the plants in my wicking boxes, were fried during the heatwave. They had access to water in the reservoir underneath their roots, but their leaves just couldn't cope with temperatures over 45 degrees Celsius. Adding shade would have helped, but we didn't get to that job before the heat prevented us from going outside, and the damage was done.

It's not all bad news though. I made some clear observations of what made the grade through these extremes.


 Wicking box #2
protected by both boxes on either side


That star- picket is meant to deter the brush turkey's, but of more interest in this box, is what is surviving. The rubarb and the spring onion. Both have moisture filled stems, and in the case of the rubarb - roots. So they had a pre-existing coping mechanism, enabling them to survive through an extreme.

The rubarb leafs were also large enough, to shade the soil at it's base. Rubarb is a perennial plant, so not surprising, nature built it to survive more seasons than one!


 Wicking box #1
cops morning sun, but protected from the afternoon


Another thing to survive in that unruly mess, are cabbage and broccoli stalks. You can see a few tiny leaves which managed to emerge, before the heat put them in stasis. They have a fibrous, thick core, which kept it alive when the searing sun and high temps stuck around.

When the rains returned, and more importantly, the day-time temperatures normalised, those sticks are the first to kick-in, and start producing.


Hugelkultur bed #2


This kale is the perfect example. I took this photo today, after a week or more of rain. It's in my hugelkultur bed. The outside leafs are what were left of the old plant (eaten by grasshoppers) and the new leaves are emerging from the centre.

I thought this plant was on it's way out. Not much survived in this particular hugelkultur bed - but it was all planted in annuals. Plants which are bred by mankind, to be pampered and not live beyond one season. Therefore, annuals are probably not a safe bet, with dicey weather extremes on the cards, for the future. 


Hugelkultur bed #1


This kale is a little more developed, than the former. It's in a different hugelkultur bed to the other, and had more protection from the afternoon sun. When the heatwave was on, the soil was shaded by another perennial crop - our sweet potato. More about that particular plant, soon.

We were able to pick the leafs from this kale, within a week of the rains arriving, to make a green smoothie. They were so tender, I could eat them straight off the plant. Had we planted a seedling though, we'd have to wait several weeks for something similar.

So the lesson here, is wait to see what can survive in your garden, before you start pulling things out. Anything with a thick, fleshy stalk and/or root system, will be quick to produce, once the weather normalises again.


 Hugelkultur bed #1


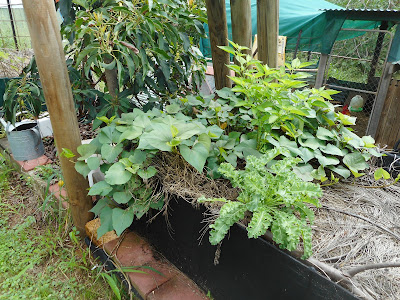
Here is that sweet potato vine, I said protected the kale. I had several plants of kale in this bed, but the one to survive, was the one closest to other plants. There's a chilli plant in the middle, which is about to set flower too.

Observing what survived in our recent heatwave, I can nail it down to a few contributing factors:

  1. They were a perennial plant, with thick, fibrous material
  2. They had some form of buffering from other plants or structures
  3. They were in beds (hugelkulture & wicking boxes) with access to moisture underground
Those three factors, are what determined the survivors, from the compost. I'm going to start planning my edible plants, from a more perennial basis. That is what stands the best chance, of surviving weather extremes. I will speckle some annuals, but by increasing the perennial ratio, I increase the buffer zone of actually getting to eat something from my garden.

What is often considered an annual vegetable, such as cabbage and broccoli, can actually be treated like perennials. They just produce smaller heads, next time around, and you can always eat the leafs in stir-fries. Or just feed the leafs to the chickens.


Future food


This is what wicking box #1, presently looks like. I revamped it a few weeks ago. I removed all but the cabbage, added some more compost, a purchased basil plant, and seeds. Wet weather is perfect for planting seeds. I went mad planting seeds in the wicking boxes, and hugelkultur beds. I hope to have something to show for it, in a few months time.

Weather extremes can hit gardeners hard, but getting back into the game, is what it's all about! Observe what worked during a weather extreme, and seek to duplicate it.

Has your edible garden taught you anything new, recently?