Monday, August 31, 2015

The sweet bed

The one thing I have managed to grow without much tender loving care, despite drought, flood and weed infestations - is sweet potato. It's so abundant, that until the native rats found them recently, we never had to buy sweet potatoes.

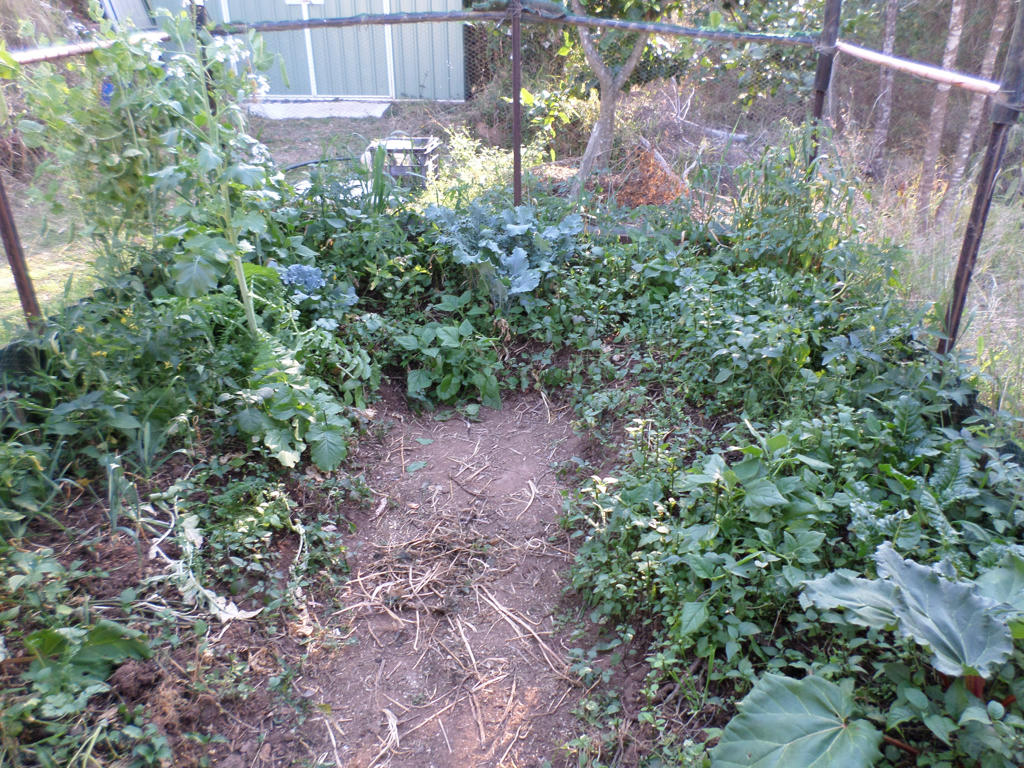
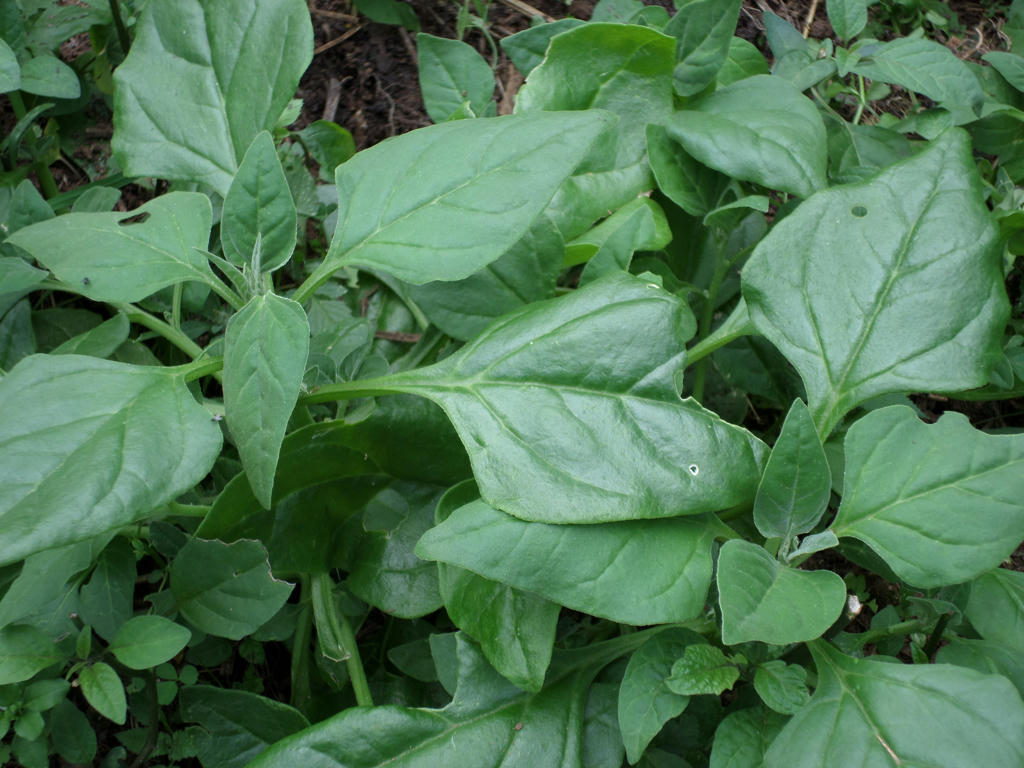
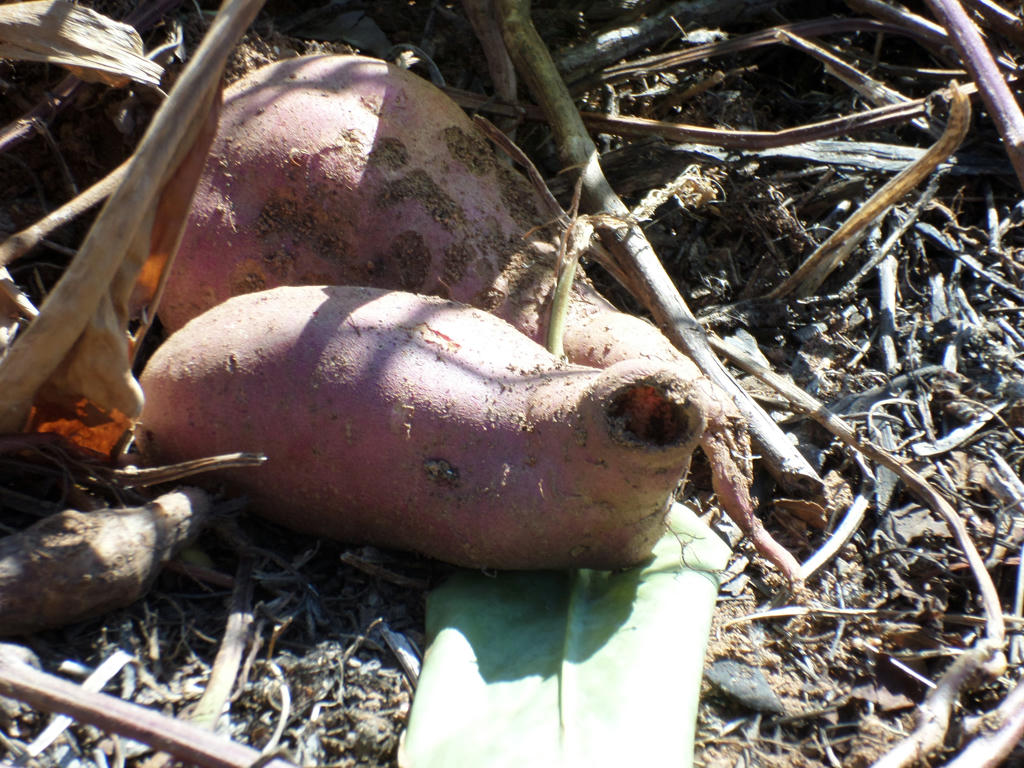
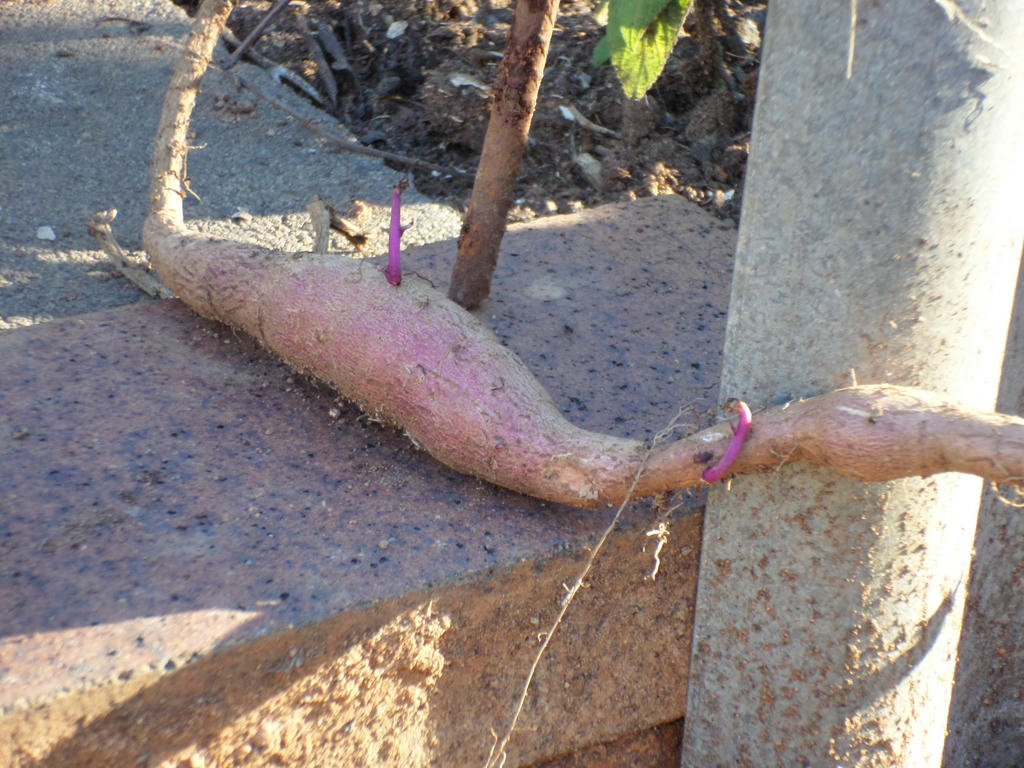
The downside to them however, is they take over land, anywhere their long tendrils can make contact. Water isn't a problem either, as they can even sprout roots in it too!


 Add water - will travel


I had a styrafoam box near the sweet potato patch, that collected some rainwater. The tendril found its way into the water and started growing roots. I'll have plenty of propagation material to transplant - not only, water grown slips with roots, but I also have unearthed roots which are starting to sprout as well.


 Loves to grow!


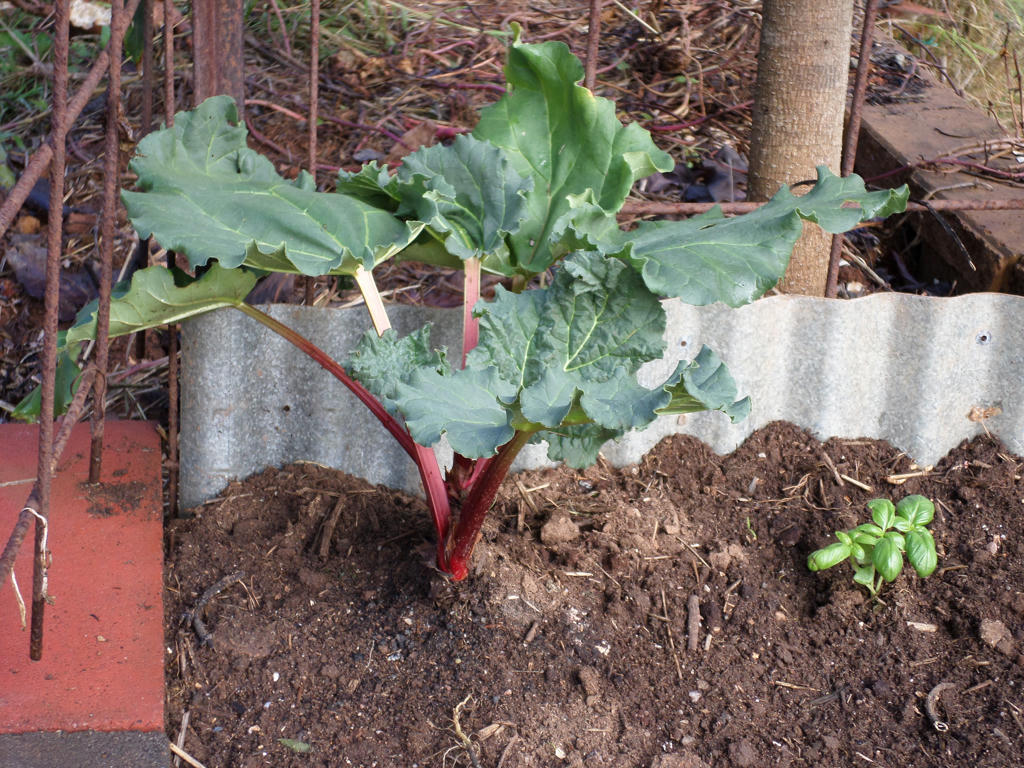
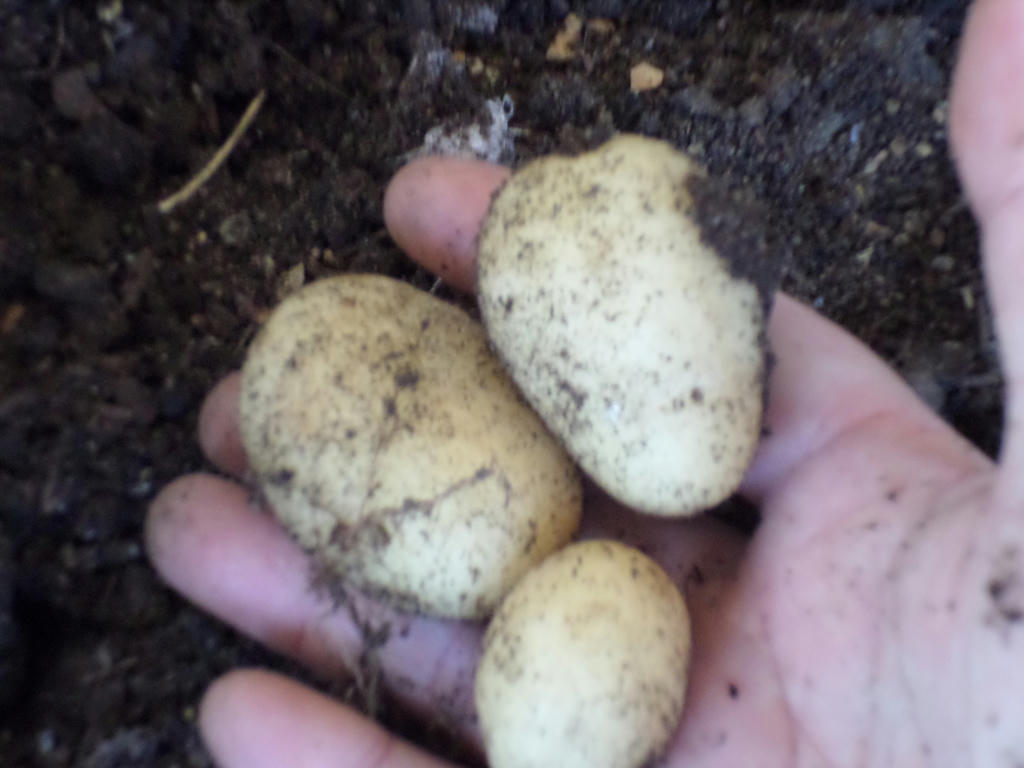
I suspect I will be plucking sweet potatoes in the newly renovated garden beds, as I wouldn't have gotten every single piece. Sweet potato is like comfrey and horseradish. Once you break off any part of the root, it regrows! I will just have to be persistent in plucking it out, as it appears.

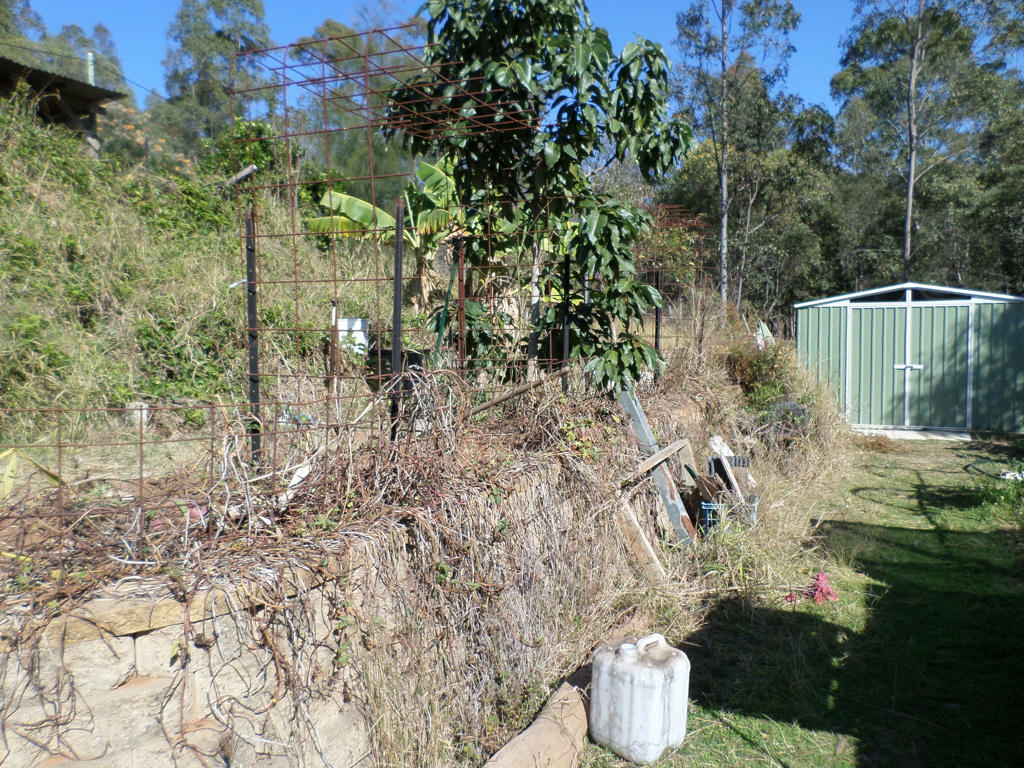
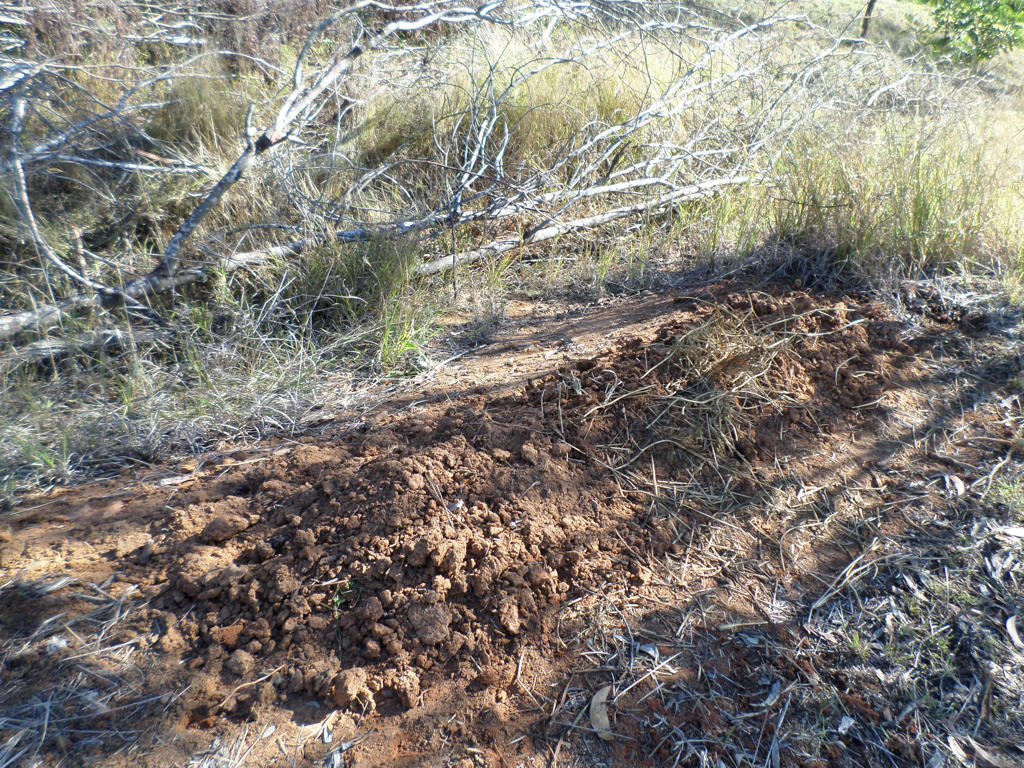
But where to grow my sweet potatoes in the meantime, that wouldn't be so problematic with spreading? I had the perfect spot, right next to a swale. The tree branches are laying in the swale, waiting for us to break them down and remove them somewhere else.
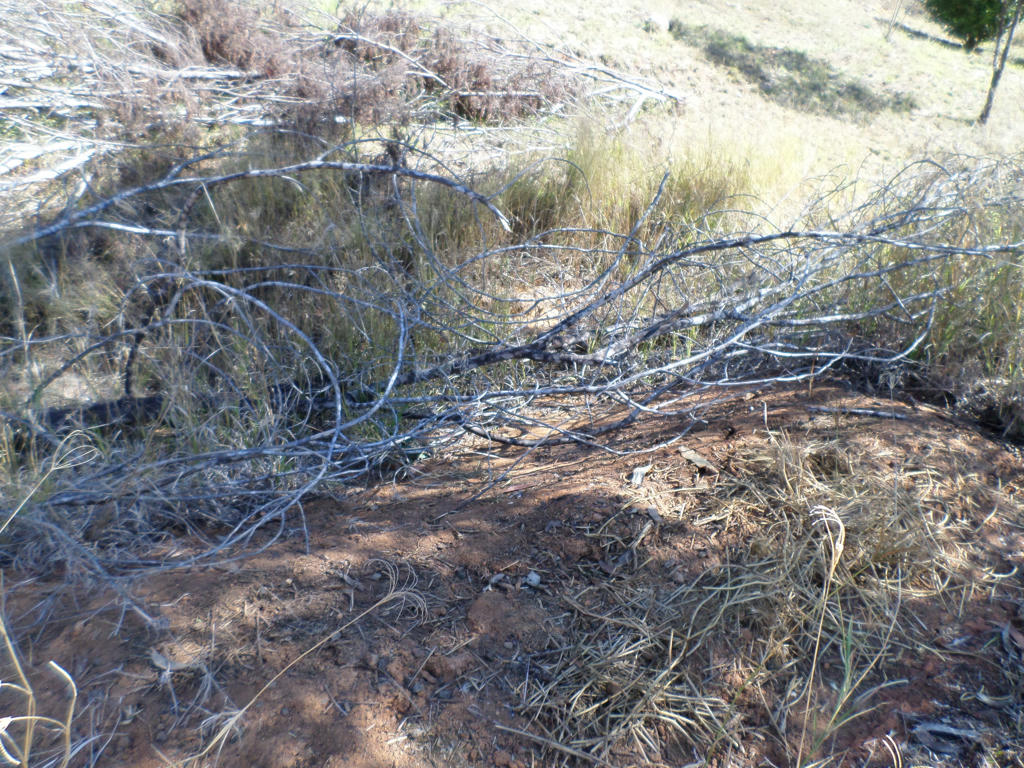
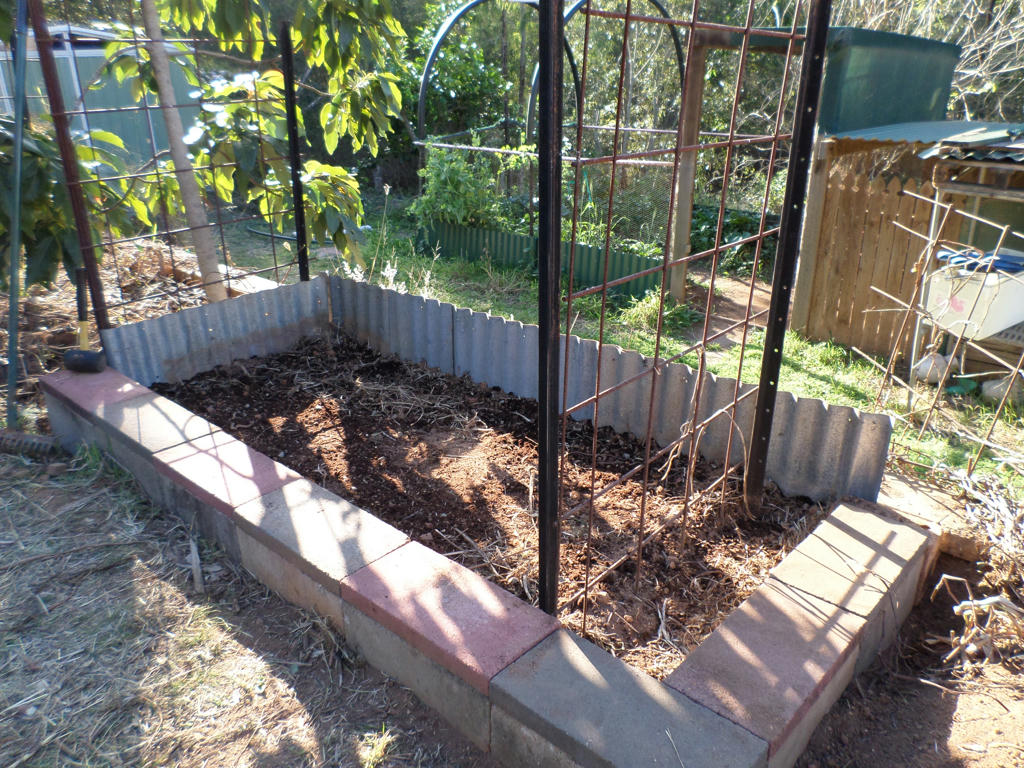
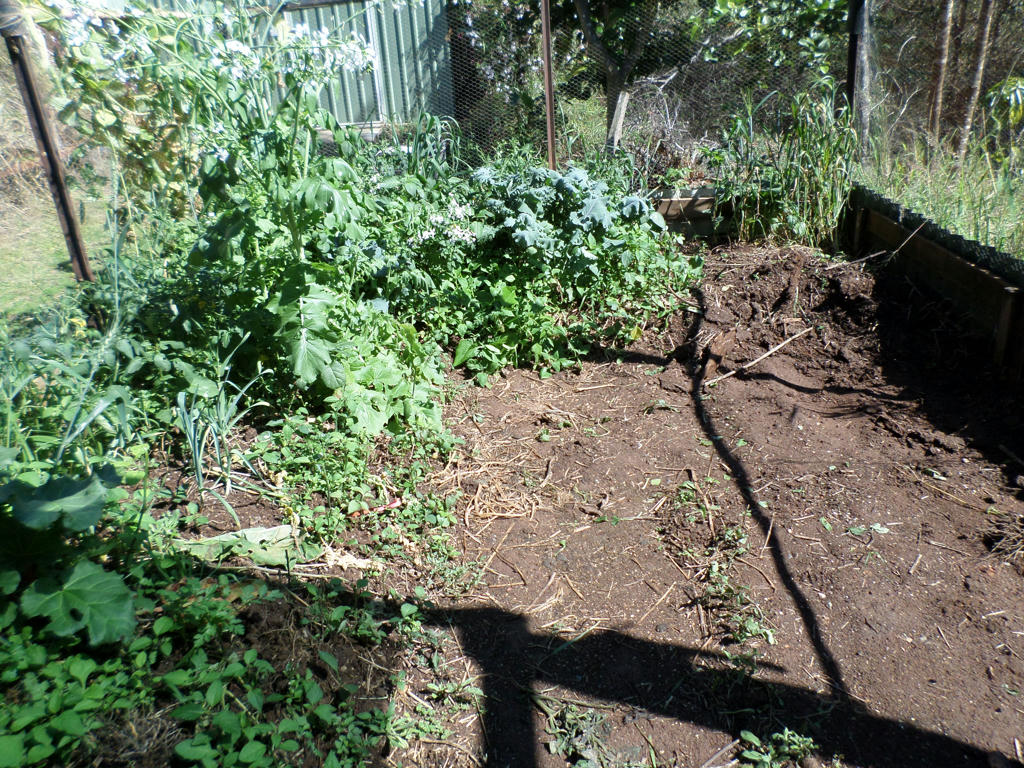
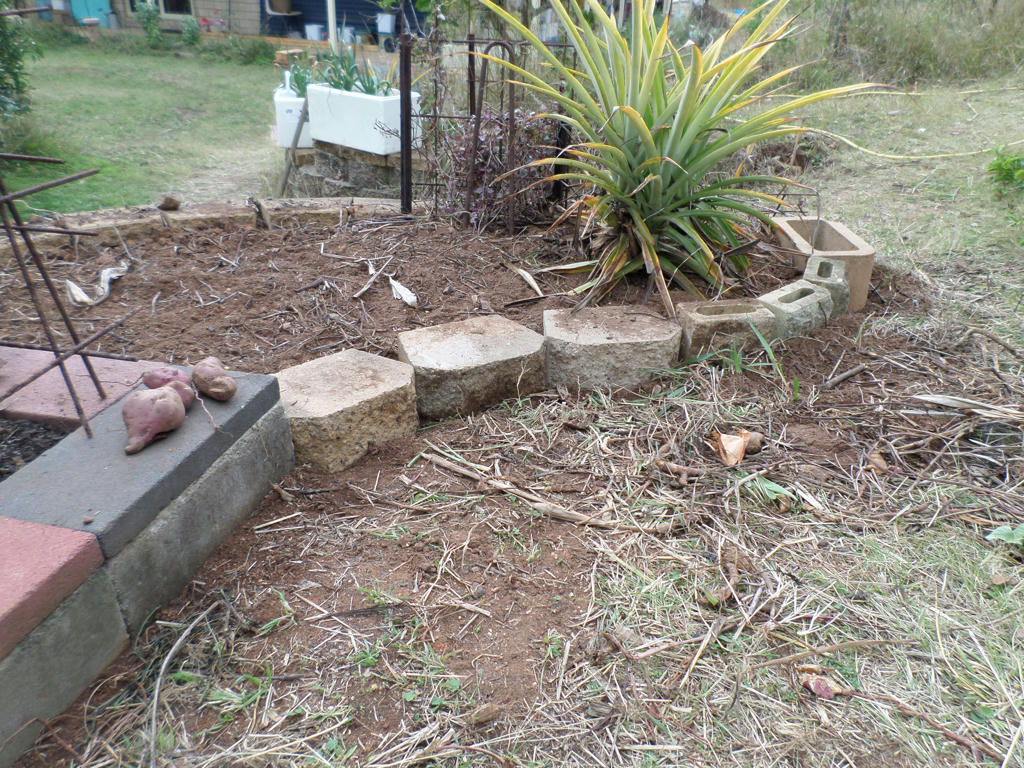
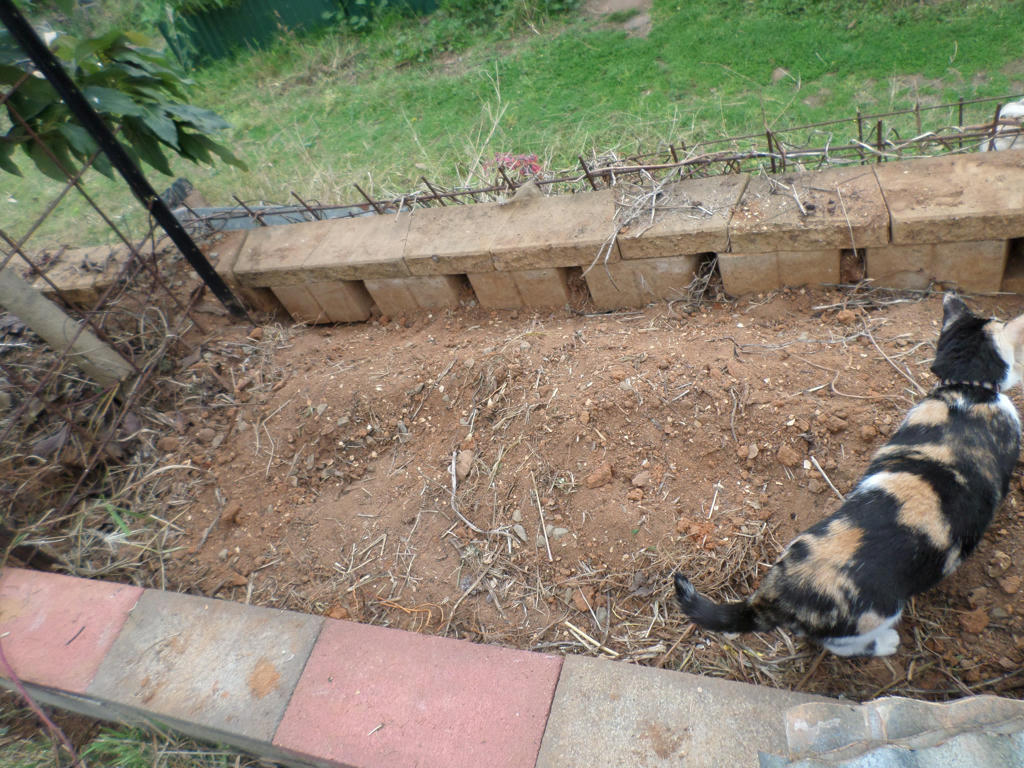

The new area


Gosh, but the soil is awful here. Compacted clay for the most part, with just a hint of bush debris, trying to pretend to break down. It's been there for years, under the weed mat and pallets, we put down a long time ago.
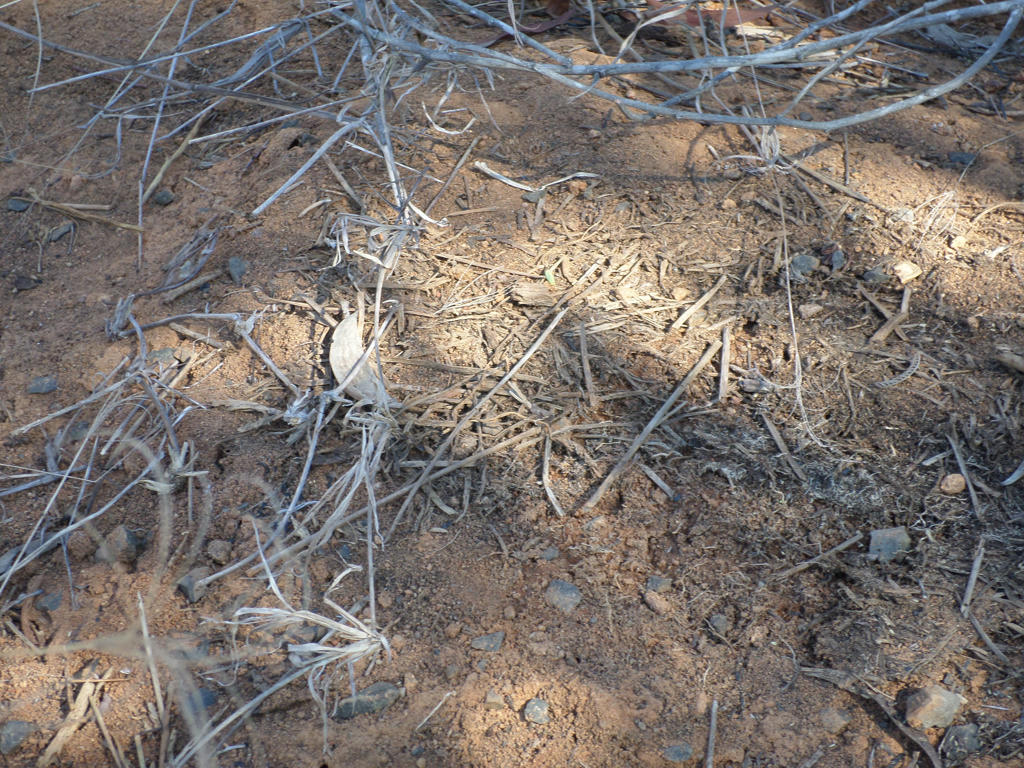

 Under the weed mat


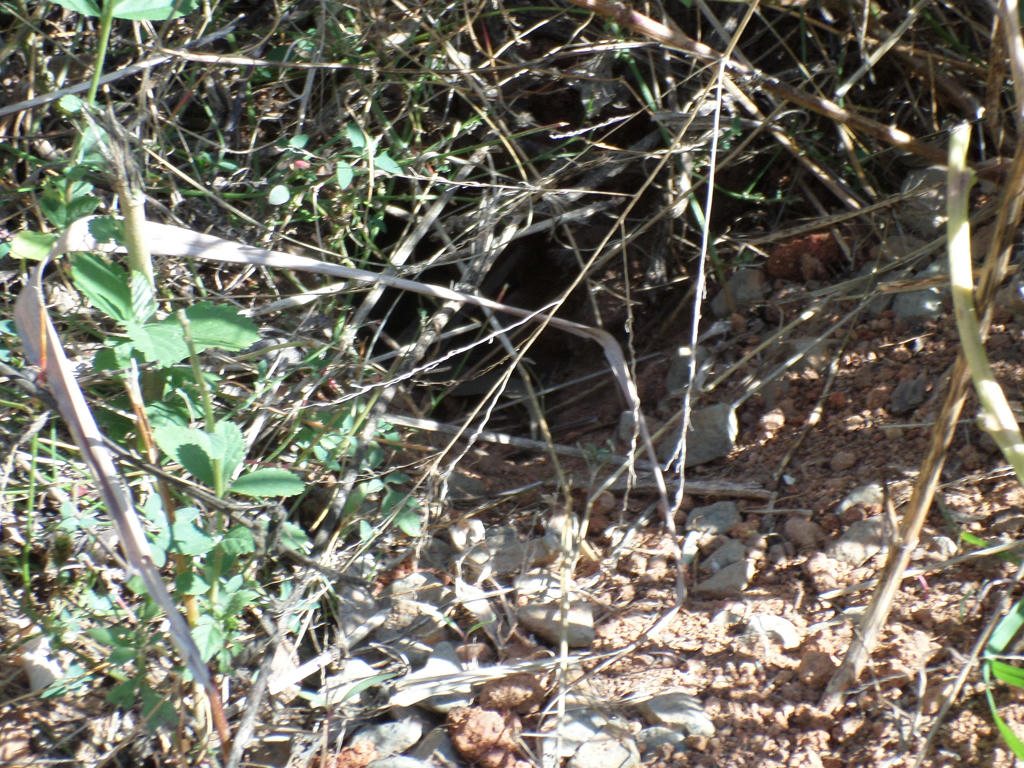
And did I also mention it was compacted clay, so extremely hydrophobic? The natural tendency is for the earth to become so dry, enormous cracks appear, to catch any moisture that might come its way. Once filled with water (generally when the rainy season arrives) the cracks then close up, until the soil is drained of moisture again. Then the cycle repeats.
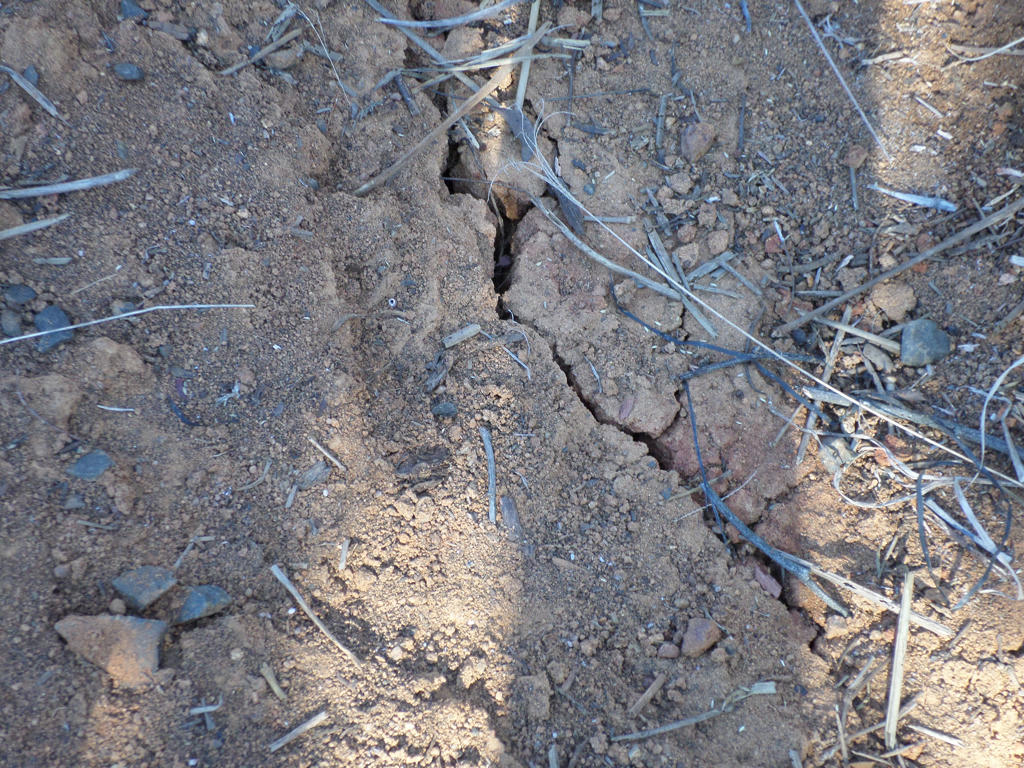

 Cracks


It's a terrible, and yet perfect area to grow the wandering sweet potato in. Any escaping tendrils, have no hope of penetrating the soil, to root and spread again. This is my dry land, Alcatraz!

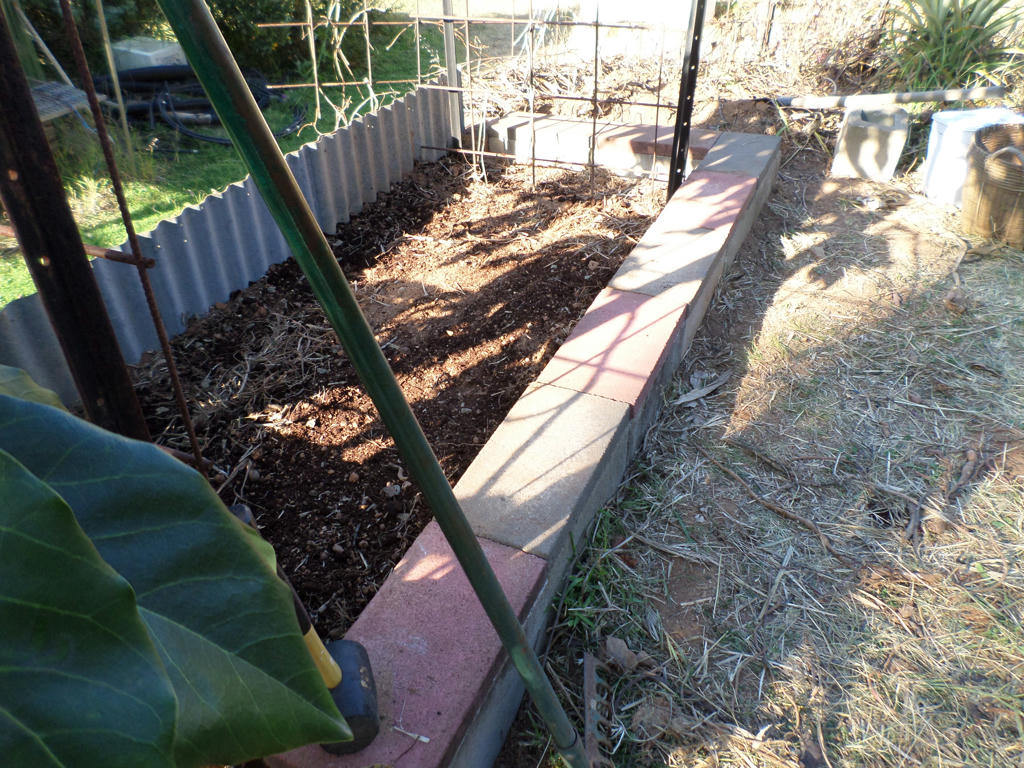
But I did need to improve the soil in the bed, where I intended to grow the main crop of sweet potatoes in. I also needed to elevate it, so the roots wouldn't be swamped when the swale did eventually fill with rainwater.


Local fertility


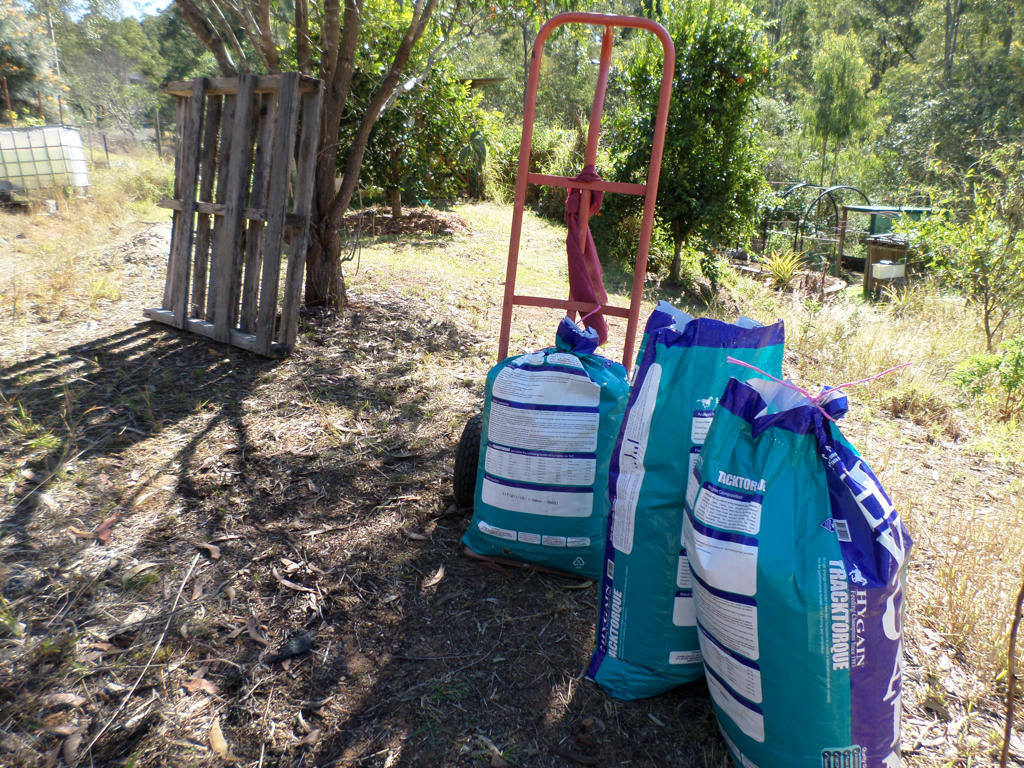
Enter a local entrepreneur with stable stalings for sale at the farm gate. Cheapest price I've ever seen it anywhere in this region, at $1.50 a bag. It's a few minutes drive down the road from here. Once I got it home though, I realised my wheelbarrow was full. Thankfully, my trolley was on standby and could cart the bags for me instead.

Can you see, one of the newly removed pallets, now leaning against the tree (above)? Any guesses as to where the second pallet might have gone?
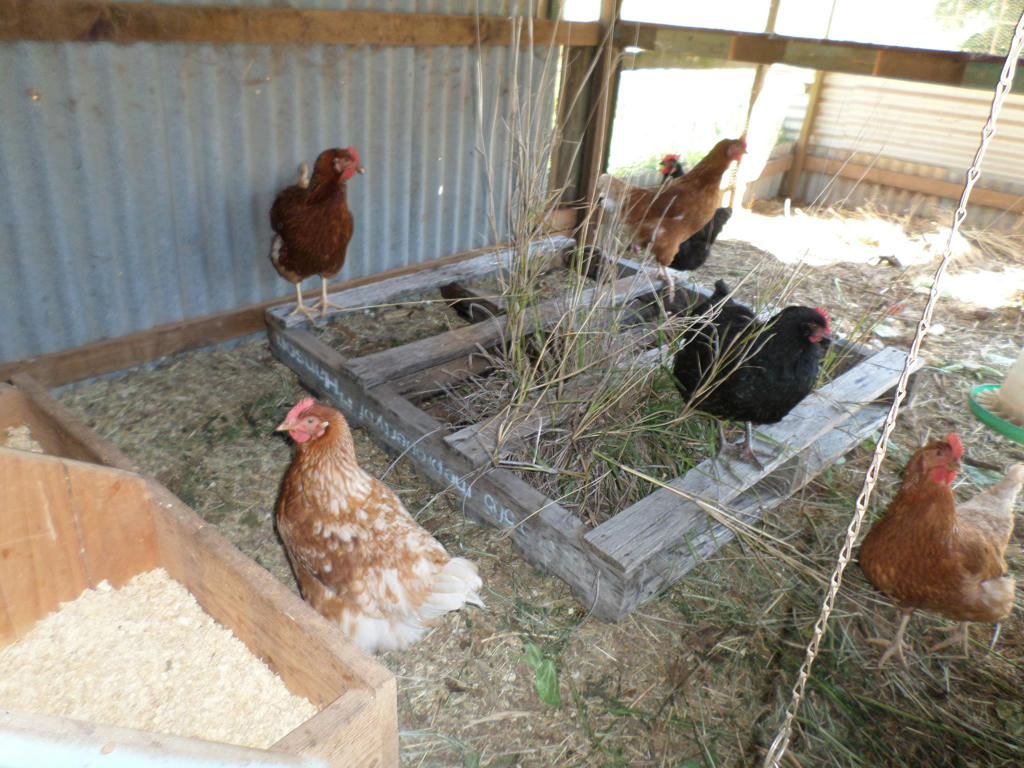

 A chicken thing


Is there any problem a chicken cannot solve on the farm? I couldn't get the tufts of grass, which had managed to grow on top of the weed mat, and through the pallet. So the whole lot went into the chicken coop. I'm glad I renovated the coop, to allow me accessibility like this now. It's priceless!

I have an update on the chickens, and their coop, to write about later. But they enjoyed the strange, new platform, they could stand on, nibble at and basically "own", as new Hilltop real estate. And I don't have to feel like an old lady, wrestling a wooden pallet, in need of a lawn mower.

Luckily, my brain remembered, the only reason I kept chickens in the first place, was to do all my problem solving for me!
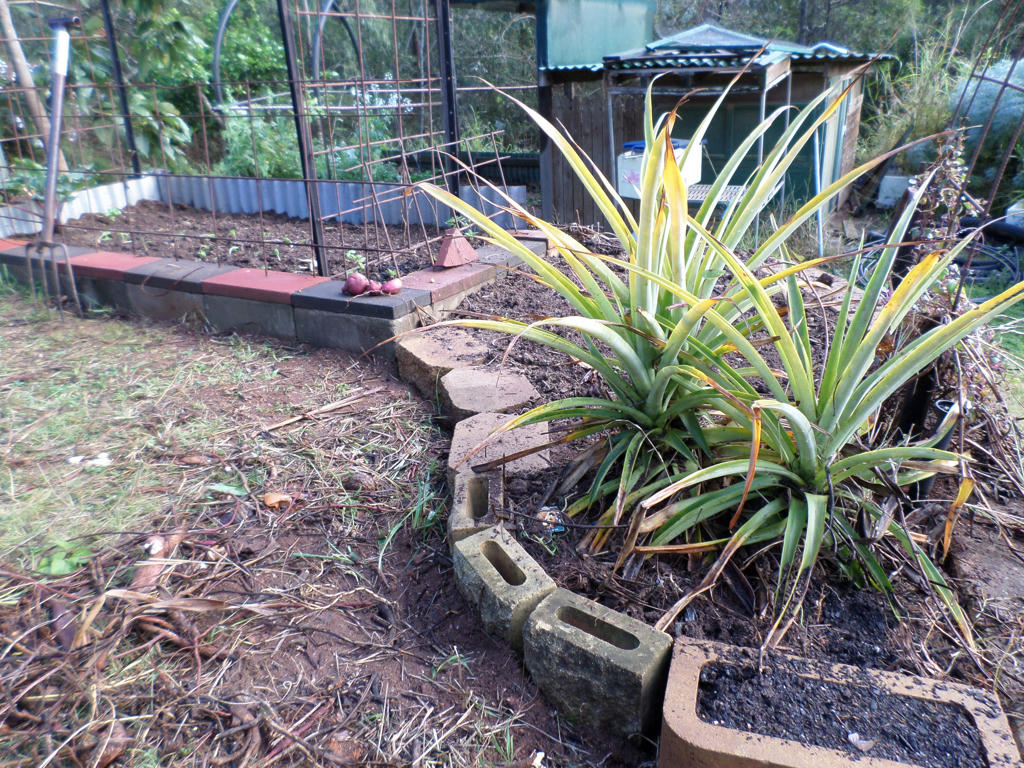
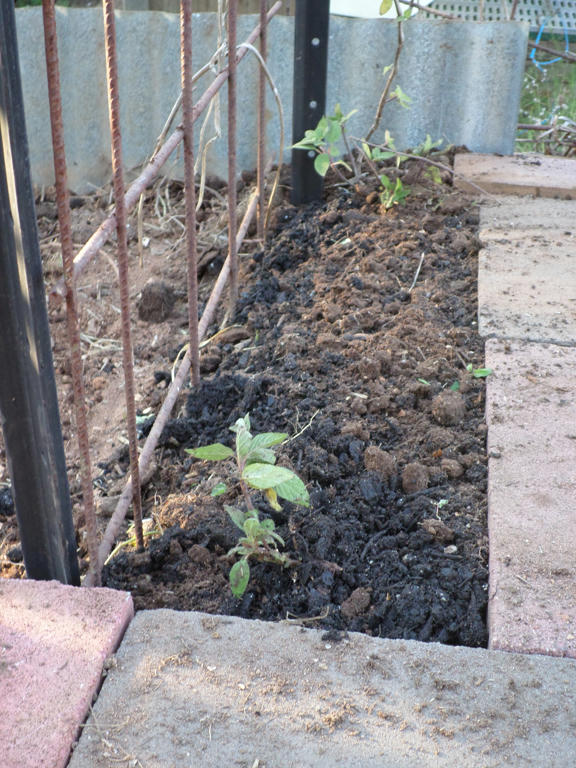

 Break it up


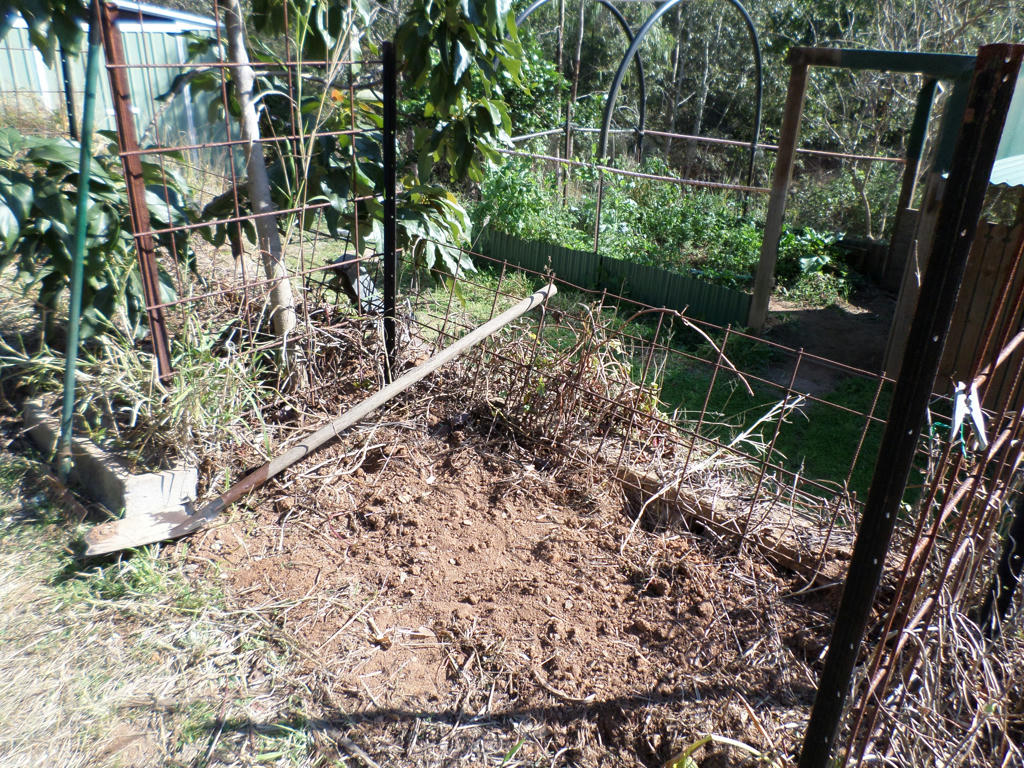
So back to the sweet bed. After removing the weed mat and relocating the pallets, I broke up the clay with a mattock and added some gypsum. If you're trying to grow anything in clay, gypsum is your friend. It helps to separate the soil particles and allows water to penetrate, rather than run off the surface.

I used several handfuls of gypsum. Plus I added the three bags of horse manure, and 20 litres of spent coffee granules, from David's work. After I mixed it up with a fork, mounded as high as it would go, I finally watered it well.
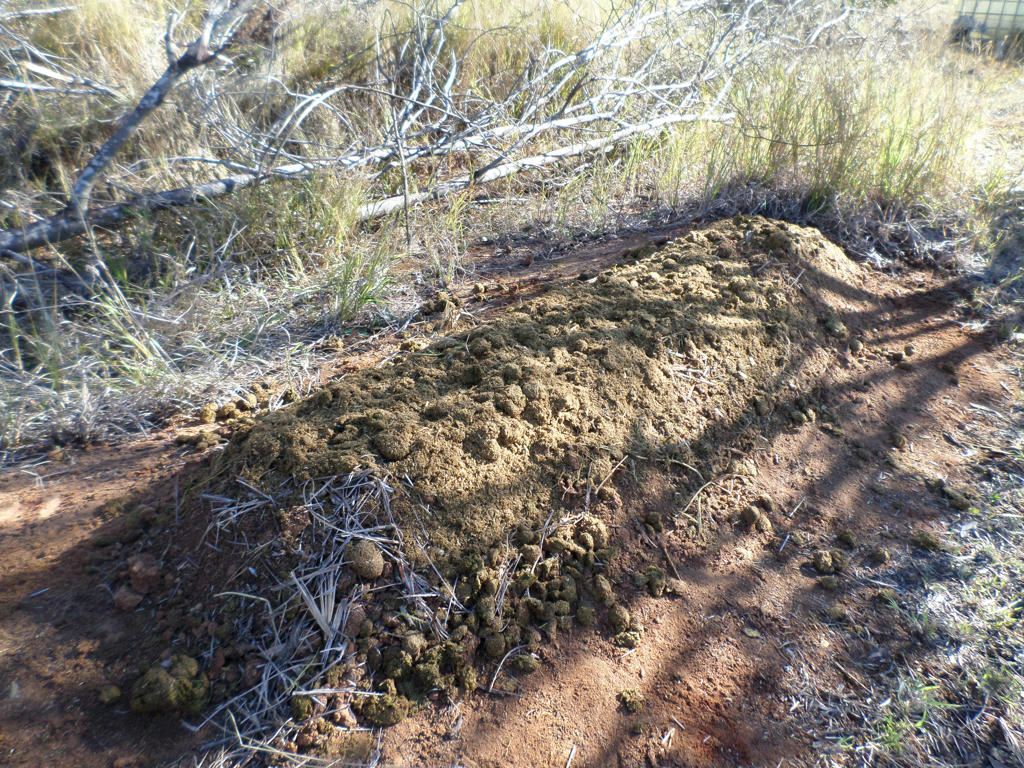

Build it up


I'll give it a turn every three days or so, and in about a month, it should be ready to transplant my sweet potatoes in.

It will be interesting to see if this new arrangement works, come next autumn, and whether the chickens will have dismantled the pallet for me, by then too.

Are there any unique tasks, you've engaged your chickens to sort out for you?


Saturday, August 29, 2015

More Veg adventures

Since making new ground in my old neglected vegetable bed, I needed some fill to improve the growing conditions. Hopefully soil that was in better condition.


New vegetable bed, with Middle Ridge in the background


It was time to raid a garden area, I had temporarily set up, after evicting the chickens from Middle Ridge chicken coop. That coop, had aged chicken manure in the run. I turned it into a temporary growing area, back in April this year.

It was only ever meant to be temporary, as I had other plans for that area, but I took some photos of the plants before removing the soil.


 Middle Ridge temporary growing area


Most of it was overrun with weeds, but it helped keep the soil shaded and ensured I always had a steady supply of greens for the guinea pigs and chickens. You can see its starting to wane as we come out of winter.


 Daikon radish flowers


The best crop of all, which I really loved was the Daikon radish. Its going to seed at present, and I'm saving the biggest to collect from. I wanted to eat it when I ran out of radish for stir fry, but I needed the seed more.

When cooked, Daikon radish tastes more like parsnip than radish, but still has a mild after-bight that we all know radishes for. I really enjoyed it, and treated it like carrot in my stir fries.


Walking stick kale x 3 plants


Another crop we have eaten from, is the Walking Stick kale. I used them in a stir fry and a casserole. A bit fibrous, but still tasty. I would also pluck this for the chickens and guinea pigs, though the latter weren't overly keen on them.


 Savoy cabbage x 1 plant


The slowest of all growing plants in here, would have to be the Savoy Cabbage. I hope this guy is spared from pest attack. Of all the cabbage, Savoy is my favourite. Its the very best cabbage for flavour in sauerkraut, and its even sweeter when fried with bacon. It even beats Sugarloaf cabbage, as far as I'm concerned. But its the only one I've got too!

I don't know when it will be ready, but it certainly hasn't hearted yet. It may bolt to seed before I get to taste it. If so, I'll collect the seed and plant more.


Lacy Lady pea x 6 plants


The Lacy Lady Peas were a mediocre crop. They grew well, but didn't produce many pods per plant. It could do with the fact, they had to recover from a particularly windy period though.

I'm guessing they're a cooking pea only, as when eaten fresh from the vine, they don't taste tender, despite the fact they received adequate water. I will save the seed and try again, paying more attention to trellising and wind protection.


Wheat?


A surprise crop, which no doubt came from the chicken feed that was once present here, was wheat. I pulled some recently, when I was clearing out part of the area, and fed it to the chickens. Even though it wasn't ready yet, they still liked it very much.

Wheat won't ever be a mainstay crop here, but if I manage to save seed (not knowing anything about wheat, lol) I'll throw some in the chicken feed areas and see what comes up. I have some buckwheat, amaranth, millet and barley to throw into the chicken feed areas as well.

I've never grown my own chicken seed before, but I figure, why not try? If I can get fencing up, I'll even let the chickens do the harvesting for me.


Right side removed


But back to the new vegetable bed, and what to fill it with. I cleared out one row of the soil from the Middle Ridge growing area - fed the weeds, including some silverbeet and celery to the chickens, and transplanted a rubarb plant into the new vegetable bed.


Rubarb


The rubarb transplanted well and even improved. I've never seen the stems that long before. I've also planted basil next to it, and some seeds of some variety, which I hope will use the trellis behind.

I'll come back for more of the soil at Middle Ridge as I need it. Which I found was required quite recently, when extending the new vegetable bed too.


New curved bed


It adjoins the former bed, but as it wasn't going to be a straight line, I used a different kind of block. It was good to use up some odd blocks I had laying around. Notice the colour of the soil is slightly red? That's the natural clay in this area.


Two adjoining beds - both filled with improved soil


Mixed with the new soil, and coffee grounds from my husband's work though, the soil is now a lovely chocolate brown colour.

I planted some jerusalem artichokes in the new bed, and some horseradish root in the block at the very front. Should make it easier for harvesting the root without dispersing it. I have to be careful what plants I choose for this area, as it sits above a retaining wall and gets good drainage.

I depend a lot on the rainy season, with some water from the chicken coop tank, to keep this area hydrated. So anything with a good root system, or preferably a rhizome, will survive here.

I'm not stopping, however. as I have more beds to extend. I'm gearing up for Spring. :)


Friday, August 28, 2015

The scoop on poop

Inspired by this post, from Bev at foodnstuff, I went looking for some links on how to reuse plastic milk cartons. There was an amazing array of ideas, but one in particular was going to solve a problem for me.


Great idea!


I needed some kind of poop scooper, much like the one I use for the cat's litter box - but I didn't want to buy one. Thanks to the link above, I was able to use a three litre milk bottle, to make a very handy tool instead.

I drew the marks on the milk carton first, then cut around it roughly with a paring knife. I was able to tidy it up with a pair of scissors, once removed from the main bottle.


Transformed


As it was going to be used for cleaning the chicken nesting boxes, I didn't worry about the texta marks, left on it.

Be warned: there will contain some chicken poop in the images below:


Double laying boxes


Some of the older hens, have taken to nesting in the boxes at night, because its lower than the roosting post. This was taken several days after cleaning it. I was attempting to clean it every day, but sometimes forgot to bring up the garden gloves, or I couldn't find a stick nearby to flick them out.

As this is the preferred laying box for most of the hens, I had to come up with a solution, so I could clean it every day.


You do not want to click, to enlarge this image
~ trust me ~


The new scoop works a treat. I can use the edge (near the corner) to flick nuggets out of the nest, or I can scoop out a bunch of sawdust with the front, which is too discoloured from moisture to leave.


That's better!


Topped up with fresh wood shavings, both nest boxes are ready for business again. When I clean it daily, it takes under a minute to flick out the nuggets which have been deposited overnight. This tool is just what I needed to keep to my routine.

So thank you Bev, for sharing your milk carton planters. It helped me to solve a problem in the chicken coop, with recycling. :)


Thursday, August 27, 2015

Warrigal Greens

Warrigal Greens


I've seen Warrigal Greens growing wild around my garden, and even read about the fact its edible. I ate it raw once, but couldn't understand what the fuss was all about. It tasted awful. Only recently I discovered Warrigal Greens contain toxic oxalates, and therefore should be blanched before being consumed.

No wonder I didn't like it, and the native animals don't seem to eat it raw either.


Leaves and stems


I've eaten it several times already, and it does taste a lot like spinach. I've eaten it just by itself, but today, I had it with some old favourites. I went outside in the rain, to pluck some Warrigal Greens from the garden.


Leaves removed from main stem


When I brought them inside, I plucked off the leaves, leaving the thick stems behind. As these can contain high amounts of oxalates, and you'll know it if you ever taste it - very bitter, even when cooked


Boil for 3 minutes


I then placed the leaves into boiling water for several minutes, before pouring them into a strainer, and then pouring boiling water from the kettle over the top. This rinses any residue of oxalates off.

You can use cold water to rinse, if you want to stop them cooking, but I wanted to eat mine warm.


Lunch time


They were accompanied by fried eggs, and my home-made fruit chutney. With a dash of salt and pepper, it made for a very fancy lunch - even for a weed.

I only noticed afterwards, this meal consists of a lot of ingredients, grown here. The eggs are from our chickens, the Warrigal Greens grew wild in the garden, and the chutney was made with my home grown bananas.

There were other inputs like grain for the chickens and the extras I put in the chutney, but as far as shopping from my larder is concerned, this meal is about 80% there.

Have you tried eating weeds as part of a meal before?


Tuesday, August 25, 2015

Fruit Chutney

 Apples, pears and choko


Since putting in our choko vine, about 4 years ago, I started making choko chutney. Not only is it a tasty way to use up choko's, but it also reminds me of my youth, when my mum used to make it.

It's thick, spicy and great with meats and cheeses. It's also great on sandwiches, toast and a favourite for making curries around here.


Ducasse bananas


Then one day, I ran out of choko's. But I did have a ridiculous amount of bananas left over from our tree, that we didn't manage to eat in time. So I thought, why not make a fruit chutney, instead?


I just substituted choko's for bananas, and also some apples and pears that needed using up too. The recipe I'm sharing, is the same as my choko chutney recipe, only the fruit has been changed.


Chopped bananas


What I like about the bananas and spices though, is it makes an almost like BBQ sauce condiment. You use a hand blender, to chop everything up, so its spreadable and easy to use. So while I remember the delicious choko chutney my mother used to make, I hope to start a new tradition with fruit chutney.

I give a guide for how much fruit to use, but substitute weight and fruits of whatever you have, to make a total of 3kg.


Displayed with cheese and salami


FRUIT CHUTNEY


Ingredients:

2 kg cooking apples (you can sub in cooking pears too if you have them)
1 kg soft bananas
1 kg onions
1/3 cup salt
1 1/2 cups sultanas
1.5 litres brown (or malt) vinegar
1 kg brown sugar
1 tablespoon curry powder
1 tablespoon cumin powder
1 tablespoon dry mustard powder
1 tablespoon mustard seed
1 tablespoon tumeric powder
2 tablespoons mixed spice (or all spice) powder
6 tablespoon cornflour


Place all chopped fruits and ingredients (except cornflour) in a slow cooker, or in a large saucepan on the stove top. You need at least 6 litre capacity, minimum, but use larger if you have it. Cook in slow cooker on high for 2 hours, once a rolling boil is achieved, or until fruits are tender. Simmer gently on the stove top for approximately 1 hour. Be your own judge in time - you want to cook the fruit and permeate the flavours.

When almost ready, mix cornflour in a bowl with a small amount of cold water, until a paste is formed. Gradually mix into chutney, stirring continuously. Once the cornflour is incorporated, simmer for another 10 minutes (stove top) or 20  minutes (slow cooker).

When done, whiz with a hand-blender until smooth. I have a metal stick on my hand blender, so I can mix straight away. Consider cooling a little if you have a plastic stick on yours (not completely if you're canning). You can have it chunky if you want, just be sure to chop your fruit the size you want it.

I preserve mine in jars in a water bath for 20 minutes each batch. You'll make around 6 litres.

This tastes even better if you leave it a week before consuming. I never can!


UPDATED TO ADD: I'm assuming everyone would remove the skins and seeds, which is why I didn't originally write it in the recipe. But I figured afterwards, I really should. :)

Also, a link which explains the role of certain foods in food preservation, as a question about salt was raised.


Saturday, August 22, 2015

Veggie tales

Like the bush rats, digging through our vegetable bed, I've been busy lately too. This post is all about that particular vegetable bed, but also our daily reality of doing anything around here.

I want to start at the very beginning of our vegetable bed's journey though. It started with something, a little like this...


January 2008


We didn't know it was going to be a vegetable bed (left of the wheelbarrow) because we were just keen to get some flat land happening. Like the complete novices we were, we grabbed some hand-tools a wheelbarrow, and started to remove vegetation and chip away at the dirt. Our daughter was a wee four year old, and my mother helped by distracting her.


 April 2008


My husband and I were determined in those days. We could erect a retaining wall in a few weeks. Every day off from work, my husband was bringing home trailer loads of gravel, to backfill the walls. More about that gravel soon.

But after we got that wall built, we finally had some flat land to run our new chicken tractor on, so we put it to work.


 June 2008


With those first sprouts of green appearing, after the chicken tractor passed over, we started to wonder if this could become our vegetable bed. That was back in 2008, and we got several years of vegetables and flowering plants, out of it since.


January 2011


The day this post went up (the picture above) little did we realise, it would be just under a week, until the 2011 Queensland floods, would hit our region. That day, changed our lives in substantial ways. It changed the nature of our marriage, forcing issues we had to deal with and fix - plus it also changed how we saw ourselves here.

It wasn't anything we could see at the time, because we were too busy in survival mode, thanking our lucky stars, the damaged caused was minimal. But the damage still had to be repaired - both in the landscape, and ourselves.

Only since getting back into the vegetable bed, recently, have I realised the extent of what we were dealing with, back then.


August 2015


Because this is the state of our vegetable bed today. It had been overrun by sweet potato - our most successful crop, but it made weeding difficult and it even started to push up the blocks. The sweet potato vines have died back, over winter (hanging over the wall) so its easier to get in and see what I'm dealing with.


Rat tunnel


I've seen the evidence for quite some time, but native bush rat tunnels, were everywhere in the vegetable bed. Do you see the gravel, they so kindly removed from behind our retaining wall? They burrowed to get at the sweet potatoes you see. Makes for a good meal during winter.

I managed to get some sweet potatoes out, but they weren't in very good condition.


Sweet potato


This is the Japanese, white flesh variety. Not as sweet as the orange ones, but they do very well in our climate. I will find another place to plant the sweet potatoes, where they will cause less problems.

I had known about this stuff happening in our vegetable bed for quite some time, I just didn't deal with it. Part of that being, because the children need attention, oh yes, and that pregnancy thing and rebuilding retaining walls, the flood had damaged - but there was one more thing, preventing me dealing with it.

I was missing my husband. He had taken on other activities, outside the home and they were constantly calling him away. Then he changed jobs again, and we got to see him even less. Just recently (as in, the past seven months) my husband has achieved one of his goals - to join the Army Reserves. This will hopefully lead to a change in career - though, we've still got an incredibly long way to go!


Work begins


A garden, seems much smaller, in comparison. It appears insignificant, but we both know its not. So with my husband, otherwise indisposed, I got to work on our old vegetable bed. It was like revisiting a forgotten dream. I remember putting in those star pickets, and the rebar wire - only David was there to help me.

I even remembered that tree (do you see it in the picture above) which I'm pretty certain is an avocado?


Avocado or mango?


It sprung up from the compost we dumped in the bed, once upon a time. It must be at least four years old now. I'm torn whether to remove it or not. It will surely suck any moisture I put in the bed, but its an avocado (I think) and I love avocado!

It hasn't fruited yet, but it will stay until I decide its fate. I hate removing trees, because they're such givers. It even shaded me on the days I was working on the vegetable bed.


The supervisor


And I certainly worked on that bed! With my little toddler by my side, playing with the sweet potatoes I'd removed from the bed, I was able to dig in the Besser blocks, as they had formerly been before. As edging. I even had to remove some of the original retaining wall blocks on the opposite side, and reset them, as the sweet potatoes had pushed them out of alignment.

I needed a straight wall, because I intended to reuse some roofing iron, left over from my chicken coop renovation.


Mission almost complete


Once again, it started to look like a vegetable bed. Something I can use in a substantial way. I have seeds in mind, and some transplants. I want (and need) to see productivity here. Because while I may have had other things to attend to, I very much believe in growing our own food.

It was far easier to attack this small area, rather than approach the whole length of the wall. If my husband was helping, we could have done it all, but that's not our reality at present - and I'm sure, this reality, isn't unique to our marriage. Sickness, jobs, hobbies, family commitments, volunteering (sadly, even death) there are many reasons, one partner finds they have to work alone.

What my husband has contributed to this vegetable bed however, is an endless supply of coffee grounds from his work place. I felt like I was standing outside a coffee bar, after I sprinkled them on the ground. And I thought of him. The soil will be much sweeter!


Shade of the avocado tree


I even sat on the Besser block edging for a while, being shaded by the avocado tree. My toddler came to my lap, and we pulled faces at one another. Giggling under the shade of a tree, smelling that sweet aroma of coffee and simply stopping for moment, reminded me of why I needed to be here.

It started as a wall, which became a chicken tractor landing, which eventually became a vegetable bed. Many more things happened in our life in the meantime. Challenges came and went, but we still have our vegetable bed. Even if it did become overgrown for far too long, I returned to it anyway. And that's the trick. Returning, when you get the chance. One of you, or both of you, but someone has to return.


Pineapple sage


I transplanted the pineapple sage, roughly in the same area I had dug them up from. There was just enough soil/compost, to fill in this little section - I will fill up the rest of the bed later. I also hope to plant a choko in the middle, if I can find one this late. It will climb up the wire, and over the top of the bed - helping to shade it during summer. Or, at least, that's the plan!

We made quite a few plans since moving here in 2007. We weren't planning on the Queensland floods however, and we've been playing catch up, for four years since. While I've spoken about the fragility of our relationship in this post, it's more about continuing the journey, despite imperfect situations.

Much of the life portrayed out there, seems to be about getting ahead - when I think much of life is lived, just trying to catch up on unexpected things. Life is an unexpected thing. It happens, regardless of what we want of it. I want a lovely vegetable bed, full of abundance (with my husband by my side) but I'm likely to experience a fair share of pest attack, overgrown beds and native critters eating what does manage to flourish. Plus my husband, will more than likely, still be indisposed.

Does that mean, I do not return? I hope not. I hope I don't leave it that long again - and I know in the future, there will be days to share in the garden with my husband again. It's what we do in the meantime. What can be done? Even if the work crew is halved - or, the work is being done elsewhere, earning income. What can each party, still do? It may have to change to fit into your current life, but growing our own food is important - so even a little, achieves a whole lot.


Sunday, August 2, 2015

Early potatoes

So I planted some potatoes back in April, in a container. I wanted to experiment with a new way of growing potatoes as I haven't had much luck with them.


April 2015


Goodness, they looked good. The bad news is, once they grew over the container sides, I had to mound more dirt up. That somehow killed off, one of the plants. So I kept the other one going and replanted a tiny spud from the dead one. In no time, the new plant had emerged, but the old one was now starting to die, after mounding up the sides.

Please tell me - you're supposed to mound dirt up the sides of potato plants, aren't you? I pluck off a few of the lower leaves. Perhaps I added too much water. Are spuds supposed to be kept more dry, like garlic?


August 2015


After 4 months, my replanted spud from my formerly dead plan, died again. Spuds are supposed to be ready to pull in 6 months. So it was a little disconcerting to find what I would uncover, as I overturned the pot.


Potato harvest 2015


While it looks depressing, its the best crop I've ever had. I've grown THREE potatoes!! Not one, tiny thing, the size of my thumbnail - but three relatively bigger ones and they look pretty good. Still small compared to how big potatoes can get, but big for me!

The three potatoes won't be eaten. Instead, they'll be my new seed stock. Once the eyes sprout, I'll plant them in new soil, so I won't have to worry about spreading potato diseases.

Are there any potato gardening tips people want to share with me? Should I spare water from potatoes at all costs? Do they prefer a sandy mix to grow in, or rich hummus? I always hit problems when I mound the dirt up the potato plant - otherwise they grow fine. Do I need to take off the lower leaves to mound up the dirt, or did I just invite rot to invest the plant tissue?

How do you treat your potatoes?