Monday, June 29, 2015

Weekend projects outside

I've decided to create a new routine, or rather, attempt to. As I have a dozen things to do on my list, at any one time, I'm going to do a weekend project, once a week, to try and get through them all. My weekend projects may not actually fall on the weekend, but the idea is to pick a small job which can be accomplished within two days.


~ Click to enlarge ~
Before


Painting the letterbox, was one of those jobs I kept shafting off my list. It's been looking like its got a bad case of eczema for a while now! After eight years, the heavy duty varnish I originally coated it with, was due to expire. I rummaged around the shed for a can of paint, and made sure I kept Saturday free. At least on the weekend, I could be sure the postman wouldn't be calling.


 After


I used a can of Heritage Red, Weathershield paint, which we picked up from a mark-down table, at a hardware store, several years ago. We buy them occasionally for projects such as these. I did my best to scrape off the old peeling varnish and slapped on two coats of new paint.


Back door


The hinges were looking like they were effected by the elements too, so they got a lick of paint to protect them. You can see the grain of the ply is deep, because the varnish seal had been baked off several years ago. I've probably given this letterbox a few more years life, just by taking the time to paint it. 

I should have done it a few years ago, but better late than never.


Inside


Even the inside wasn't spared from my brush. There was quite a lot of dust and muck to clean out first, but the letters should be nice and cosy now.

It's not perfect, but it will protect the wood for at least a few more years to come. I built this particular mailbox for when we first moved in, so its been going since 2007. Apart from the hardware, and number plate, everything used in its making (including the stand) was from recycled materials.

Sunday, June 28, 2015

The happy accident

I struggle with growing flowers. I don't  know why. Perhaps lack of experience? Or perhaps because they're too fussy? Either way, I don't really strive to incorporate flowers in my garden as anything more than the side-effect of plants I can manage to get to survive in our conditions.

So I was pleasantly surprised when Chrysanthemums found their way into my garden. And quite by accident too! I couldn't have planned it better if I tried. In fact, I did try! My husband bought me a bouquet of flowers, and when I initially trimmed them to put in the vase, I tried to strike the prunings. Unfortunately, they proceeded to rot in the medium I planted them in. The rest of the flowers sat for weeks in the vase, with just the perfect amount of water underneath a tiny bud. When I went to toss the spent bouquet in the compost, I saw these tiny little roots begging for me to plant them.

So I did, and it grew!


Not only did it grow, but it thrived! They received insufficient water, and had to compete with weeds in poor soil too. These propagated Chrysanthemums played the underdog for quite a while. The tall stems, fell over and sprawled across the ground, but the buds still turned their heads to the sunlight. And when they bloomed, they did it en mass.


I know why people try to plant flowers now. They seem to smile at you, when you walk into the garden. They call you over to have a natter, all the time shinning a neon sign that says - haven't I just made your day, and don't you want to plant more of me?


Flowers may not speak English, by they certainly have the visual display and aromas, down pat. They know how to attract attention, and get emotional creatures such as us, to spread them around the place. Not to mention the bees which go crazy over their blooms. I had both native bees and European varieties, taking a keen interest.

If  you want a bloomer that can handle some neglect, consider the Chrysanthemum. I don't have any experience with the double blooms in ground, but the single blooms have proven they're hardy enough to stay. You will find they grow tall and lanky, and they may require some support. I just let mine flop over, and when all the buds flowered, it looked like a carpet of pink.

Do you have a favourite, no fuss flower, that will grow in your conditions?


Friday, June 26, 2015

I-view


Sometimes the view from my kitchen window, is better than a nature documentary. This is a female wallaby, who is probably gestating a joey in her pouch - as you can tell by the hanging sack.

This new baby critter, will pop its head out for the first time in spring/summer, to taste its first blade of grass. Then before we know it, they'll practice jumping around our house, and call our backyard home.

All seen from our windows, year round.


EDIT TO UPDATE: Upon further research, I have discovered these are Eastern Grey Kangaroos. Not Wallabies.


Thursday, June 25, 2015

Nutrient bomb

Unless you haven't caught on already, I'm somewhat of a lazy gardener. Scratch that! I'm an acreage gardener, which means my time is limited. Inevitably the garden has to do more for itself. So anything which can do my job, just by way of its normal biological function, I want it.


Leaf fall


Enter the humble mulberry tree. What a fantastic invention this was, for nutrient deprived soil like mine. It drops a giant nutrient bomb when the weather gets cold enough, via its fallen leaves. We're nearly at the end of the first month of winter, and its still holding onto some of them.


nature's carpet


But it's also dropped a lot more leaves on the ground. Since clearing the lantana and building the swale to help water this beast, leaf drop this year, has been exceptional. Just what I need to put those ground dwellers to work (otherwise known as worms, microbes and fungi) to turn my sandy, clay, loam, into dark chocolate soil!


Growing leaf mould


All these wonderful leaves which once fed the tree through photosynthesis, are now in various stages of decay on the ground. Some are turning black and being absorbed into the soil, some are still in the process of browning off, and some are even still green. A patchwork quilt of energy, being stored away for next years' growing season.


Under story


But there are even more benefits to this incredible tree of life-giving qualities. I have managed to grow comfrey under it! I've tried several times unsuccessfully to grow comfrey, but it turns out it likes the dappled shade provided under canopy trees - especially in our blazing hot summers!

The mulberry is large enough to create a micro climate, which is protecting the comfrey from dying back. It will be interesting to see if the comfrey leaves hold all winter. It seems to be getting a good feed from the mulberry tree though.


Sunlight and leaves, like the birds and the bees


In permaculture circles, this tree's function is termed a Dynamic Accumulator. To me its just a big old nutrient bomb, infiltrating the soil to connect many different lifeforms together. The magic after that is healthy soil, which can store nutrients and water better. Plants seem to like those things, so I try to have as many dynamic accumulators, as possible.

Weeds are another dynamic accumulator, and so is grass. They grow, store nutrients, which can all be released back into the soil to feed the ground dwellers, all over again. Year after year. So long as we understand their purpose and manage them according to their biological function.


Blue sky on a winter's day


Personally, there is something deeply romantic and mystical about a tree. Its a living companion. A quiet presence which moulds itself into the landscape, drawing life, like an invisible magnet. It never leaves its one place, but so many things change around it because of its existence.

Nutrient bomb, dynamic accumulator, romantic escapade, whatever you want to call it, a garden is poorer without them.


Friday, June 19, 2015

Another job done

After turning part of Middle Ridge chicken coop, into a new growing area, one thing became clear after a few weeks. The seedlings I had planted, needed more sunlight as the winter days got shorter.

Before


That all changed yesterday, when I decided to take the shade cloth down. It was a dirty job, but it made a huge difference to the new growing area.


After


Suddenly the run was filled with sunlight for what must have been, approximately seven years, after first finishing the run. As I cut down the shade cloth, all those memories of constructing the whole thing, came flooding back. How can seven years fly by, just like that!


Rubarb


It was all for a good cause though. The thin rubarb with enormous leafs, suddenly received more sunlight. I should see thicker stems emerge in a few weeks, as they won't be starved of photosynthesis, like it was before.


Peas


Removing the shade cloth, also allowed the Lacy Lady Peas some sunlight to produce flowers, hopefully. It was also just in time before the tendrils started latching onto the shade cloth too. If I don't get many pods, I would at least like to save some seeds for next year.

There was only one problem encountered, removing the shade cloth however...


Kale


Everything growing in the run, suddenly started to wilt. This is my kale. It received some sunlight through the side of the run, but not much during the day. The leafs  hadn't really grown for full sunlight over consecutive hours. Not many of the seedling's leafs had.

Having checked on them today, they seem a little better. I don't know if I've done my dash with the veg growing in here, but time will tell. I suspect they may go to seed rather quickly come Spring, as they spent the early part of their development, adapting to heavy shade. When the sun gets more intense, along with the temperatures, its a given, everything will bolt to seed.

Or at least, that is what I'm expecting. But it would also be a good thing too!


The bones


While I'm loving all the green this new area is producing - abundant tomato seedlings too, as we fed the chickens many tomato scraps in here; it will soon be time to move onto something else - a new transformation.

My tools will come out again, and I'll have more to unveil later. Let's hope I get some sort of harvest in the meantime.

Monday, June 15, 2015

Pot culture

Wowee! Two weeks into winter already, and I'm behind in my garden chores. It's been mostly overcast, with no rain lately (at the time of writing this) but I did manage to break a sweat tidying my potted area, near the verandah.


 December 2014


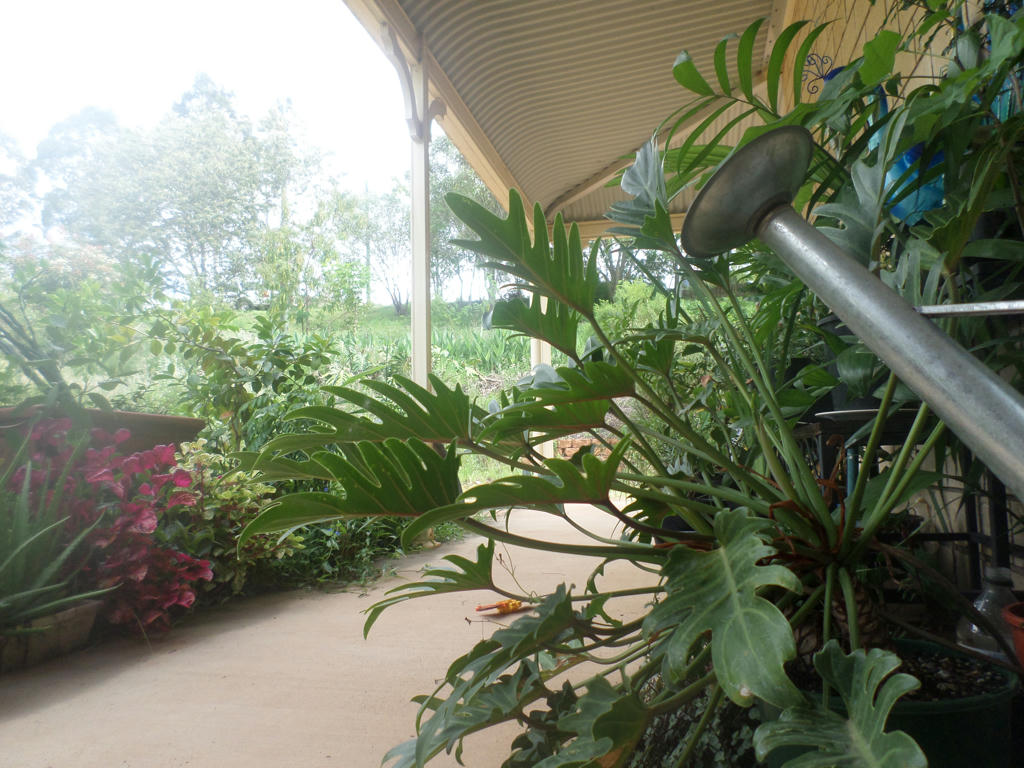
I love my potted area. Everyone who walks onto our verandah, comments how jungle-like it feels. That's the beauty of pot culture, in and around our house. We can bring nature right up close, without having to worry about roots attacking foundations or what have you. It's also very water conservative, if you can house all the pots together.


Clean up


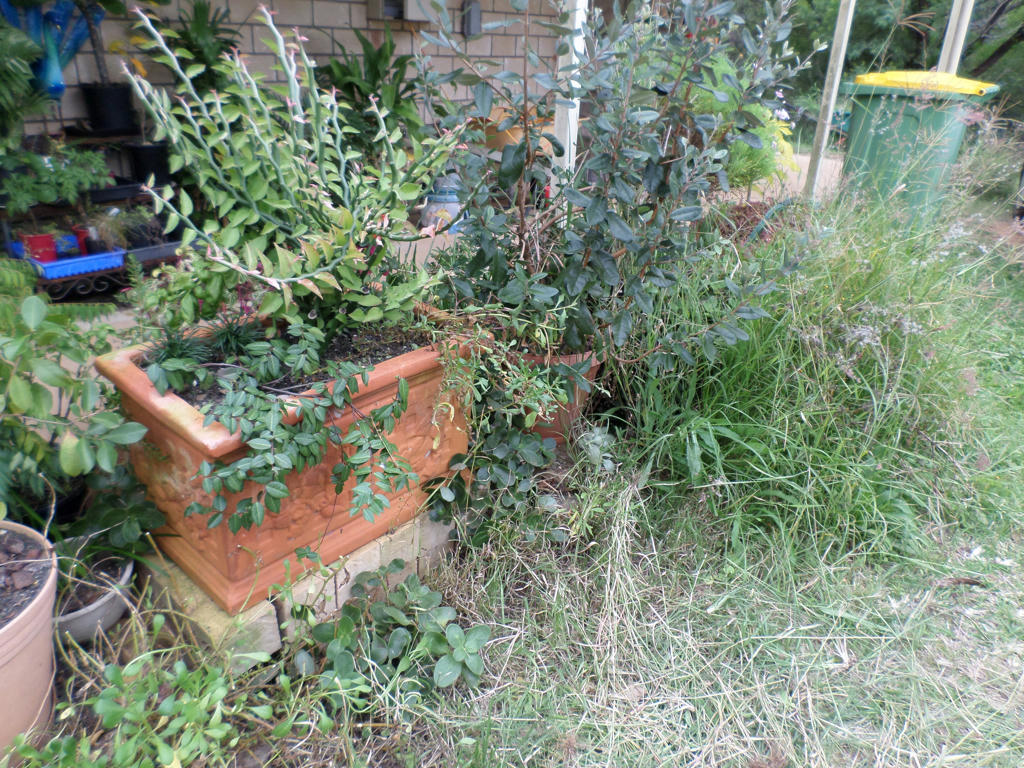
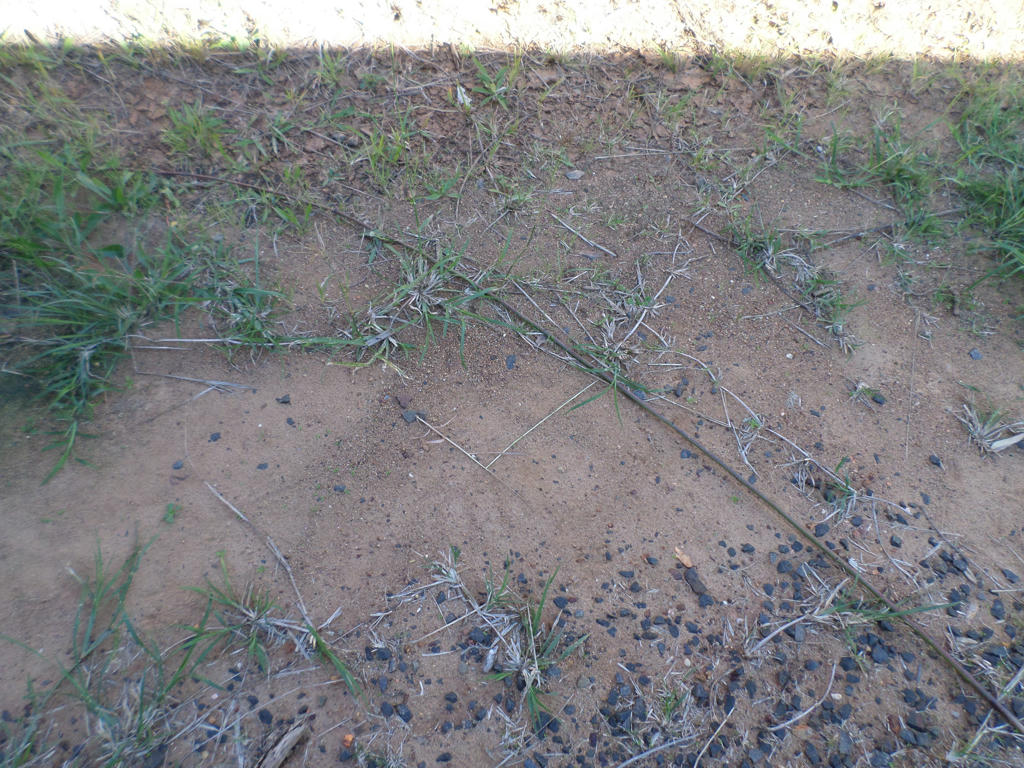
My potted area has become somewhat overgrown after summer, and it was time for a tidy. I have plants growing on the edges of this potted area (in ground) and asked David not to mow near them, in case he gave a lethal haircut. As a result, long tufts of grass grew on the edges. I cut away at the grass by hand with secateurs, which revealed a tangle of plants which probably needed a prune several weeks ago! There is still some more tidying to do.


I got quite a bit of pruning material from my plants, which I'll pass through the chipper and return to the area, ready for spring. While cleaning up, I also managed to take several different cuttings.


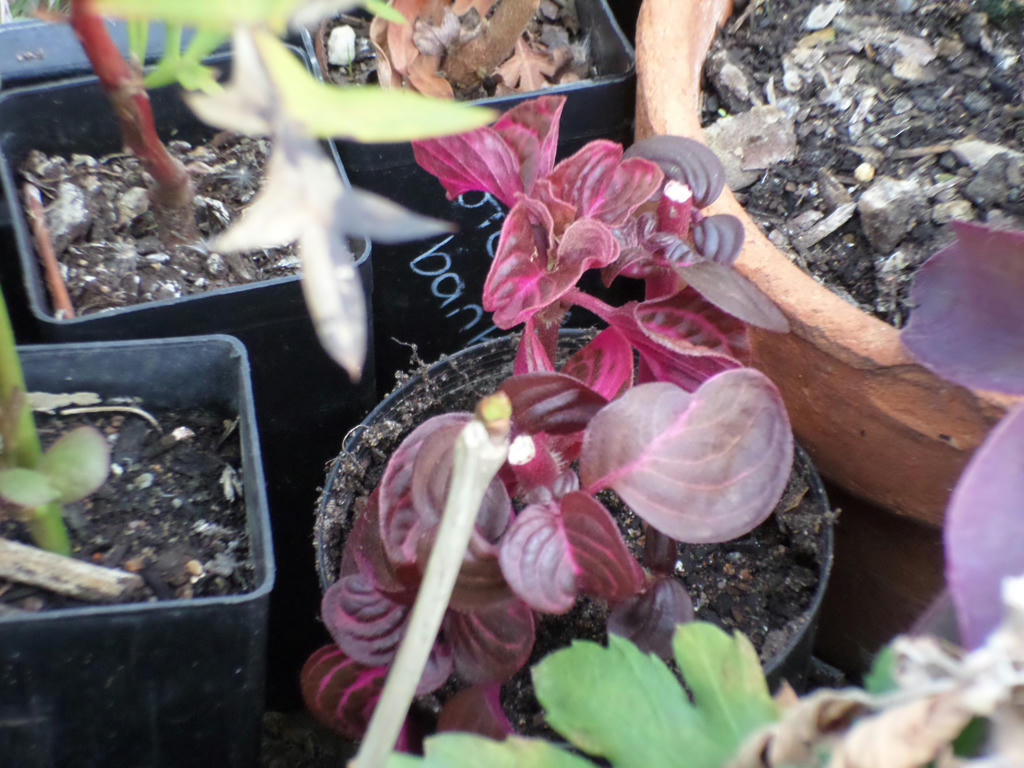
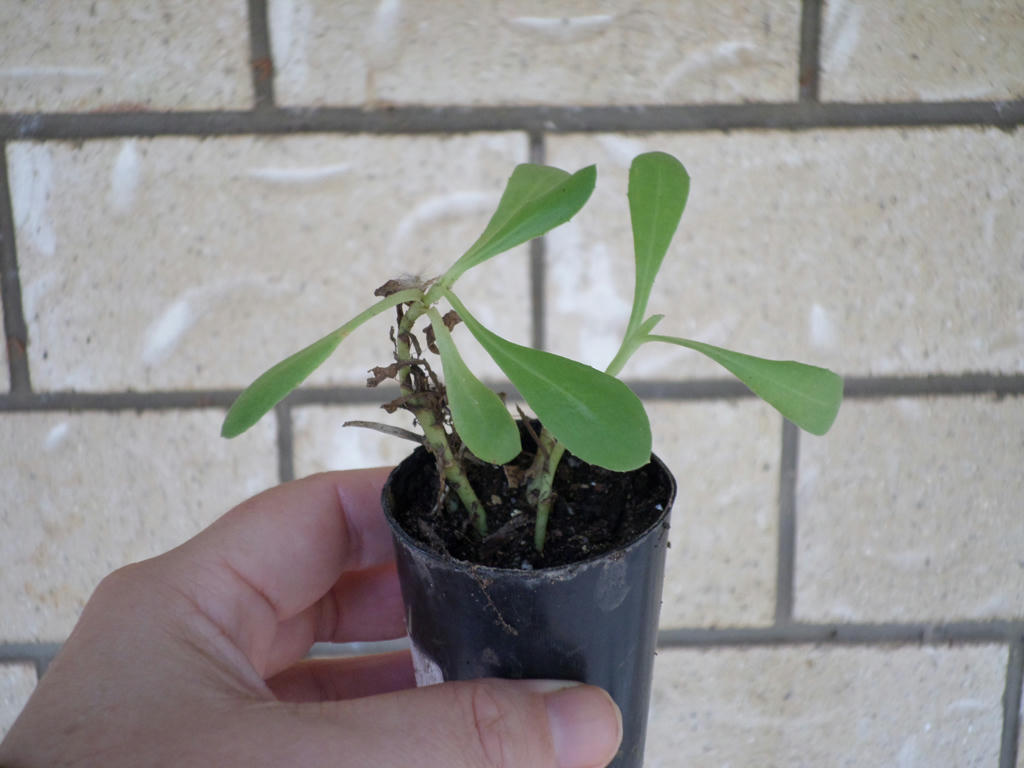
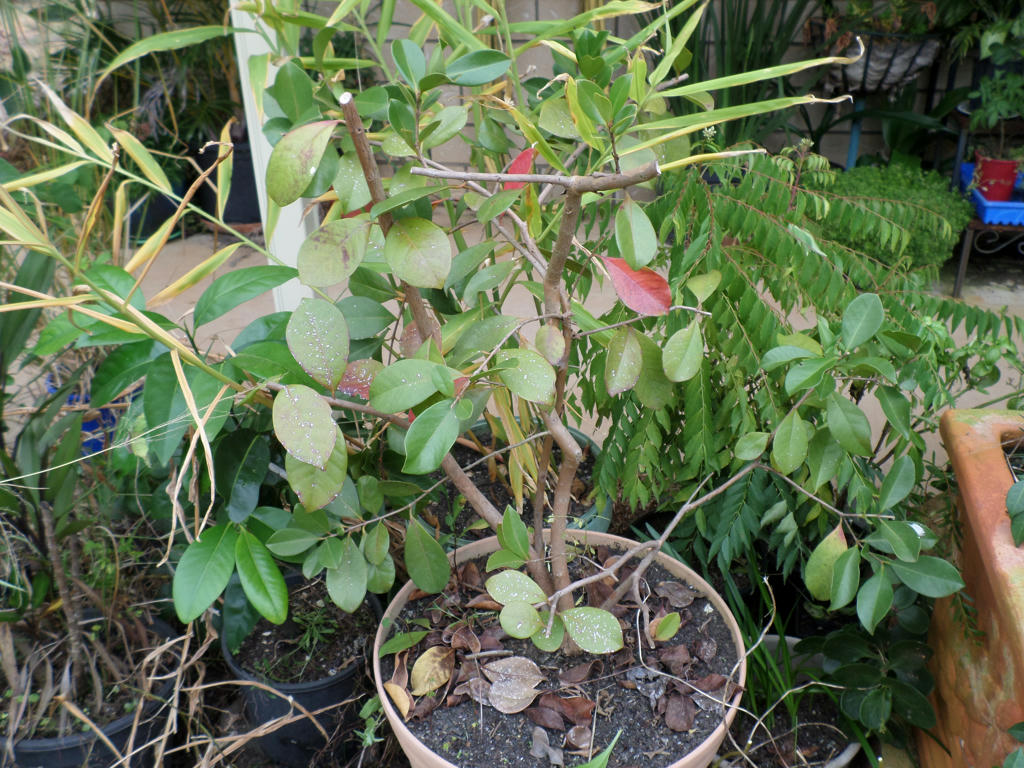
Not sure what this red-leaf plant is called, but it seems to love moisture and dappled shade. There was plenty of material after pruning, to stick into some soil and strike for next spring. When an opportunity arises, always propagate, as you never know if something will happen to the parent plant.


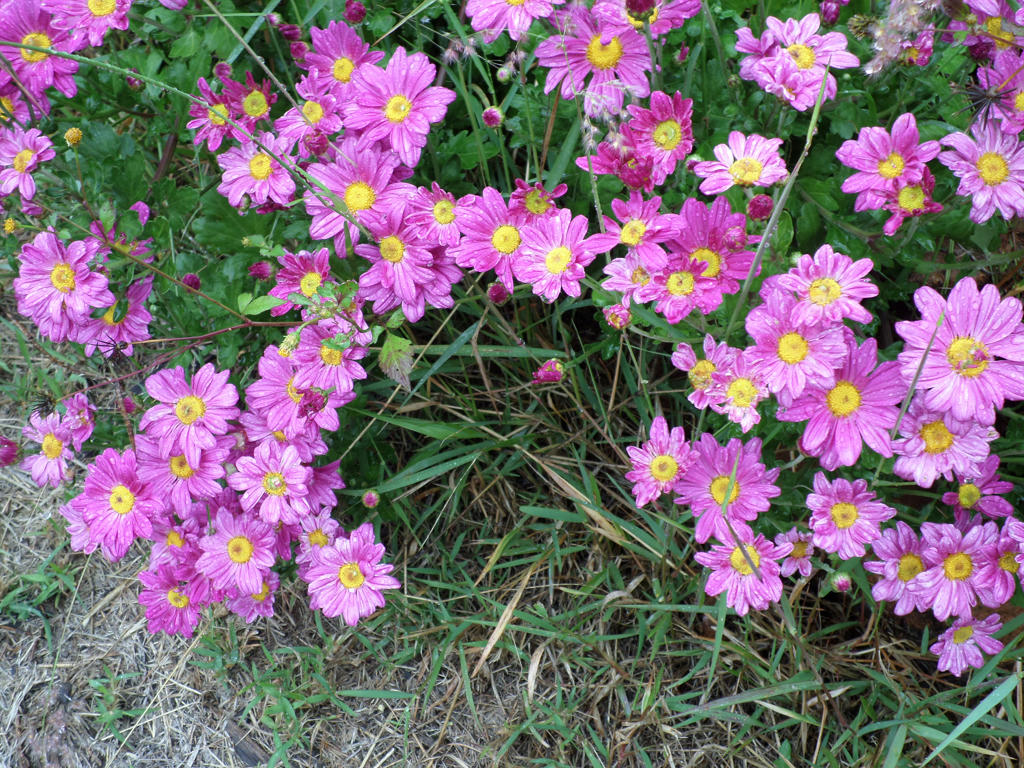
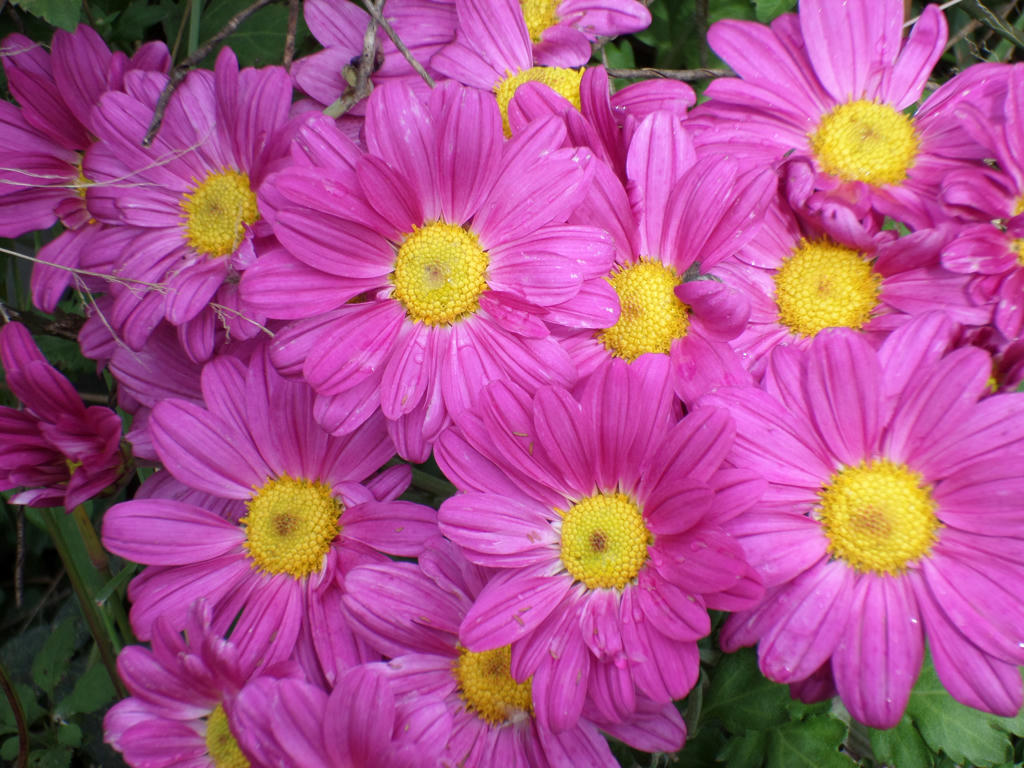
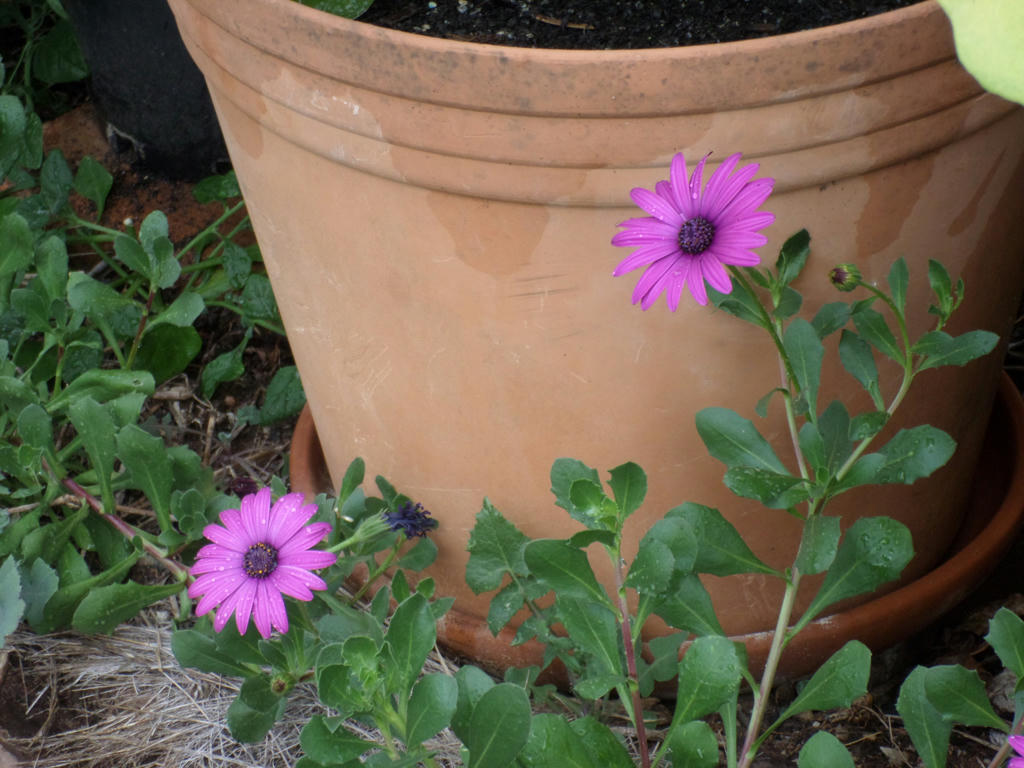
Osteospermum ecklonis (deep purple) cutting


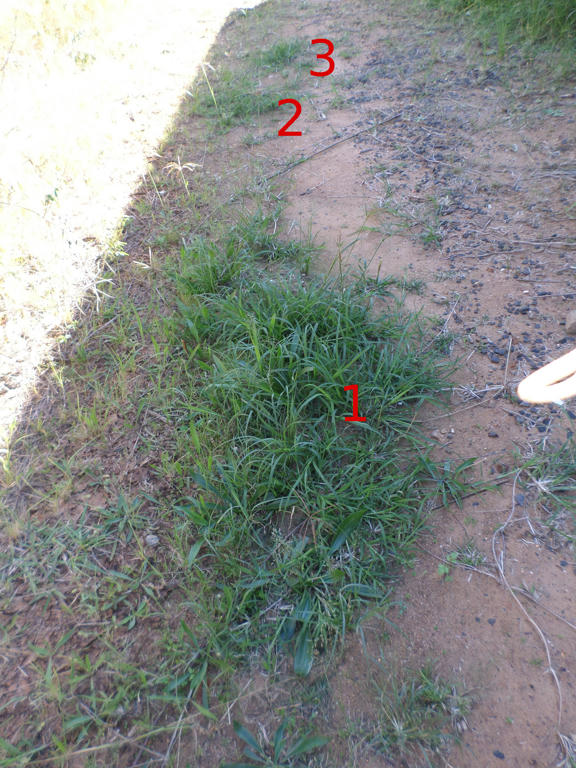
Some plants even rooted into the soil already (natural layering) so it was simple to just snip and re-pot. Ridiculously easy. I really like this particular ground cover too, as its hardy, easy to propagate and helps keep the moisture in the ground, near my pots.


Osteospermum ecklonis (deep purple) in ground plant
September 2014


That's part of the designed success in my potted garden - having plants in the ground, around the edges of the pots. It cools the pots at ground level, when the sun can dry them out pretty quickly. I place these pots on the eastern side of the house too, so they get morning and noon sun during summer, but receive shade in the afternoon.


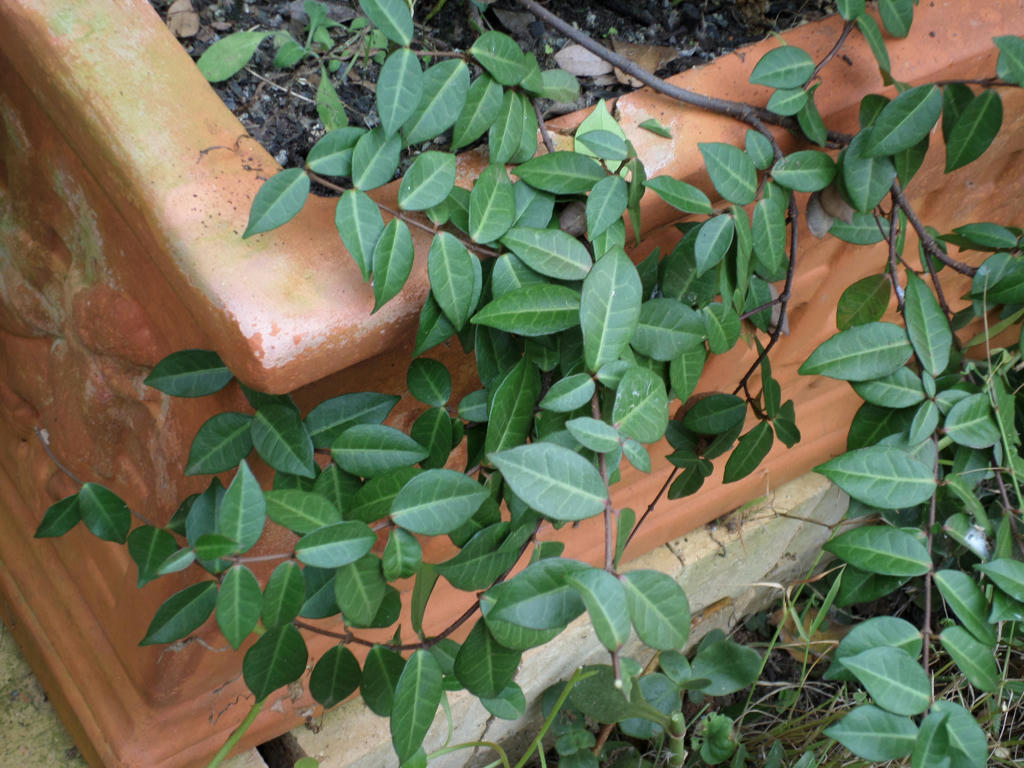
Trachelospermum asiaticum


Another strategy I like to employ to save pots drying out, is growing plants over the sides. It shades direct sunlight, heating up the pot. Especially terracotta pots! These wandering plants, really are into self preservation and will happily cover the edges you give them. This particular plant is called Trachelospermum Asiaticum, and is related to the Star Jasmine. Unlike its relative however, this variety doesn't grow to weed proportions and is much slower growing.

I've heard its hardy, but I've never gotten it to survive in ground in these parts. It seems to love moist pots though.


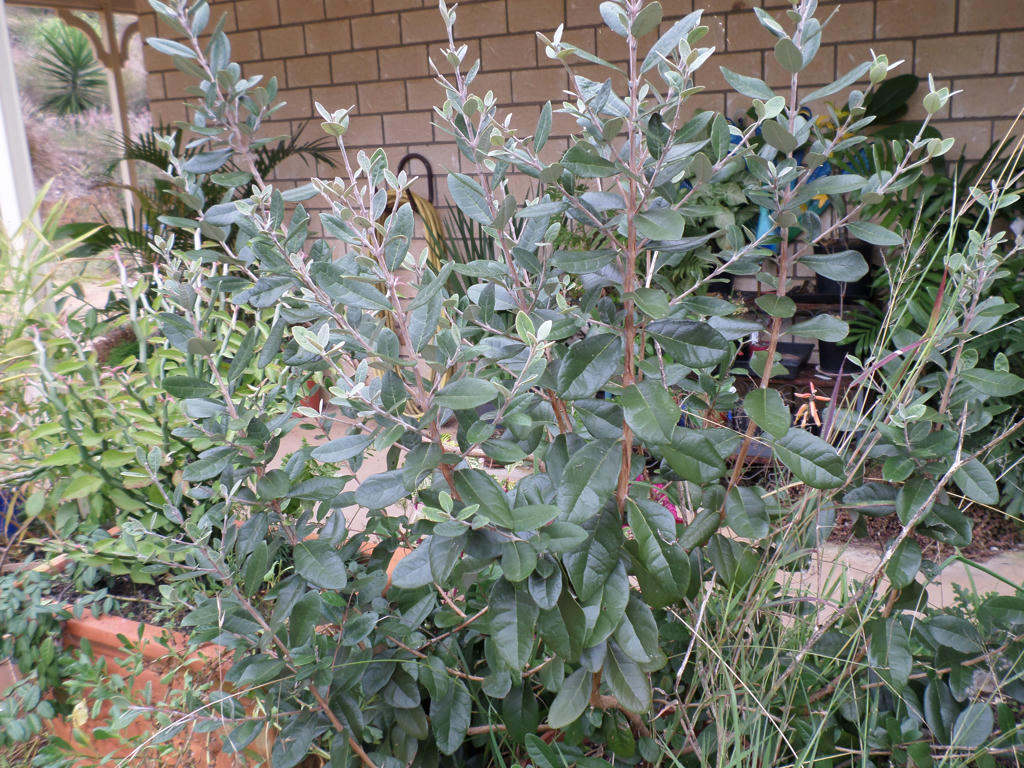
Pineapple guava ~ due for a prune


I've had a lot of success with my fruit trees in pots, even if I didn't get anything more than a few fruit this year. This Pineapple Guava didn't give me anything at all, but put on some lovely growth instead, which helped shelter more delicate pots nearby. That's another advantage to pot culture, you can change positions to create the desired micro climates you want.


Strawberry guava ~ after a prune


On the other hand, my Strawberry Guava struggled at bit towards the end. I put it down to the potting mix I used, as it was mostly bark. Very poor quality, only good for three months, not six or more. I cut it back to promote more lush growth, which I've read guavas need to fruit well. It produced about 3 fruit, but it was definitely poor quality. I don't think the potting mix was holding the moisture, making the fruit shrivel.

I will give it new potting mix in the next few months, when the weather warms a little more, and the plant can take advantage of it.
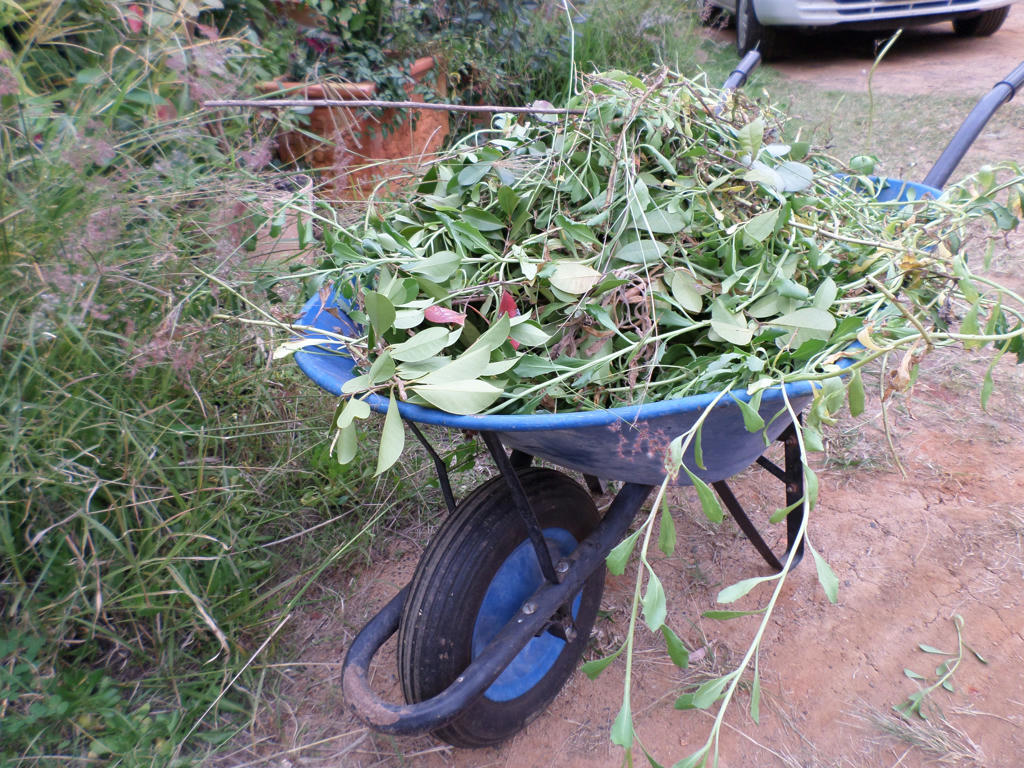
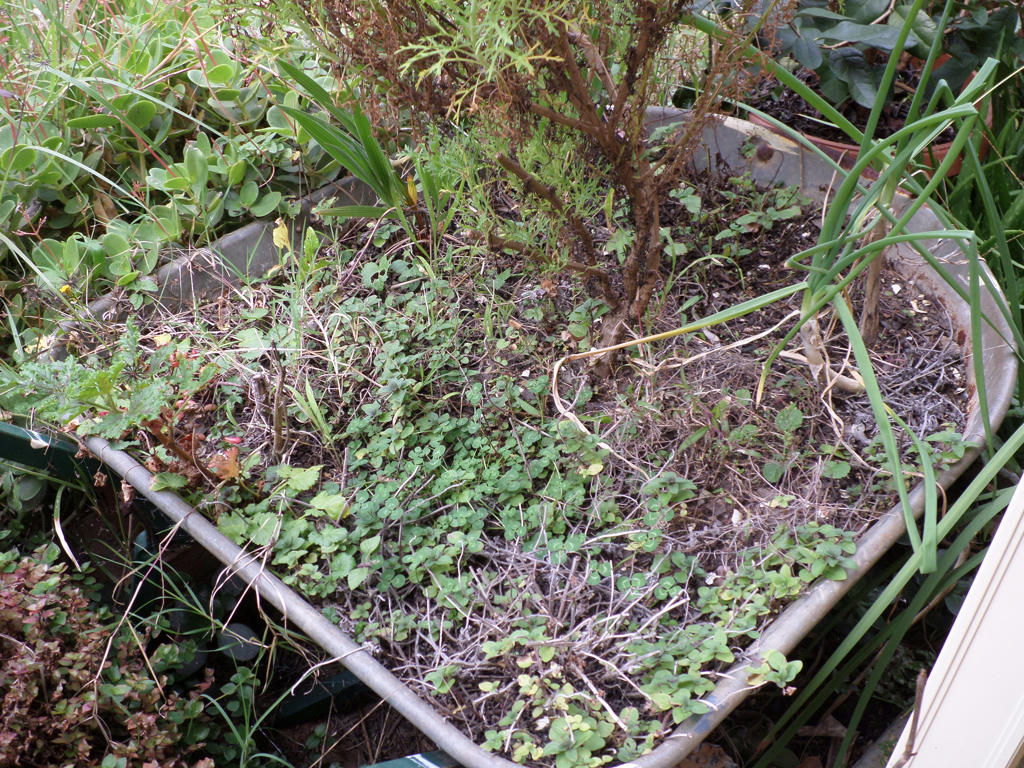

Wheelbarrow


The wheelbarrow I surrounded with a collection of pots, did well, although I think I've spent the soil to exhaustion, as there was quite a lot planted in it. Two different mints, oregano, shallots, lemon balm some flowering bulbs and a hardy daisy. If it wasn't for the pots and the micro climate around the wheelbarrow though, I doubt anything would have survived.

I've never had much luck with metal wheelbarrows, if they don't get some form of shelter from direct sunlight, heating up the metal. Nestling pots around them, really does improve the growing conditions.
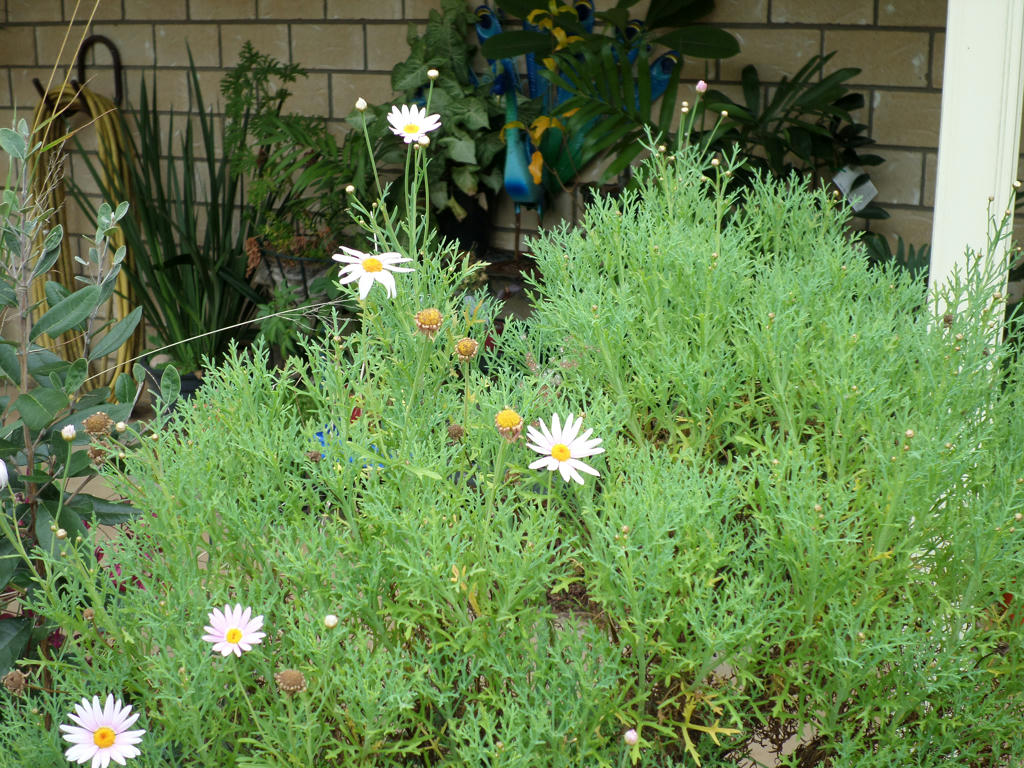

Daisy shrub


My daisy grew very well in the centre of the wheelbarrow, but now I think its sucking up any moisture amongst the fiercely competing plants. I intend to transplant this daisy back into the garden (originally a cutting I took) and fill this barrow with new soil and a different arrangement of plants. I'm thinking a lovely spring display of flowering plants.


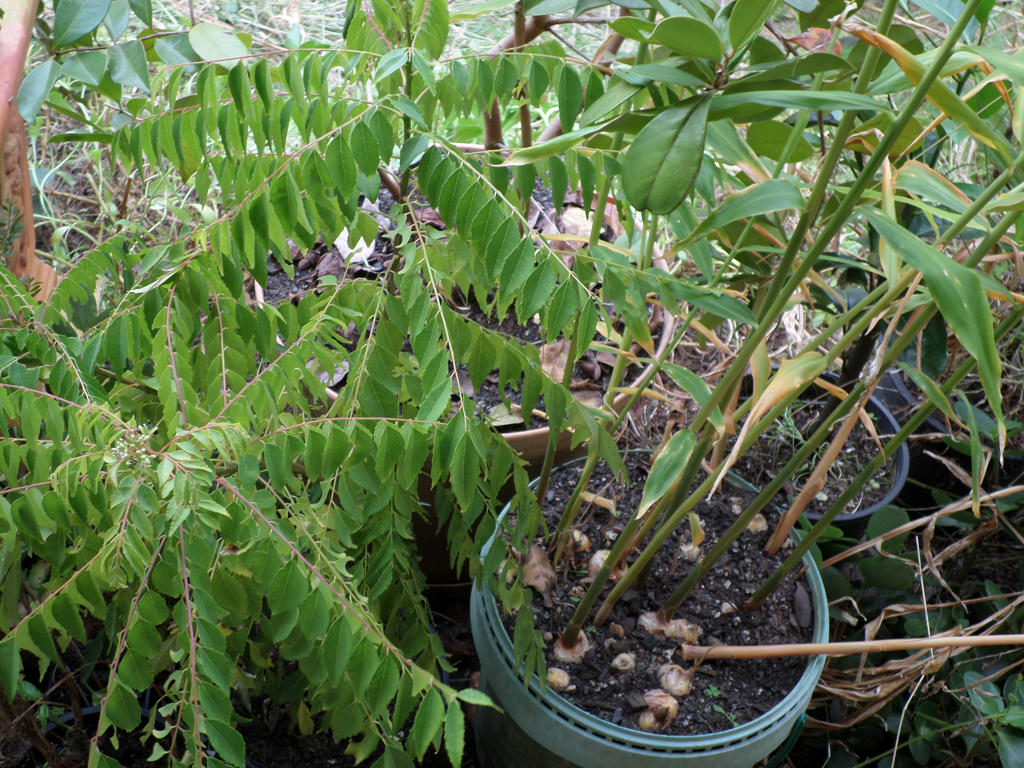
Curry tree (left) ginger (right)


And lastly, my ginger has started to die back, which means it will soon be ready to harvest. I want to make some lime and ginger marmalade soon - my limes are ready, I'm just waiting on the ginger!

You can also see my curry tree plant, next to the ginger and it did really well at creating dappled shade over the ginger rhizomes. Frankly, potting the curry tree saved its life too. I almost lost it, in ground, but managed to spoil it back into life with pot culture.

As you can tell, there's a little involved to growing in pots (the right soil and creating conditions where the vessels don't overheat) but I would have to say its one of those growing enterprises, with very quick results. The rest of my garden takes many seasons for the plants to grow into their niche and start supporting the system. With pots though, you pretty much bring everything to them and they reward you with instant results.

I'm experimenting with other areas around the house too, all involving plants to some degree - and its about solving particular micro-climate problems too. I also love the feeling of nature hugging our house.

Do you have a favourite plant(s) you love to spoil in pots?


Saturday, June 6, 2015

Natural sequences

Natural Sequence Farming, are techniques discovered by pioneer farmer, Peter Andrews. His intent was to demonstrate a way, farmers could make products on their land, without relying on expensive inputs or practices which would ultimately destroy their land.

I love everything Peter Andrews has been calling people to pay attention to, but I'm not a serious farmer. Sadly, not even to feed our own family, let alone making money to feed others. But I know a natural sequence when I see one, and I just had to share it.


This is a spoon drain which is in front of our house. Its on a small incline to drain water away from the front of the house. It attaches to a swale (level on contour) which has a lot more greenery because the water isn't designed to drain away.

Due to the draining nature of this spoon drain, however, its mostly sandy soil and will hardly grow anything. But then this happened...


Care to take a stab at how these green clumps have suddenly emerged in our spoon drain? Clumps two and three, were the initial ones to form, but then clump one became the main festoon of disturbance to the soil.

Any and all guesses are accepted. But I bet you didn't say, it's our cat's toilet!

I have been watching this development since we started to let our cat venture outside. Because she was effectively raised inside as a kitten, when it came to letting her outside, she would always come back in to use her kitty litter. Nature eventually dawned on her instincts though, and she decided this nice sandy area, would make a great toilet.

Our cat wouldn't just do her business here though. She effectively became an earth mover too! Scraping up the sand to cover her kitty-business, which formed blockages in the spoon drain. When the water came in, it was held back a little with most of it getting away. But the organic matter in the sand, along with the moisture, formed little islands of greenery.

Much to our cat's dismay, her lovely sandy area is turning into a jungle! That's why clumps three and two were initially abandoned, to start clump one. I imagine she'll be moving to other sandy areas in this location, and I'll have a lovely swathe of greenery, to show for it.

I'll be picking some of this grass soon to feed the guinea pigs. While I may not be a farmer, in the traditional sense of the word, it seems my critters are into natural sequence farming regardless!


Monday, June 1, 2015

Sharing information

After my recent book review on Jackie French's book, Let the Land Speak, I realised I had some resources I should share for anyone interested in land rehabilitation.

Here is a good website to get acquainted with some Natural Sequence Farming techniques. It has a lot of pictures to give some visual displays of what is possible to rehydrate our landscape in Australia.

From the same author, Cam Wilson, there's a PDF for Low Cost Erosion Control Techniques. Complimentary to that, is also a list of Native Plants which do well, in and around water bodies (specifically Southern Tablelands).

Still on erosion control, there is a page by John Greenfield, with anything and everything you ever wanted to know about Vetiver Grass, and how it prevents soil erosion. I tried implementing this grass last year in our gully, but the first deluge covered the slips with slit and they never emerged again. Thankfully, I still have the mother plant I can divide more slips from.

If you're a Peter Andrews fan, as I am, here is a list of interviews taken at Barramul Stud, one of the places he has worked tirelessly to restore the natural sequences to.

I have gotten the confidence to try new things on our property, thanks to some of this information. While it is mostly for Australian conditions, some of the information may be transferable to overseas locations - but always factor in your local elements and consider your local regulations as well.