Sunday, June 25, 2017

Sad Saturday

RIP, Muesil, 24 June 2017


It was an ordinary day, like any other. Until it wasn't. After a bizarre set of circumstances yesterday, we sadly had to have our cat euthanased. It's too difficult to talk about, in more detail. Other than to say we love her and miss her, after four and a half years, in our lives.


Wednesday, June 21, 2017

Urban Garden Tour

I use to live on an 800 sqm block in suburbia, but when I came to live on our five acres, I had to learn how to garden in a whole different way. Scale and exposure changes everything. But I still find learning about creative gardening in smaller spaces, helpful in my bigger picture landscape

So I wanted to share a video I found recently, from a channel called, "From seed to spoon". It's a small backyard in Oklahoma (US) and they're using the existing infrastructure, to help select sites for growing plants in different seasons.

I thought it was really interesting, as I'm sure a lot of people find it challenging to grow large, in small spaces. There are often too many shadows, where plants won't thrive, or excessive radiant heat, which could bake plants instead of growing them. But if you observe your environment, and change how you're growing things to meet those conditions, success is inevitable.


I hope you enjoy watching this video, and let me know if you're following any of this advice already? Or what have you learned about gardening in your own challenging conditions, to succeed?


Saturday, June 17, 2017

Dividing

One of my favourite ways to propagate, is dividing an existing plant. You don't have to worry about roots striking, or death by transpiration. It's just breaking down, one big plant, into a number of smaller ones.

I did this, back in April, when I needed to stablise the earth around our new water tank.


Before


After


Three, Purple, Pygmy Grasses, became six! Very easy to do. But not all divisions are that straight forward! Take Lemon Grass, for example...

I wrestled to dig up, 2 established clumps, which had grown in red clay. It took me three hours!! Not just to dig up, but to divide into numerous other plants. Boy, those suckers are tough!


First hugel-bed (foreground) second bed (background)


You can sure bet, when you're taking that long to dig up and divide a plant, you're going to make it extend as much as possible. From two plants, I now have nine, large clumps. Plus, a few more smaller ones, which fell off the main clump. They were put into pots. In total, I expect to get 13 clumps, out of just two plants.

The purpose of dividing the Lemon Grass, was to provide more mulching material, in our troubled, north facing slope. It's clay, it gets sun all year and it needs MORE chop and drop material, than the former two clumps provided.


Third hugel-bed (background)


Knowing how bad the clay was, we decided to suck up, more of our fallen and felled trees, into hugelkultur mounds. David and I are getting real good at building these now. We've constructed 3 separate beds on our north facing slope, to hold the clumps of lemon grass.

You can see in the above image, we also used the tree bark, from the large eucalyptus trees, we had felled, last year. This was to prevent brush turkey's from digging up our new mounds. It will also make temporary lizard habitat, before the grasses grow in again.

We've had so much material from those two trees, and we still haven't used it all up.


Lemon grass re-shooting


When on acreage, everything has to be done to scale. Two clumps may be perfect for a block in town, but for a 40 metre stretch of land, you need a lot more plants, to cover that ground. Even at 13 plants, it still won't be enough. So I'm looking at dividing up another clump, at the end of the vegetable patch.

I'm propagating some more shrubs by cuttings, which I also use for chop and drop material. But I love the simplicity of just being able to divide a clump of something, instead. You can plant them straight away, and have your garden growing quicker.

Do you have a favourite clumping plant, you like to divide, for more? They don't have to be grasses, they can be berry canes, or plants which multiply by runners (ie: strawberry).


Monday, June 12, 2017

Recycle waste

I'm always on a journey of discovery - learning new ways to deal with old problems. I like to extend potting soil I purchase, for propagation and plants I keep in containers.

I use coffee grounds, from my husband's work, to help in this endeavour. I've also been known to use sand and compost too. All of which, can set like concrete if it dries out. Which means, dead plants.

I found a solution, in a waste product I have to deal with every few weeks...


Vacant for cleaning


We once had two guinea pigs, but one passed away, last year. Now we just have the remaining one to look after. She lives inside for the most part, and I bring fresh greens, a couple of times a day. We buy wood shavings from the local produce store, to line the bottom of the cage. Which I then have to clean out, every few weeks.

Previously, I dumped the spent shavings in the compost, but we gave up making compost in piles. We prefer to place all our food scraps, either in the chicken coop, the worm farm, or in the banana circle. But then one day, I decided to experiment with this waste product, in a different way....


What is this?


It's a terrific soil extender, for my potting mix. I had about 15 litres of a bag left, which I already extended with coffee grounds and old bark - sitting in a pile for years. But it was also setting like concrete, when it wasn't kept moist. Most plants like to have damp soil, but not drenched, so I had to fluff the mix up with something else.

I used about half of what was in the cage, to match how much potting mix I had. Then I mixed it all together. A wheelbarrow came in handy, for ease of mixing, and so did my son's smaller shovel (a Christmas gift, for gardeners in the making).


Ready to use


I stumbled on this trick, several months ago, and it keeps the moisture in the soil, without needing to be drenched all the time. Plus it doesn't set like concrete, should it dry a little - which can be damaging to finer plant roots.

Finally, I get nuggets of guinea pig poo, and guinea pig hair, as slow release fertiliser. So I'm pretty happy to have discovered this new way of recycling waste. I like how it's performing in the pots too - the plants are doing so much better.

Effectively though, the money I spend on the guinea pig food and shavings, are extended into my nursery and potting culture. I don't have to buy as much potting mix now, or any slow-release fertiliser. Nor do I use as much water. Incremental savings add up over time. It makes sense to simplify what we buy in, to do as many jobs as possible, on it's way out.

Do you have any secret ingredients, you use to extend potting mix, or a useful way to recycle waste from the home?


Saturday, June 10, 2017

New visitor


How cute is this guy? A kookaburra, and new fledgling which has recently left the nest. Feathers are still a little downy, and their beak hasn't quite grown in yet. But I've noticed them perched on several trees in the yard, searching for an opportunistic meal.

We value these carnivorous birds, because they help keep the snake population under control. I've seen a few harmless, baby tree snakes around, and wondered if they made it into this new fledglings' belly?

Normally, we hear the baby kookaburras, gagging together - which is really them attempting to laugh, but not quite able to, yet. It's very funny to listen to. We didn't hear them this year though, so I suspect this fledgling is a loner. Still, they are very welcome to hunt in our yard, as much as they like.


Thursday, June 8, 2017

All grown up

I wanted to pay homage to the process of growing mulch, and using it regularly, to make our valuable plants grow. So it's time to showcase the evolution of a few fortunate specimens.

What I love about blogging, is being able to go back and see, what we started with - right through to where we are, today. So let's start with a blog post I wrote back in 2015, called Prolific as a weed.

In it, I show some tiny, Old-man Saltbush, plants, propagated from cuttings...


March 2015


I planted 6 Saltbushes, in total, but I'm only showing three at a time. Because they're broken up with an archway. You can see in the picture above, I've mulched them, with pulled weeds from the same bed. I've done this a lot over the years, but especially when I needed to paint the verandah, recently.

Here is what that same row of Saltbush, looks like, some two years later...


Saltbush and verandah transormation


They seem to do well in this space. So much so, the hedge is in need of a trim. Strong wind, or a lot of rain, could see some of the branches snap off. I guess it can be a bit of a brittle, woody shrub, but only because I prune them.

Normally, their branches would entwine, and it's these gnarly weaving branches, which supports them. Treating it as a hedge means, I have to ensure I always keep them trimmed, so I don't lose branches. More mulch for me though.


Saltbush hedge


I selected Saltbush for this side of the house, because it cops the western sun in the afternoon. It lives off rainfall, and the only thing it requires are those manual hedge trimmers.

Some of the cuttings, go into propagation, a little goes towards mulching the hedge again, - but most get spread around various nearby plants. I can probably get several months coverage of the soil, during winter, and a few months in summer, if rain is about. So it does break down quickly.


 Late 2008


I first broke ground on this western side of the house, back in 2008, with Very lazy, "No dig" beds. Yes, look at all that purchased, uniform mulch. I was starting from scratch though, and decided to plant Sunflowers...


Early 2009


Apparently they did well too - set seed, then attracted the cockatoos. From memory though, I did manage to keep a few large heads of seed, for planting the next year. I also think they got attacked by mould, as I didn't keep them dry. Sunflowers haven't been a mainstay, unfortunately.

For a newly establish bed though, I thought it was a success, and even decided to give it a go as a vegetable area.


Mid 2009


It was kind of successful too, for a very small window of opportunity. As soon as the heat set in, however, everything would bolt to seed. This was an exposed, dry area, due to facing the western sun. Notice the small, uniform wood chips - purchased from the landscape suppliers? You won't see those around here now.

Because I learned this was going to be a challenging area though, I decided to try yet another approach...


January 2010


The Great Shading Experiement, was the very first plant solution, I tried, for actively introducing shade to this particular area. I hadn't given up on it being a convenient vegetable bed, just yet.

So I tried growing luffa vines, up cheaply made trellises. They were remarkably productive too, but still required a bit of water to keep it that way. As our gardening expanded further into our property, I neglected this area, more and more. Short of installing a permanent irrigation system - I decided to pick the most die-hard plant I could find, and grow it as a hedge.


Six Saltbush, all in a row


Which has been the most successful approach so far. As long as I keep applying those weeds, and it's trimmings, as mulch, I should get quite a few years from this hedge.

I expect at some point, however, it will get woody, and I may lose a plant. So I have to keep propagating them, to ensure I have something to fill the gap.

On to a different location now - the upper, north facing slope, I have found the most challenging to grow...


May 2011


This isn't that spot. It's the temporary nursery, I made out of Middle Ridge chicken coop - but is demonstrating the plant I'm referring to. It's in that clump of large seedlings, to the left. A carob tree.

So I know it's about about six years old (in the ground) as it wasn't planted until  2011.


 July 2014


It goes to show I either had a lot of faith this plant would make it, or no faith at all - as the next time it showed up in a photograph, was 2014. A whole, 3 years later.

Over the years, I've mulched it with everything I could get my hands on. This particular vintage (above) was bark mulch we once collected for free, from the Toowoomba refuse centre. Since the tip has relocated, and effectively doubled the time it took to collect (40 minutes now) we've stopped.

It was a good thing too, as the finer particles would clump together, and not allow any moisture to penetrate. So not everything that's free, is actually beneficial.


 May 2016


The carob featured again, autumn of last year, as I was out mulching more fruit trees. The post was called Planning ahead, and it showcased my collection of mulching materials again, using what I had available - in this case, a fallen tree or two!

I also managed to toss, what was left of an old pallet and some wattle leaves, around it. This is growing on clay, and my successive mulching, has helped it along.


June 2017


And here is what our carob tree, looks like, as of June 2017. I'm sure if it had a much kinder life of abundant moisture and friable soil, it would be a third, to half size bigger! But I'd rather have a tree growing, than no tree at all. So I have to accept, growing in my conditions, will come with a slower growth rate. It's getting them to live, that's the trick!

In the end however, I still get this...


New pods


...fruit production! The first flush came, at about year 5-6. I didn't put it in the ground straight away, so not sure when it started producing exactly. But it falls within the standard expectation of producing fruit, anywhere from 6-7 years. So I didn't do too badly, for it to start producing on the early side.

This will be it's second round of pod production. It had a pretty good first crop, and the pods tasted nice. Not too sweet and not too bland. I'm attempting to sprout seeds, right now, in hopes I can propagate more of this self-fertile variety.

I would like to be able to dehydrate the next pods, and attempt to make carob powder.


Bamboo - June 2017


I already showed this Bambusa Multiplex, in my last post about Mulching Land. This is what is started from, as a wee baby though...


Bamboo - March 2015


Bamboo grows fast, so long as they can hold onto moisture. I have mulched this new seedling with dried grass - something we have plenty of, in the growing season (if the rains arrive).

I'm glad it has done well, considering some bamboo varieties, do better with a lot more moisture available.


January 2011


In my Summer 2011 another season post, I showed several fruit trees I put in the ground. One of which, was a Brazillian Cherry. It also had the unfortunate luck, of being planted on clay.

Thankfully, it's a tough tree, and I moved past mulching with purchased bales (in the picture above) but I had to start somewhere.


 Fruit


We got our first taste of the fruit in 2015, so it was roughly 4-5 years in the ground for that to happen. I cannot emphasis enough, the importance of selecting hardy varieties of plants, if you're growing in harsh conditions. It really makes all the difference.

Mulching helps, but if the plant you're growing is sensitive to moisture requirements, it's not going to save them. So pick the edibles that will work for your normal conditions.


 April 2016


The next time we saw our Brazillian Cherry, was in 2016, when I wrote about establishing a new plant I propagated from seed. I mulched it with grass clippings, added some old logs, as a semi- retaining wall, and you can even see the Canna Lilies I planted at the side (Yellow King Humbert), as mulching material as well.

I used a bit of sugar can mulch, but only because I was planting a new seedling next to it. I was buying only a couple of bales a year, and if I had some left over, I used it up. But for the most part, it was whatever I could scrounge from the land. I can't see buying bales of anything, now I appreciate what I already have around me.


June 2017 - Brazilian Cherry (right)


Now in 2017, it's gotten to the size, it's blocking the walkway. We didn't get fruit last growing season though, because it didn't rain for months, a heatwave came, and then when the rain finally arrived, it didn't stop. So bees couldn't get out to pollinate. It was just one of those years.

But I'm happy with it's size, considering they grow anywhere from 2-5 metres.


Under the Brazilian Cherry


At the moment, I'm mulching with a lot of coffee grounds, and a lot more woody material. Out of sheer necessity, now the brush turkey's have moved into our area, and love to dig up all our hard work. I can't blame them, it's an easy feast, compared to what the scrub will offer them.

But the heavy wood, means they cannot scratch it back, and our tree gets to stay mulched!


 Mulberry, in full leaf


By far though, our best producing tree would have to be a standard, black, mulberry. They are made to survive extremes, and still put on ridiculous amounts of fruit.

I'm sure we planted it, somewhere between 2009 and 2010, because I have photos back then, of clearing the area. But the earliest image I have of it, is in 2011.


January 2011


I'll say we planted it in 2010, which would make it about a year old, in the above photograph. Mulberries are particularly fast growing, somewhat like passionfruit. Turn your back and it's engulfed something. So it took, no time for it to dominate the area, we set aside.

In the beginning, our Mulberry, really had to contend with some pretty awful conditions...the soil has been scraped back to build our house (2007) and it was dotted with little eucalyptus saplings.


September 2012 - Mulberry, centre


We used those saplings as nursery trees for the Mulberry, in an attempt to reduce evaporation in summer. But our strategy was always to remove the scrub and allow the Mulberry to dominate. The picture above was taken in September 2012. We wanted to use this area more, giving the mulberry more space too.

Of course, our plans are to constantly develop an area. Which often takes years!


March 2015


In 2012 we were clearing more room for the Mulberry, and in 2015, I was digging a new swale to help irrigate it. Ideally, you would plan this stuff out, and build the swale first, but I hadn't even stumbled upon Permaculture design, when we planted the Mulberry.

We're just fortunate, where we first sited it, didn't require us interrupting much...


Digging the swale


When I started digging the swale, we had another Mulberry planted, lower down the gully. So it was somewhat of an experiment, placing the soil, so close to the Mulberry trunk. I wasn't sure if it would cause collar rot, or not - and we'd lose the tree.

Thankfully, nothing bad happened to the Mulberry, and it continued to produce fruit. Being the start of winter, it's perhaps not the best time to photograph a Mulberry Tree, but this is what it looks like today...


June 2017


It's losing it's leaves which makes it a little hard to define, but it's a lot larger than it was, back in 2012! And of course, it's mulched by one of the best soil conditioners around - deciduous leaves. In this case, it's own.

I wrote about mulberry leaves, being a nutrient bomb, back in late June, 2015.


June 2015


It's one of the best reasons to consider planting a deciduous tree in the garden. Here in Australia, with mild winters, we can have evergreens all year round. But having a deciduous tree means, we get a flush of nutrients, dropped on the plants we want to fertilise. No trips to the landscape suppliers necessary. Nature provides it all.

I hope you've enjoyed this short trip down memory lane. It's amazing how quickly the years pass by. At the moment, we're doing more earthworks, which is why it's takes me so long to post anything. Winter is the perfect weather for digging. But new plants have gone into the ground, which I hope survive too.

I should remember to take the camera out and get some more photos, for my next update - in about 5-6 years time.

Do you have a favourite tree or plant that excels in your conditions? Mulberry would have to top my list, with Carob, a close second.


Monday, June 5, 2017

Mulching land

Buying mulch gets expensive to cover acreage, but it's also, somewhat unnecessary. As land can grow plenty of plants to substitute for mulch. It's the only way we've been able to build soil and protect it from drying out - by growing our own mulch.

Of course, it's not always easy to do, if you live in extremes like we do. So I recommend starting with some hardy plants, which will continue growing through extremes.

I'll share the ones I grow here soon, but first, a trip down memory lane...


Winter 2014


Three years ago, I shared a proposal for a Landscape Rework, we intended to pursue. The picture above, shows just how emancipated this landscape was. We built a swale to hold water, and divert it away from the house, lower down the slope. Unfortunately, rain was only sporadic.

Without water most of the time, we had problems growing vegetation in this area. It was on both clay and sandstone, with very little topsoil.


 Winter 2014


And  where we intended planting a row of native trees, along the walkway, there was a drop off, down hill. So retaining water, was going to be a challenge. It all had to come from the swale, and what moisture we could keep on the flat land, as long as possible.

So perhaps it was a tad ambitious to consider what we wanted to develop it into...


Winter 2014 - swale (right) walkway (left)


Did I mention this is also a north facing slope (south facing, for the Northern Hemisphere)? Crappy soil, little rainfall, and also receives sun, year round.

This has been the most challenging aspect of our land to develop. I've killed a lot of plants in this area, learning what would work, and what wouldn't. By the way, those pear trees have to go. I learned they're not flowering, because they're not getting enough chill hours. I'll try relocating them, down a shady, winter, gully.

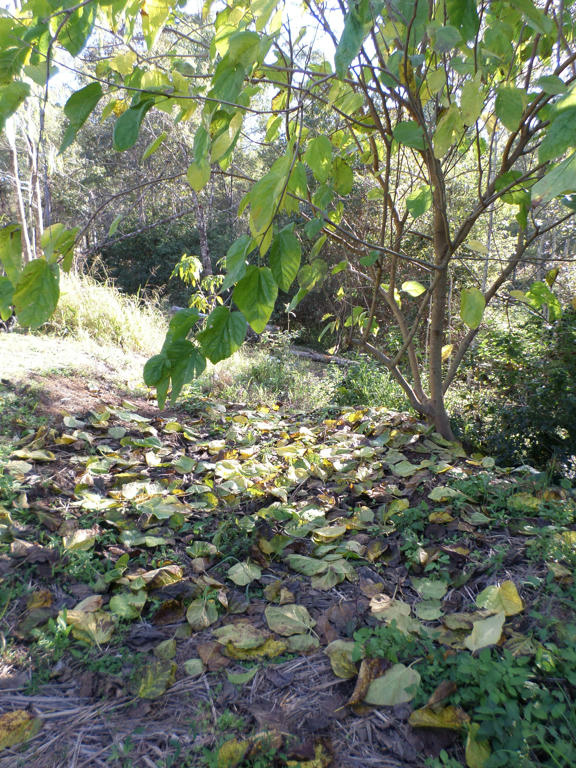
Three years later though, this is what that same landscape, looks like...


 Winter 2017


What is growing here, is designed to survive these sorts of conditions. So plant selection was key. Secondarily, most of these plants growing, were designed as chop and drop, mulching material. I had to out-number the trees I wanted to establish 3:1, with mulching plants.

I still don't have enough mulching plants in this area, which is why I only have one tree which managed to survive...


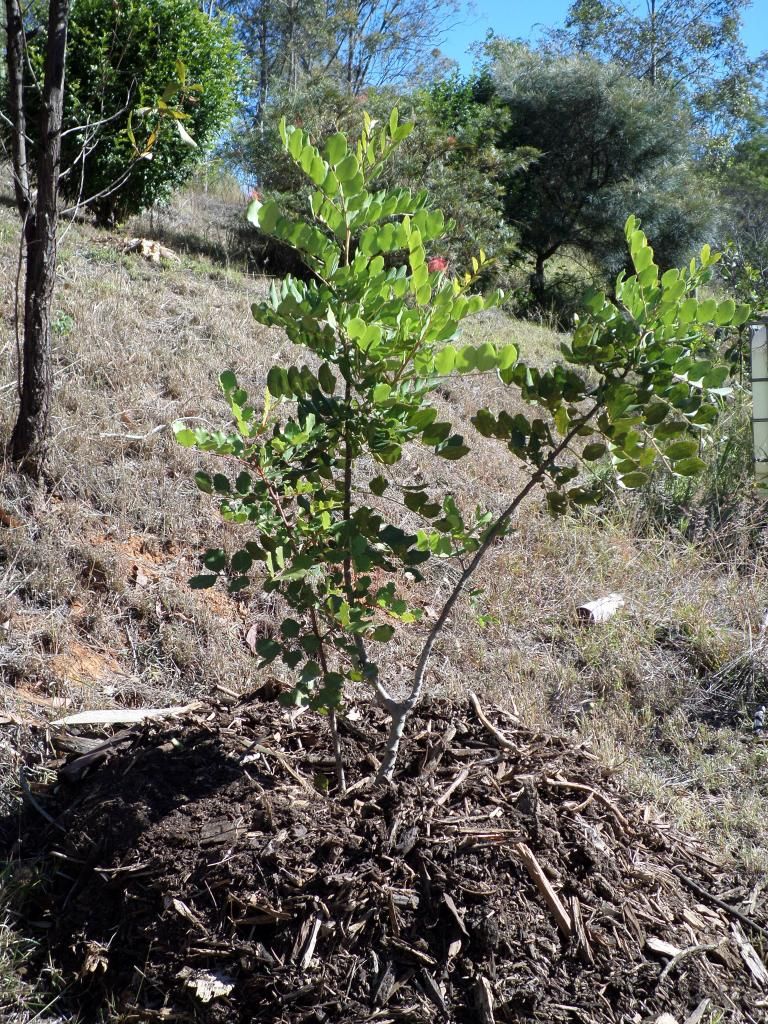
Winter 2017 - Tuckeroo, front (right)


Also known as, Cupaniopsis anacardioides, the Tuckeroo is simply an amazing tree! Not only are it's fruits beneficial to local birds, but it hosts many butterflies and caterpillars as well.

Tuckeroo, is grown as a street tree and car-park landscaping plant, in urban areas, because it seems to cope with extremes. It can grow in clay too, which is why it hasn't died here. Unlike the native acacia trees I planted, which I thought would do well, but melted the first season.


Winter 2017


I've cut back the Lemon Grass (front, right) and Old-man Saltbush (front, left), and mulched the walkway with their leaves. This benefits the Tuckeroo tree, as it's protecting the soil from drying out, plus feeds it too. As it breaks down, it will help create more topsoil.

I've been doing this for three growing seasons now, but I don't nearly have enough mulching plants in this area yet. I'm working on it, through propagating more plants.


Winter 2017 - before the Lemon Grass (rear) was trimmed


In the foreground, is another Lemon Grass, which isn't doing nearly as well as the one, in the background. It's still alive, but I may need to add some additional inputs to resuscitate it.

The soil on this side, is more sandstone than clay, so roots cannot penetrate real deep. I have to focus my efforts, on building deeper topsoil, by adding more mulching material on top. I'm hoping this struggling Lemon Grass will pull through.

I find Lemon Grass can survive on little water, but it does need a year to get it's roots down, first. So watering in the first summer, will see it through to surviving only on rainfall. It's a really fast grower, and the smell of lemon is wonderful, when you cut it as mulch.


Atriplex nummularia


This is the Old-Man Saltbush I was referring to earlier. It's another mainstay as material for mulching, and easy to propagate. It's much hardier than the Lemon Grass, requiring even less water. But it breaks down quicker, because it's less fibrous - at least if you prune it regularly. It can develop more woody material, if you let it grow naturally.

I find when I start pruning Old-Man Saltbush, I have to continue doing so. As it will get top heavy and fall over. When left to grow naturally however, the branches will cross one another, and hold up the plant.

Old-Man Saltbush is used as a fodder plant for ruminants too - although it's recommended as an additional food source, rather than the only one provided. As too much is not beneficial either.


Lemon Scented - Pelargonium citronellum


Another plant I use for chop and drop material, which can survive in this area, is the Lemon scented Pelargonium. But any variety of Pelargonium will do.

I also have an Oak-Leaf Pelargonium, and two flowering varieties. But the Lemon Scented Pelargonium, is by far, the most vigorous grower. Which makes it good for mulching material. It's really easy to propagate as well.

This mulching plant, breaks down the quickest of all, so it's best to grow this plant en mass. A plant or two, won't last very long, once the mulch is on the ground. Especially during summer.


The common rosemary bush, is another survivor, in this area. I grow it more for bee food, and as seasoning for roast. It doesn't grow very quickly to be a mulching plant, but when I do give an annual haircut, I mulch the ground around it. The branches, take a long time to break down, and it's the only care this shrub will get.

It survives on natural rainfall, otherwise. So if you're looking for a die hard, bee-food shrub, you can't go past the common rosemary. This is growing in clay, so you know it's got to be tough. You've got to have some plants which aren't cut back to the ground, to make the area still look lush.


Broken down


This is an area I mulched previously, with a mixture of the Pelargonium and wood material, from a native plant which died. You can see the Pelargonium has all but disappeared, and the woody material is left behind. In my experience, it's good to mix up your mulching materials. Have one that breaks down quickly, but also have woody material.

Otherwise you end up with the above, bare patches. I relied too heavily on the Pelargonium, and now I have exposed soil. This is why I need more mulching plants. I don't have enough to go around yet.

But as I make progress in this area, it has improved, incrementally. The more I increase my chop and drop plants, the better this area is getting.


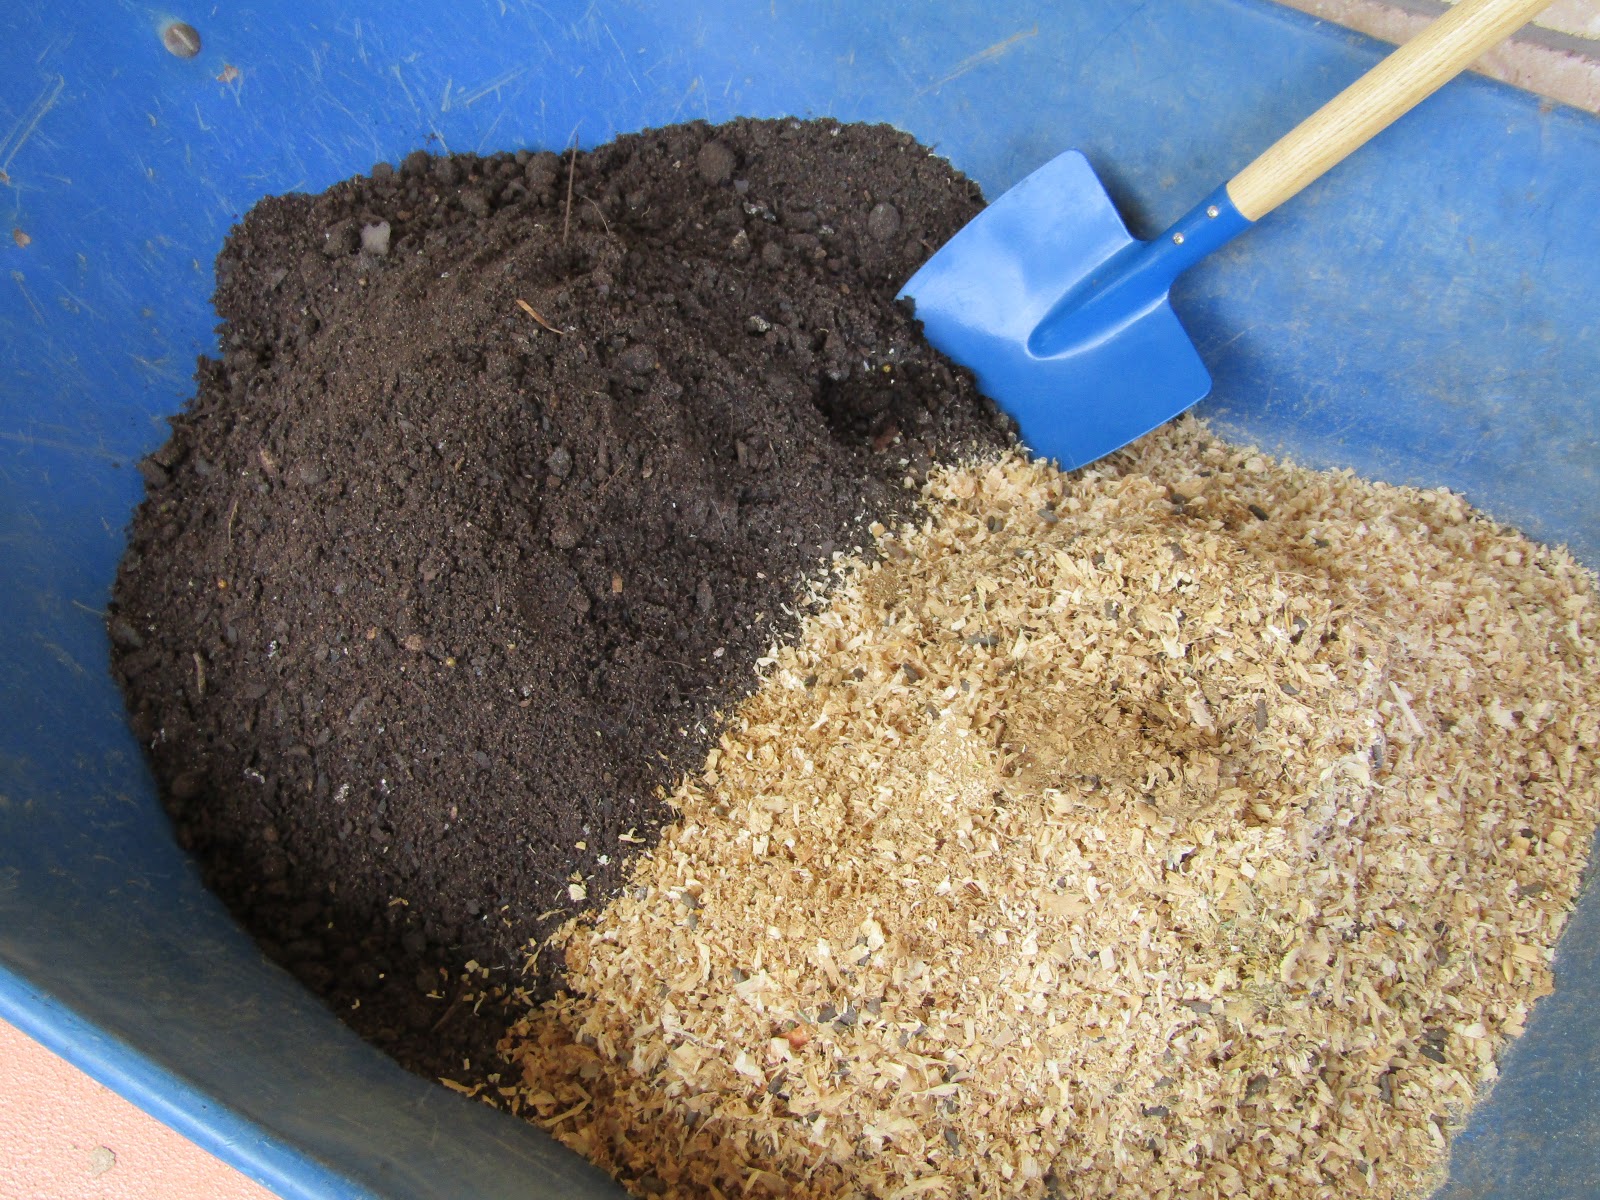
Coffee Grounds, around a Jade Plant


My strategy has been, to grow as much mulching material as we can, and propagate more. But failing to have enough growing on site, it helps if you can bring other forms of mulching material in.

Considering it's a waste resource at my husband's work, we use a lot of spent coffee grounds. It's relatively clean, grows healthy bacteria when it's kept moist, and just adds another layer of "something", that otherwise wouldn't be there.

We've tried free horse manure, collected from other properties, but it brought a lot of running weed grasses with it. So we don't do that any more. Thankfully, we have the humble weed, as yet another prolific resource, I'm constantly using as mulch.
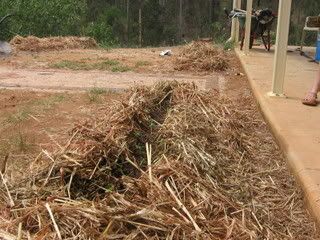

April 2017


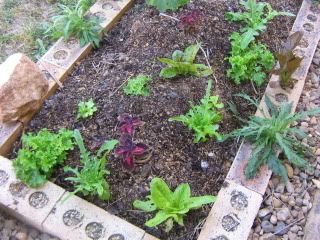
Take this healthy patch of weeds, for example, happily growing away. They're right where I need them to be. Populating an old vegetable bed, we've always had problems with. We had to improve the soil, in a major way to get anything edible to grow.

I'll share the details about that project, in another post, but it's a terrific example of how I use what nature has already provided, to mulch the ground.
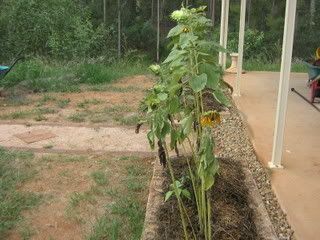

April 2017


I pulled all those grasses and weeds, set them aside, and after amending the bed, put them back on top, as a thick layer of mulch.

Why buy mulch, when my land is already producing an abundance of foliage, I have to do something with anyway? Even if it's not particularly uniform, and contains seeds, it just provides another generation of mulch I can pull as mulch, later on.
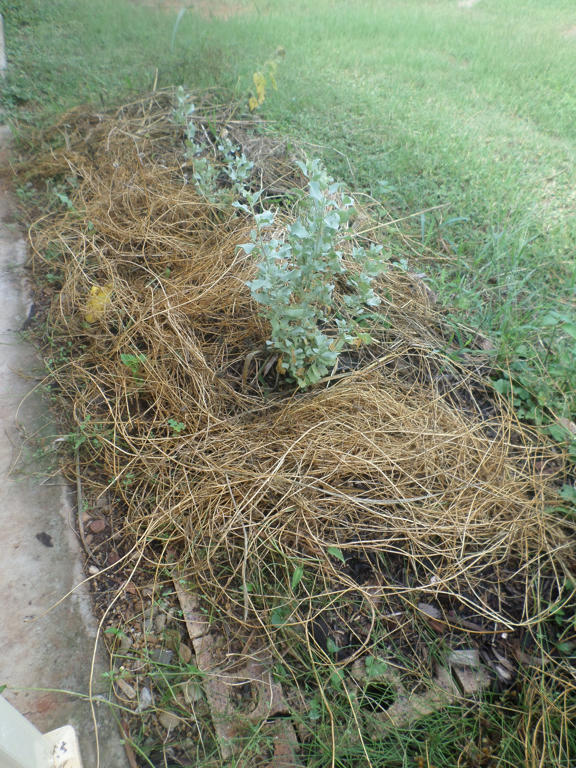

June 2017


The above photo, has given a month for the grass to dry out. It's applied thickly, suppressing weeds for the most part, and more importantly, keeping moisture in the soil.

In this new garden bed, I've had to remember it's important to plant mulch plants, along with edibles - because mulch eventually breaks down, and needs replacing.


 Edibles


Next to the Paw-Paw tree, in this new bed, I've planted Queensland Arrowroot. It grows from a tough tuber, so it can handle periods without moisture, very well. I've used some of it's foliage already, to mulch the Paw-Paw.

It propagates easily, by dividing the tubers which multiply underground. I'm working on building up my number of clumps, by spreading them around the yard.


Arrowroot


The Queensland Arrowroot (Canna Edulis) has very attractive foliage, and I use it to shade annuals in my garden bed too. Which is where this particular clump, is located. So it's not just a mulch plant - it's a shade and windbreak structure as well. Interesting fact: the tubers of this variety, are edible as well.

I haven't multiplied mine enough, to be able to eat them. The tubers are more valuable, as propagation material. I want plenty of mulch material, ready to drop - so the goal is to increase the number of chop and drop plants, before I experiment with eating.


 Yellow King Humbert


I've also used the regular flowering, Canna Lily (non edible) as mulch too. It's extremely hardy, probably more so than the Queensland Arrowroot. Plus it has the advantage of being able to spread, by seed as well. 

The flowering Canna Lily, puts a lot of energy into flowering though, at the expense of foliage. So it's not as plentiful as the Queensland Arrowroot, as a mulching material. But it makes up for it, by spreading seed readily. Once you put a clump in, you'll always have more popping up somewhere.

Which just proves, having multiple varieties of plants growing for mulch, covers a lot of bases. If you only stick with one or two varieties, your options are more limited.


Chrysopogon zizanioides


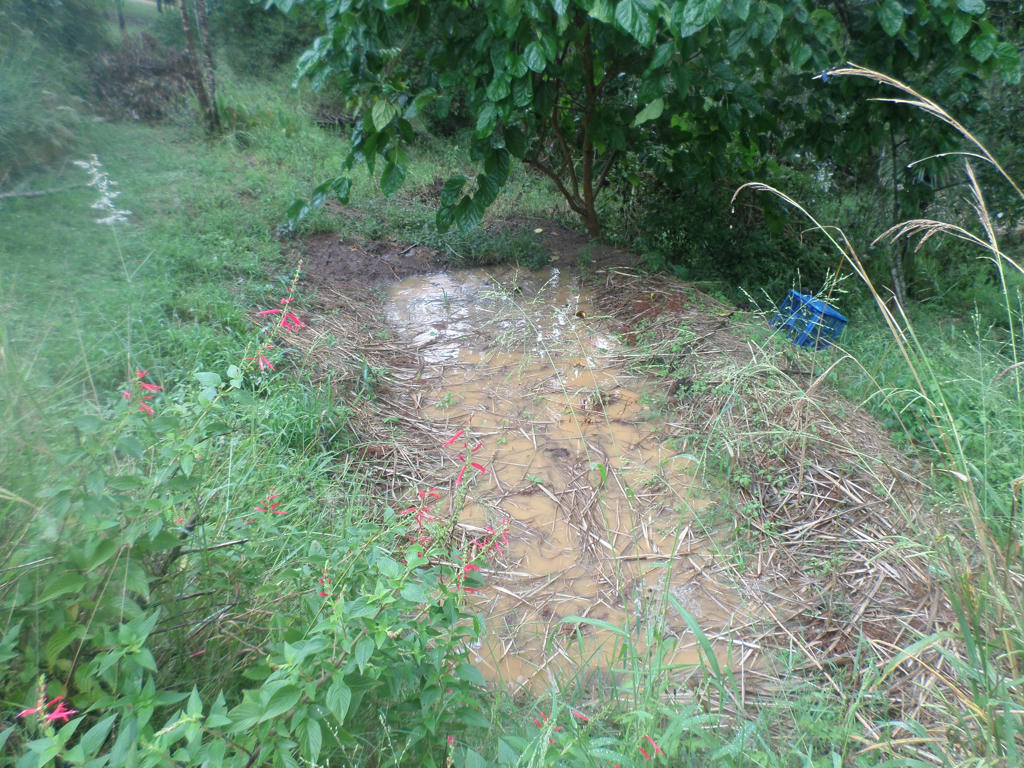
Another plant, I would love to have more experience with, is Vetiver Grass. I've managed to keep it alive in pots, so I can multiply them - but in the field, is proving hard to establish a clump. I suspect it's a lack of water during establishment, because I don't always have the water to spare.

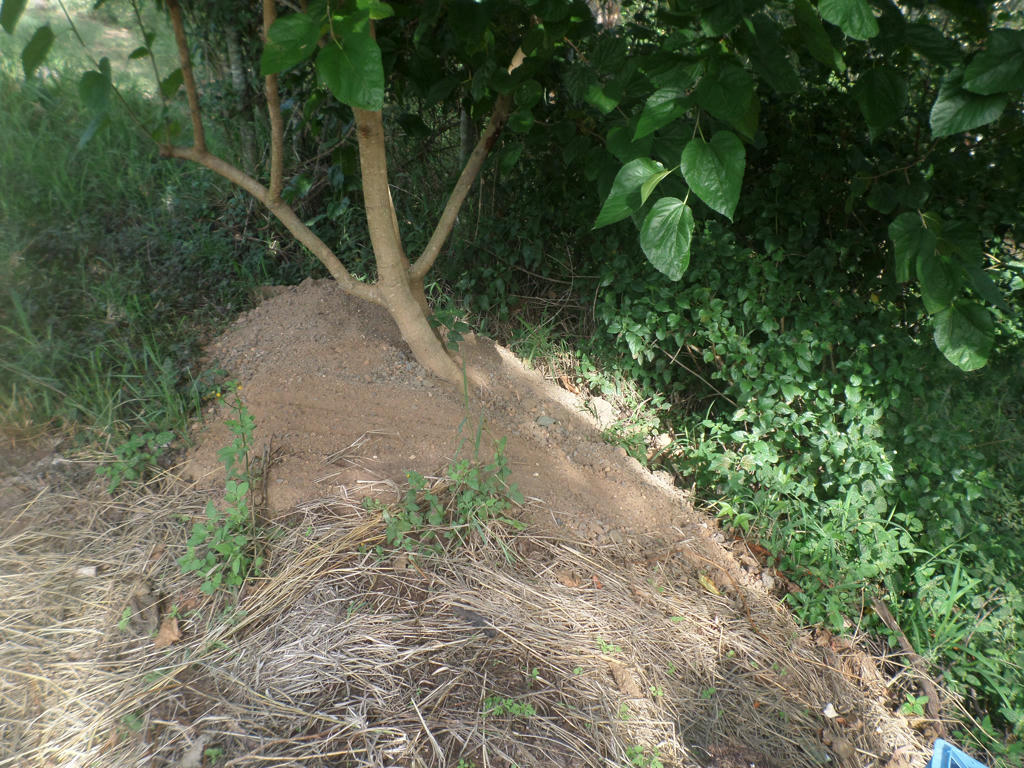
Once Vetiver Grass, gets it's tenacious roots down, however (some have been found to go down, 3 metres) it will be a reliable supply of mulching material. I'm hoping my latest plantings (above) do well. These are planted on the edge of a swale, near the mulberry tree. They survived the heatwave, so let's hope if the frost nips them, they'll come back.

I've read Vetiver is sensitive to shade, so I only have to worry about that during winter, when the sun drops behind the trees. But so far, so good. It seems to be getting enough sun.
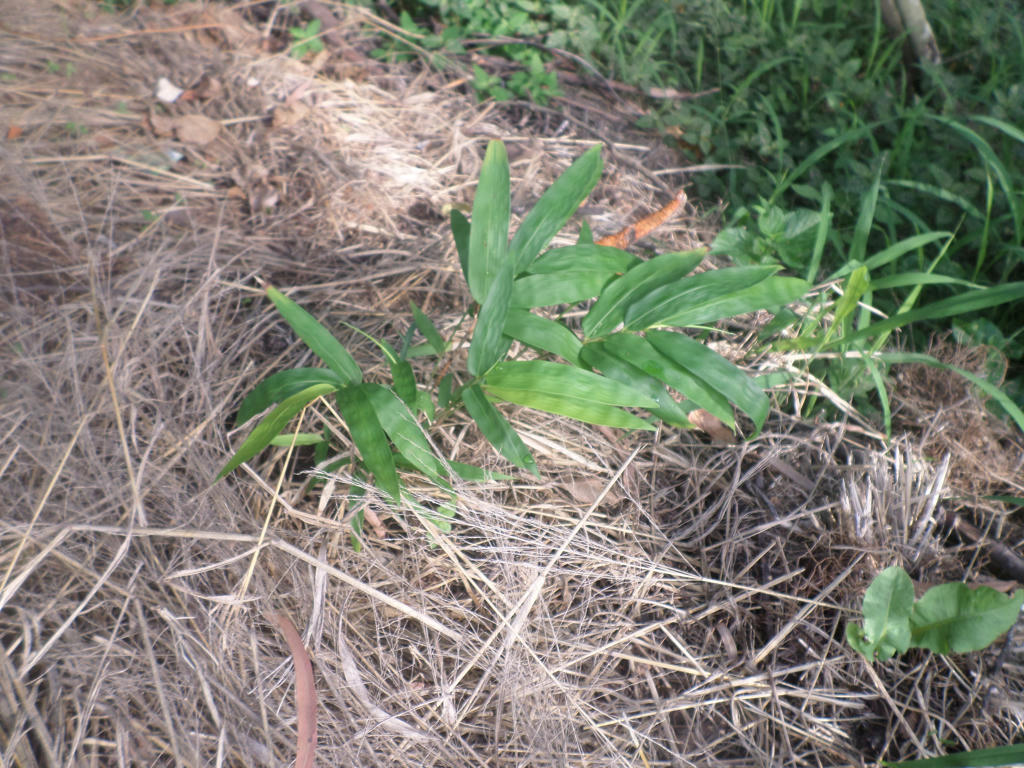
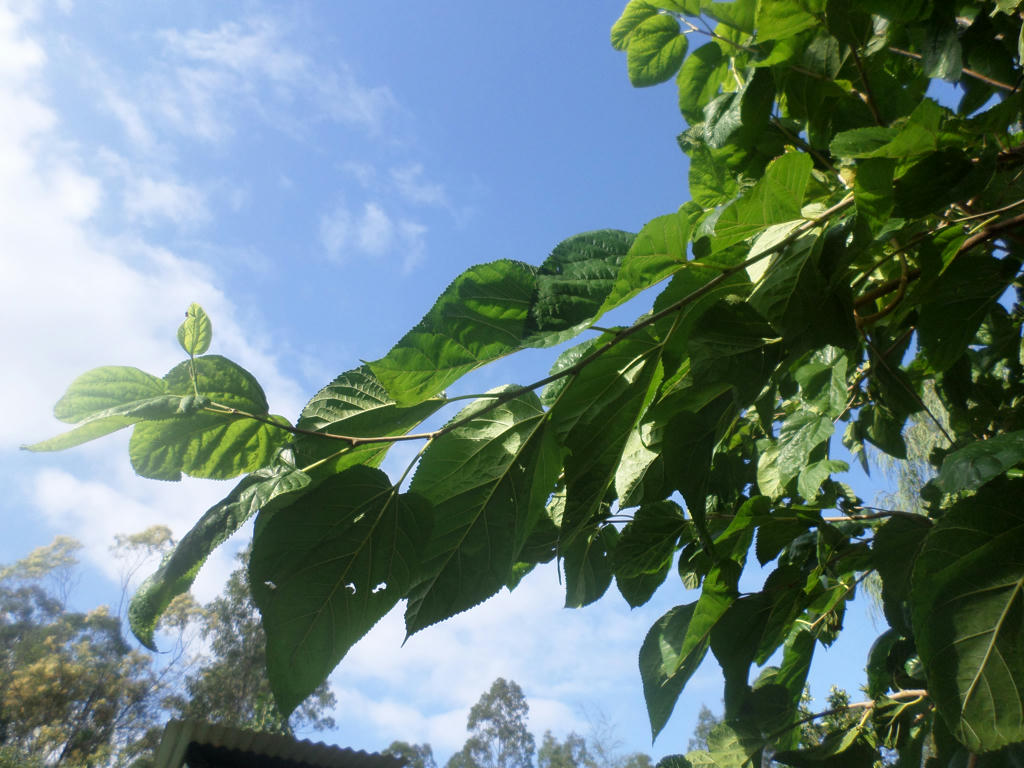
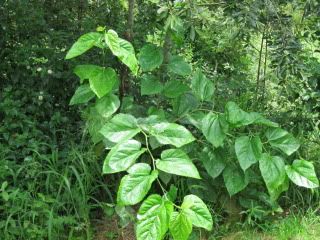

Bamboo


What doesn't mind the shade of the mulberry, and is actually planted under it's canopy, is bamboo. Can you notice it, amongst all that grass? Some gardening advice, recommends removing completing plants, such as grass and weeds, from establishing plants, in order for them to grow.

That advice doesn't work in my location, however. As establishing plants are more in danger of dying from a lack of moisture, than competing plants. It might take them longer to grow with competition, but all those other plants are providing a means to cover the soil, and retain moisture.

This is the Multiplex variety of bamboo (Bambusa Multiplex) which grows up to 5 metres tall. Mine won't make it that high though, as it will be periodically slashed for mulching the mulberry and swale. I have a row of 3 bamboo (along with the Vetiver Grass) to help in that endeavour.


Artemisia absinthium (Wormwood)


An underrated candidate for mulching material, is the humble Wormwood. This herbaceous shrub, grows super fast, and actually benefits from regular pruning.

It's a lot like Lavender and Rosemary - if not trimmed regularly, it grows too woody and dies. But it's a true survivor and easily propagates. A lot of these scented, plants I place near the chicken coops to grow as well. As it deters insects. Maybe not completely, but it helps.


Native mat-rush or basket grass


There are many more plants I've used, which I've failed to mention too. Like Lomandra Longifolia (above) and Dianella Revoluta, which is a flax lily. But they are more slower growing, requiring a trim every two years - so cannot be relied upon, regularly. I also use Pigeon Pea, Acacia and Leucaena trees, for woody materials, as well.

I have a fun, follow-up post, recounting the growth of several plants, I've kept alive over the years, due to mulching with what grows on our land.

To summarise briefly though:

  • Choose a variety of mulching plants, that will grow in extremes

  • Plant en mass and chop regularly

  • Grow enough, to always keep your soil covered

  • Use pulled weeds, grass, and imported (clean) waste products, before buying mulch in. This will save A LOT of money.


Do you have a favourite mulching plant, which features in your garden?