
If you're someone who takes a while to complete tasks, then chances are, you'll be successful at propagating pineapples. And here's why...

Propagation material
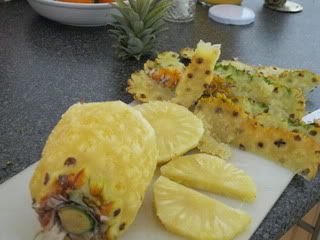
First of all, we start with the pineapple top, or sometimes called the crown. Technically, it's the bracts, or rosette of leaves, which grow in a spiral on top of the pineapple fruit. It's these bracts, we need to propagate the plant with.
At the fruit store recently, we purchased a triple header - meaning it sprouted three separate rosettes, from the one pineapple fruit. It was a good investment, as we planned to get three plants out of it. First, we chopped the top from the fruit, and it sat on the bench for a week and a bit. I honestly can't remember how long. Pineapple tops last for ages.

A little too soft
Now YOU don't have to leave them on the bench, for that long. It's just something which happens around here. By the time we got to it, the flesh left on the crown, was so soft, it was extremely easy to pull out the core. But you don't want to keep the flesh on the crown indefinitely. As this can grow mould and rot the parts you want to sprout roots from. So plan to remove all yellow pineapple flesh, prior to propagating.

Dividing
You can skip this step if you only have one rosette to deal with, but if you have more, simply pull them apart with your hands. Or a knife, if that's easier. The fibrous core is what we want to sprout roots from, and they need a little extra treatment to do so successfully.

Less is more
The rosette on the left has been treated, by removing any yellow flesh, and pulling off the leaves, one by one. So you're left with a fibrous rhizome and a few leaves. This rhizome, is what gets planted under the soil to sprout roots and grow subsequent new leaves. So don't worry about losing too many leaves in this process.
In fact, I try and take off as many leaves as possible, because it helps to keep the plant upright, before the roots have a chance to secure the soil. Otherwise you end up with tops that fall out, or lean too much. Especially if they're exposed to the wind outside.

Prepared
These are the three pineapple tops, freshly prepared and ready to go into the soil. Now you can prepare the tops like this, right after you eat the pineapple, or whenever you get around it - like we do. However, there's another step before it can make contact with moisture. Which is to leave it to dry, for at least three days. This is so the fresh rhizome you've just created, has a chance to callous over.

Ready to plant
These are the same pineapple tops, after three days. They're now healed over, and won't grow mould or fungi, which could rot them, when they come in contact with the damp soil.
Which is why you should also plant them in a free-draining potting mix. Watering them only when the soil needs it. Pineapples actually need very little water to grow. In fact, I would say too much water is probably what kills most pineapple propagation attempts.
Their leaves also cannot handle strong fertiliser, so never feel like you must pamper your pineapples. The best fertility to give a pineapple, is to position them near other plants, which will drop leaf mulch. Or provide your own mulch, with the odd banana skin or other organic matter on the soil.
2011
In an agreeable climate (they prefer subtropical conditions) they can fruit within 24 months. Maybe that's a long time to wait, but have you ever tried fresh pineapple? Sweet sunshine in your mouth, and so tender, you can even eat the core! That's why I keep propagating pineapples. When we tried our first in 2011, I was destined to continue propagating them.
If you don't have a subtropical climate, you could try experimenting with micro-climates, using heat sinks, such as north facing walls or any kind of rock structure. If you're fortunate to have a greenhouse, even better!
Happy propagating, and may all your pineapples, grow fat and sweet.
Oh dear! I think I have done just about everything wrong with propagating my pineapple top. I just plopped it into a pot with some plant growing medium without drying it. And I have probably been over-watering the poor thing. Well thanks to you Chris I now know better for the next pineapple top I plant.
ReplyDeleteI know I've killed pineapple tops I kept in pots, which had successfully rooted. I was just waiting to plant them out. Only in the meantime, I over-watered them and they rotted in all that wet soil. We learn the hard way, lol. ;)
DeleteOh I don't think we can grow pineapples here! :( Great tutorial though. Perhaps when we build a green house. one day. ;)
ReplyDeletexx
Thanks Emma. I can understand the trepidation, if the climate isn't suitable. I do so admire Sepp Holzer though, for his ability to grow edibles where they normally shouldn't grow. It keeps me experimenting in the garden, but then I have the time to. I know you're busy with study. :)
DeleteThank you Chris! That explains why the ones I have neglected have grown the best. We usually lose them to frost but will try to put them in a frost-free spot in my next garden :)
ReplyDeleteOh my Liz, I'm a bit slow on the uptake. Late to reply. Sorry.
DeleteI'm glad you're still persevering with them, despite frost. Because I'm sure one day you'll be rewarded with pineapples, if you keep experimenting.