Monday, February 15, 2016

Choc-Chip

I'm going to share with you, my Choc-Chip Cookie recipe, gluten-free style. I've found when I bake my new Simple Bread, I can slot my cookie making in, after I've kneaded the bread. Because this recipe requires refrigeration for about an hour, before baking.

I like to find ways I can double up my baking in the oven. The bread hogs it first, then the cookies get their turn, last. This way, I only have to clean the bench ONCE after everything is done!


One bowl wonder


What I also like about my cookie recipe is, its not such a tough dough, I can do everything in one bowl, mixing by hand. I'm not trying to be a purist, or anti-technology. I'm just plain, lazy! It's that simple. If I only have to clean one bowl, one bench and one spoon afterwards, I'm extremely happy.

I might have to use my arm muscles a bit, but once you're over forty, that's actually a good thing! Because if you don't use it, you lose it, quicker than any time in your life. It also makes that first warm cookie out of the oven, all the more rewarding too.

So onto my cookie recipe. Any gluten free flour can be used in this recipe. All except for coconut flour, as that's a real moisture sucker. Besides, it already has desiccated coconut in it, to give the cookie texture.

Ingredients:

125g softened butter (I use, regular salted)
1 cup sugar (half raw, half castor - use whatever you've got)
****  ****  ****  ****

2 eggs
1/2 teaspoon vanilla essence
****  ****  ****  ****

1 cup white, Gluten Free plain flour (I buy mine from ALDI)
1/2 cup buckwheat flour
1/2 cup sorghum flour
1/2 cup desiccated coconut
1 teaspoon bicarb soda
optional 1/8 teaspoon xanthum gum
****  ****  ****  ****

3/4 to 1 cup choc chips (to taste)


(I find the cookies don't really need the gum, so try it without, at first. If you want extra congealing factor, add the gum)

1. Place first part of ingredients, above the asterisk, into a bowl. Beat.
2. Add second part of ingredients to bowl and beat again. (Image above).
3. Add dry ingredients in the third section, and mostly combine.
4. Finish by adding choc chips and mix until all dry ingredients are combined.
5. Place in the fridge for a minimum of 1 hour.


Ready to go


6. When oven is free, set to 160 degrees celcius, fan forced. 180 if not.
7. Grease and line 4 baking trays.
8. Use a teaspoon to take about a walnut size of dough and roll into ball.
9. Position on trays so they are not touching, as they will spread when baking.
10. Fill all oven racks with trays (3 in my case) and bake for 8 minutes.
11. Turn trays and also alternate top to bottom, bake for another 8 minutes.
12. Keep setting timer for 8 minutes and rotate trays. Total cooking time will be approximately 32 minutes, but all your trays won't stay in that long. Add your extra tray when space becomes available, because you will remove trays as each top one, reaches a nice golden brown colour. Like below:


Done and delicious!


13. Leave to cool on trays for five minutes then transfer to rack.
14. Makes between 38 to 42 cookies.

My kids love to eat these straight, or their favourite is dunked in a cup of hot chocolate. I pack these in my daughter's lunch box for school, and I also like to take some if we journey into town. If you're an active person or child, these are treats worth having in the house on a permanent basis. They're a little bit sweet and a little be filling, so you won't be reaching for worse things during the day.

If we go longer than a few days without these in the house, we crave far sweeter things. Because we're active people. We eat proper meals too, these are just handy if you've been extra active. Which we always seem to be.


Sunday, February 14, 2016

Simple bread

I'm an avid fan of making sourdough bread. It's the best stuff you can make for your family. So why have I stopped making it? In a nutshell, we've stopped eating a lot of bread. Being gluten free, I gave it up completely, David would rather reduce his carbs by eating a wrap, and our kids will eat bread, but not a lot.

What this meant was, my sourdough starter had to be revived on numerous occasions. This was after keeping it in the fridge too. Instead of giving our kids the yucky store bought bread though, I decided to start baking with bought yeast instead.


Light and fluffy bread - made today


I've never been a fan of the yeasty smell, and taste of bread, made with yeast. But I stumbled on a way of making it less so. Like the sourdough bread I used to make, a "sponge" is made an hour before I want to make-up the bread.

Which is basically adding 1 cup of baker's flour, to one cup of slightly warm water (plus a smidge extra) to which 1 teaspoon of yeast and 1 tablespoon of honey is mixed all together, in a bowl. Then its covered with a plate, and set aside for an hour (during average temps) and it bubbles up.


Sponge is ready


The benefit of this process is twofold. Not only does it make the bread lighter and fluffier, but it also puts half the yeast to work an hour earlier. Which takes that powerful yeast smell out, which I so dislike when making bread with yeast.

I have to knead the stuff so I've got to like the smell!


Add ingredients to sponge


Then to the bowl of sponge, I add another teaspoon of yeast, 1 tablespoon of oil, 1 tablespoon of powered milk, 1 teaspoon of salt and 1 cup of baker's flour.

Mix together with a spatula, to form a thick cake batter. Then turn onto the bench, which has been floured with another cup of baker's flour.


Turn on to the bench


Start to incorporate the extra flour, as you start kneading. Now it depends how moist the dough is, in your location, but you may not need any more flour. Or you could need another cup. Use your own judgement for how much flour, but you basically have to be able to knead the dough, without it getting stuck to the bench and your hands. Add little bits at a time, if you do need more.

Once you've incorporated all the necessary flour to stop it sticking to the bench, knead for 10 minutes, until a tight ball is formed.


After kneading


As you can see, the ball is about as wide as my hand. It's also round and smooth. Now place the dough into a bowl, which has been oiled and cover. Set aside for roughly an hour, or for the dough to double in size.

I find because I kick-start the first teaspoon of yeast in the sponge, this doubling process is much quicker than if I don't kick-start the yeast. So check on it before the hour is up (45 minutes) to make sure it isn't over active. You don't want to use up its gumption, before you reach the second prove.

Once its doubled, punch the dough down in the bowl. Turn it onto a clean bench and knead for about a minute. Roll into a fat cigar shape, and turn into an oiled bread tin, seam side, facing down. Then let rise in a slightly warm oven (not over 50 degree Celcius) with a bowl of warm water at the bottom of it. I like to set my oven to just under 50 degree C, run for 4 to 5 minutes, then switch it off before putting in the bread, for the second prove.


Cooling off


When its reached the top of the tin (about 45 minutes) remove it from the oven, then preheat to 200 degrees Celcius. Bake for 25 minutes. Even though I have a fan forced oven, I still like to turn my bread around, half way into baking. Once cooked, turn immediately from the tin, onto a rack, so its laying on its SIDE.

This is what professional bakeries do. They never leave it in the tin to cool, and they never place it on its base to cool on the rack either. Bread is always left to cool on its side. This is to avoid a soft bottom, which leads to slices slumping sideways, losing their form after slicing.


Slicing ~ note how they keep their form,
instead of being misshapen


Wait for the bread to completely cool before slicing, or you'll end up with misshapen bread too. If you simply must have warm bread though (my daughter does love this) wait at least 15 minutes after its come out of the oven before slicing.

I actually slice my bread by hand and have gotten pretty good at it, over the years. I read about people using bread slicers and bread machines to make their bread with, and I simply cannot justify the cost at our house. We're not huge bread eaters any more, and I actually enjoy the hand-eye coordination of slicing.

If you happen to use any mechanical devices making your bread at home, don't feel bad about it. I'm not judging what's appropriate for your home. If it means the difference between making bread and buying it, get the machines that will help you do that.

I've weighed-up whether these machines are suitable for our house though, and while they will save me some time making bread and slicing it, there's no other reason for purchasing them. Thankfully, I don't have injuries to my hands (yet) and I only have one toddler to wrangle at home. So everything is manageable without having to buy machines. Though I would change my mind, if circumstances required it.


Storage


This is how I store our bread afterwards. Half goes into a container, and stays on the bench - the other goes into a freezer bag, and goes into the freezer. It comes out after a few days. In our hot weather, it doesn't last on the bench, longer than a few days and we don't go through a whole loaf, in that time any more.

So as a family, we've gone from lovely fresh sourdough bread, that wouldn't see the inside of a freezer, to this new arrangement. It's definitely a step down from where we were, but its also better than store bought bread too.

Have you had to change how you make bread over the years? Perhaps this involved purchasing machines too. Do you feel it was worth the investment for your circumstances?


Monday, February 8, 2016

Technical glitch


Oops! I recently changed my email address, and forgot to change it in my settings. So I've missed all the lovely comments, people took the time to write!

Terribly sorry about that. Unless I'm really busy, I try to reply to comments promptly. But I've rectified the problem now, and will endeavour to find all the comments I didn't get notified of.

Back to our regularly scheduled program...


Sunday, February 7, 2016

Summer garden

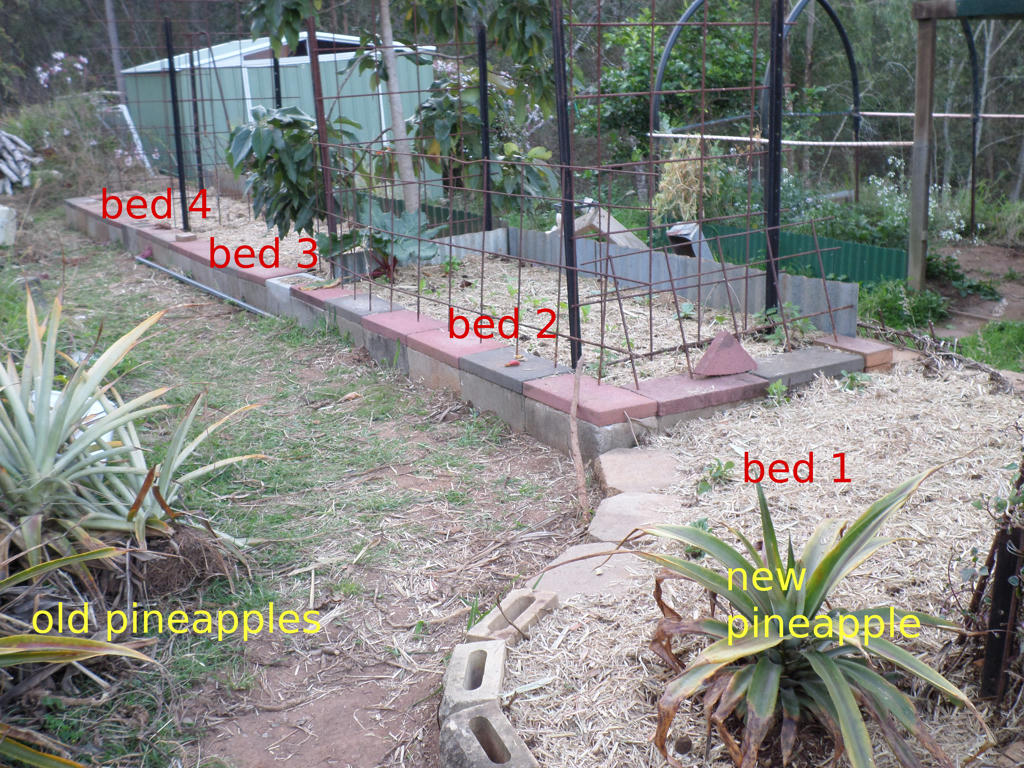
As to be expected, my summer garden isn't as promising as my spring one was. Everything is dying back, due to sporadic watering, bouts of heatwave, and pests who see the stress of plants, and move in. So my garden beds went from looking like this, in the second month of spring...


Neat and tidy in October


To looking more overgrown, but surprisingly, with very little produce to show for it now.


 Same row of beds in February


I harvested sporadic tomatoes, beans, beetroot, radishes, rubarb, zucchinis and some beautiful spaghetti squash, as well as herbs, over the growing season. But it was a battle all spring and summer to keep the garden hydrated enough.

What you can see in the image above, are the flowers of my Jerusalem artichokes.


 Jerusalem Artichokes


The rhizomes, of which, will be ready to harvest in late autumn/early winter. I will also have my Yacon, which will be ready to start harvesting around the same time. So there's more to come from my vegetable garden, but this season hasn't been without its problems either.


Pumpkin on a hot tin roof, to cure the skin


This is our Kent pumpkin and is one of our favourites to eat. This was the largest one to be produced. I have another four smaller ones to harvest, and that is all I've managed to grow, on three separate vines. If I were to boil it down to the major culprit of such a dismal crop, it would be a lack of balanced nutrients in our soils. My cucumbers barely managed to produce two fruits, on 4 separate vines, either.

So my task is making better soil improvements, but also exploring a better way to water - as it was a full time job to cart water by hand, to the garden every day.


Spaghetti squash vine


These are the last of my spaghetti squash, and I will be sad to see them gone. They were a delicious meal to have with a white sauce, made from coconut cream and chopped home grown herbs. This will be a stayer in my vegetable garden, for years to come. I just have to work on improving the soil, so I can get more to produce on the vines.

Blossom end rot, was the culprit. I was actually able to get these two remaining fruits to produce, after delivering a milk spray to the leaves of the vine. I also added some magnesium, by watering the base with an epsom salt solution. That intervention, saw these two fruit emerge, which makes me very happy. Especially since I'll be having spaghetti squash, for dinner tonight!


Nasturtiums


My nasturtiums are still producing flowers, which is great to see, in an otherwise shrivelled bed. As the season has progressed and I've gotten busier, I haven't been able to water as regularly as I was. Even the rains we received, while welcome, wasn't enough to water deeply into the soil.

I'm going to completely rethink this area, as some interventions are required, if I want to produce food on a consistent basis.


Summer fruits


Here is the spaghetti squash for dinner tonight, but also two mangoes I picked from our tree. Its a tiny tree and I wasn't expecting much from it, but its produced 3 fruit. One is already ripening but the other just fell off the tree, as I went to inspect it. It may, or may not ripen on the kitchen bench.

I will give the other mango a try, after a few days on the bench. This was a lovely surprise to find in our garden. Especially since our avocado tree, managed to drop all its developing fruits.


Space invaders


This is why we had problems growing vegetable beds in this particular area, before we put in the retaining wall. The passionfruit vine would invade from above. We keep saying we're going to take out the passionfruit vine, but it does give us food we can eat, as well as the chickens, so its tough to consider its demise.

Maybe this winter? I have plans to put in beds under the wall, but hopefully they won't be ordinary beds. I don't want to soften the soil under the wall. So it will have to be raised beds, with a barrier, to suit this area.


Bananas and herbs


The banana plants we rescued, from having to cut the parent tree back, have gotten so big, I've had to transplant some into boxes. We should be able to get these in the ground, in the next few months - hopefully. We have to cut out some lantana first!


 Banana trees cut back to make way for retaining wall


Overall, if I hadn't decided to tackle the overgrown garden beds, back in August, and turn them into vegetable production areas again, I wouldn't have grown anything. So that can be considered a success! However, what I was able to produce, was sporadic and while utterly enjoyable when available, it wasn't enough to justify the labour involved.

When you tend a piece of land, you have to be able to expect a reasonable amount of calories to come out of it - to compensate for the expended energy. I don't feel I've achieved that. Not YET anyway. But I've learned a lot from this growing season, and hope to change our system to better meet the conditions.