Thank you to all those who joined me at the workshop today. I had a lovely time, and I hope you all did too. There were some familiar faces and some new ones too, and we all got busy with the leavening! I appreciate there was a lot of information to take in, so I'll share it here again, for your reference.
Retarding, or delaying fermentation, is the process of slowing down and even halting the leaven. This is achieved through refrigeration or freezing, using the right storage containers to protect the dough. Retarding fermentation will change the taste and texture of the final product, as it has a longer window of time to ferment.
It will be more chewy and a little more sour, as a result, but not unbearably so. In many regards, this is beneficial to things like dinner rolls, or picnic loaves. Where they will perfectly compliment soups, casseroles and sandwich spreads.
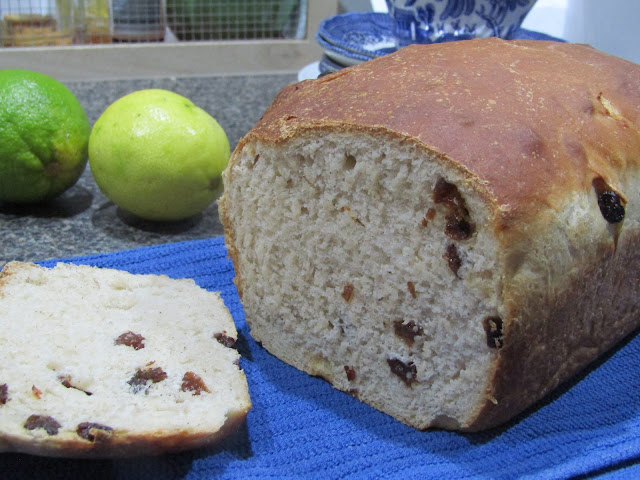
Light and fluffy sourdough, is the one I make when time permits (above). You will need to be familiar with that process of making sourdough first. Which can be found on my Soughdough page. It takes you through the step-by-step process. Once you understand how to make a dough, from the starter - this dough stage is where the two different options for retarding fermentation, begin.
~ After the first knead of the dough for 10 minutes ~
- Place dough, into an oiled bowl, large enough to double in size. Cover as normal.
- Transfer to the fridge, and store anywhere from 1-3 days. Be sure to watch after 24 hours, to make sure it doesn't overflow the bowl. If so, prepare to bake early, or consider a larger bowl next time.
- When ready to bake, remove from fridge and bring to room temperature. Anywhere from 2-4 hours, depending on ambient room temperature.
- Remove from bowl, shape the dough and place into baking containers (or trays) as per the usual method. See the Sourdough bread tutorial.
- Prove again, covered and in a warm/humid environment, for up to an hour. Or until doubled in size.
- Baker per the Sourdough bread tutorial (above).
~ After the first rise of the dough, from 4-8 hours, or doubled in size ~
- Shape dough and place into oiled containers. These can be glass pyrex (rectangular or round) and used to bake later on. Or plastic containers with a lid. Always cover containers with matching lid, or, damp tea-towel or cling-wrap. See Containers for further information.
- Place straight in the freezer, in an upright position, until frozen solid.
- Recommended time limits, for freezer storage, are in the list (below).
- When preparing to bake, remove from freezer the day before - then let sit in the fridge overnight. Remove from fridge and allow to come to room temperature, 2-4 hours, depending on ambient room temperature. Let rise in a warm/humid environment, for an hour.
- It will be ready once doubled in size, and baked, per the usual instructions. See Sourdough Bread tutorial.
It's important to remember, you can still bake dough with a slight chill, however avoid huge temperature differences between the centre and outside, of the dough. As this will cause uneven baking, and the possibility of a doughy centre. Which is why the transition between freezer and fridge, is necessary.
There are a few recommendations with the process of retarding fermentation, for the best results:
- Fridge storage, best used within 1-2 days. Can go to 3 days, but watch for overflow.
- Freezer storage, best used 1-2 weeks. Cover completely and watch for freezer burn.
- The longer it ferments, the chewier and stronger the flavour. Which can be desirable in certain recipes - just be aware and experiment.
- Always wake dough from freezer, by placing in the fridge first. It needs to thaw evenly, before reaching it's final rise.
- Times given for waking up dough, are estimates. It will always depend on the ambient room temperatures in your environment. The warmer the temperature, the less time required.
- Always proof room temperature dough (ie: after it has transitioned from the fridge or freezer) in a warm-humid environment. As the dough is more prone to skin and rise unevenly, the longer it's left to ferment. Consider using the oven method below, to create the perfect conditions.
- Set oven 50 degrees Celsius, with a bowl or tray filled with boiling water, placed on the bottom shelf. Leave oven on for 5 minutes. Place dough in oven (middle shelf) close the door, then switch off immediately. You will not need to cover the dough for proofing, as it has enough moisture to prevent a skin forming. It's also not hot enough to cook your dough.
- Another option to prevent skinning, is to spray your dough with a fine mist of oil.
Please bear these recommendations in mind, when it comes to making my sourdough donuts too. They're very convenient for a freeze stash, when you're suddenly notified of visitors coming the next day, and you don't want to race to the shops.
Still come, is all about making those delicious Sourdough donuts.


No comments:
Post a Comment
Thank you for taking the time to comment. I love reading what you have to share. Gully Grove is a Spam free environment though, so new commenter’s only leaving hyperlinks, will be promptly composted.