Thursday, May 12, 2016

Leibster award

Thanks to Liz, from Eight Acres, for nominating me for the Leibster award. I enjoy reading Liz's blog, as their climate is very similar to ours, and she attempts to find natural solutions to challenges in life. She also has a lot of farm critters which I enjoy reading about.


I received a Leibster award back in 2011, and discovered they now included 10 questions. Which I think is kind of fun! So after writing my answers, I look forward to creating 10 new questions, and nominating the recipients at the end too.

1. If you had a big lottery win what would you do with it all?
I'd pay off the mortgage, so my husband could take the time to swap careers, as he's been wanting to do. I'd also purchase some commercial land on the edge of our local retail district. Where I'd set up a permanent farmer's and artisan market. It would be designed with permaculture principles, including a community garden and picnic areas too. It would be run by a group of members, elected by the community, which would become a not-for-profit organisation.

2. How do you think you'd fair in a zombie apocalypse?
Has anyone watched i-zombie, on Stan? I don't, but my daughter and her dad do. It has a different take on the zombie mindset though, where an underground brain trading market exists for civilised zombies, hiding in the population. It got me thinking if zombies would actually want to set up an underground economy for their "secret" food supply, letting the rest of the world get on with its business. Rather than the traditional social anarchy model we're use to seeing advertised. Either way, because I'm insulin dependent, I'd have to go uber paleo, in order to survive my pancreas.


3. If you had six months warning do you think you could grow all you needed to feed yourself and your family?
Sadly, no. We need to get our water storage sorted, before we can grow anything dependably. But I do think we could forge some community networks to ensure "some" food would be available. We'd probably lose a lot of weight!

4. What life-skill should every child have to learn in school?
How not to need a school, to learn anything important.

5. If you could live anywhere in the world, where would you go and why?
Gully Grove. Because I did a lot of travelling as a child, and as Dorothy says, there's no place like home. ;)

6. What advice would you give to someone who wanted to live more self-sufficiently?
Change the way you think. You can do this by enrolling in a permaculture course, or reading extensively about it. While you're at it, read about Natural Sequence Farming too. Lastly, learn about Indigenous food gathering traditions in your region - especially, the interaction with native wildlife. Because whatever your personal desires of self-sufficiency are, it can only be framed within your specific landscape. So learn to read it, what it needs and interact, accordingly.

7. What's your most hated food?
Brussel sprouts. Offal comes a close second. I even hate the smell of them both.

8. What is your favourite quote/saying?
It's hard to have one favourite, as many have cropped up in my lifetime, with some significance. But there's a Chinese proverb, which sums up human involvement with nature that I'm partial too...


9. Is there a time you've made a massive fool of yourself in public that you laugh about now?
Yes, and it WAS embarrassing. I was a teenager, dating my boyfriend who was from Canada. It was young, innocent love. We were at the local national park, on a busy weekend. My boyfriend told me a joke (as he was quite the comedian) with a word in the punchline, I wasn't familiar with. I couldn't laugh at his joke because I didn't know what the word meant. I asked him to tell me, but he thought I was joking. I asked again, but he said I should know. Frustrated, I turned around and yelled across the park, "Muuum, what's a clitoris?"

10. If you had a warning label what would it say?
Never presume I know what you're saying.


Now for my nominees: an eclectic group of ladies, from different walks in life, who write sincerely about their journeys.

Bev from foodnstuff.
Nana Chel from Going grey and slightly green.
Emma from A simple living journey.
Linda from Green haven
Nicole from Early Bird farm.


And the 10 questions:


1. What is your inspiration, and your favourite speaker about that inspiration?
They can be well known or a personal acquaintance.

2. What is your go-to remedy, on a bad day?

3. If you could improve one thing in your community, what would it be?

4. Was there ever a moment, you thought you were weird?

5. If you had a time machine, what pearl of wisdom would you tell younger you?

6. What was your favourite game to play at school between classes?

7. Do you have a favourite musician or style of music? What do you like about it?

8. If money wasn't an issue, what course of study would you take?

9. Have you ever wanted to start your own business? What would it be?
10. If there was a dessert on your table, to rule all others, share your precious temptation.


Thanks for nominating me Liz, although one of my answers probably revealed a little too much. ;)



UPDATE: Because I didn't leave easy instructions the first time around. Here are the recommendations: 

If you have been nominated for The Liebster Award AND YOU CHOOSE TO ACCEPT IT, write a blog post about the Liebster award in which you:

1. thank the person who nominated you, and post a link to their blog on your blog.

2. display the award on your blog — by including it in your post and/or displaying it using a “widget” or a “gadget”. (Note that the best way to do this is to save the image to your own computer and then upload it to your blog post.)

3. answer 11 questions about yourself, which will be provided to you by the person who nominated you.

4. provide 11 random facts about yourself.

5. nominate 5 – 11 blogs that you feel deserve the award, who have a less than 1000 followers. (Note that you can always ask the blog owner this since not all blogs display a widget that lets the readers know this information!)

6. create a new list of questions for the blogger to answer.

7. list these rules in your post (You can copy and paste from here.) Once you have written and published it, you then have to:

8. Inform the people/blogs that you nominated that they have been nominated for the Liebster award and provide a link for them to your post so that they can learn about it (they might not have ever heard of it!)

* Chris again: if you want to upload either of the Leibster Award logos in my post, right click your mouse on the image, and press "Copy Link Location". Then when writing your post, look for the add an image by URL - and right click your mouse in the box provided. Then click "paste". This should work. :)

Its meant to be fun and light-hearted though, so if uploading images makes it too complicated, skip that part. ;)

Sunday, May 8, 2016

Natural fertility

I believe in using what we've got on our land, to improve the land. Nature is doing that part automatically anyway, through natural processes - which I will demonstrate, shortly. But as stewards, we can help this process along, by taming and stabilising, the features we want to use on the land the most. Rather than remove, dump, poison or burn these resources away: we sequester ours, back into the landscape instead.


Nature builds a pot-plant


It's important to make that mental shift in thinking: from this is just rubbish, constantly in my way, and an eyesore - to this is a free resource, replenishing itself naturally and how can I use it? Because this shift in mind, can engage the natural processes your land is already using, to replenish its natural fertility.

Why is this important to recognise? Well, for all the books you can read about gardening strategies, there's only one way nature is going to work on your patch of land. That is through pre-existing natural sequences. You can tweak the landscape, here and there, but if you don't learn to regard what's pre-existing, how can you improve it without inadvertently, working against it?

Our natural fertility isn't that rich here, but we're slowly working on it and noticing the difference.


2006 - the sand pit, pre digital camera days
Click to enlarge


Before we even built on this landscape, ten years ago, there was a pre-exiting system. Our house was destined to be built on the mid-slope, its not the one under construction, on top of the hill. Did you notice, the enormous sandpit on our property though? As a toddler, it was our daughter's favourite play area, when coming to visit the property. It also gave us a flat spot to stand on, and survey what was around us.

This was the lowest point on our property, and its where all the water ran to - as well as receiving run-off, several properties, uphill from us. The sand is silt, dumped from upstream (and our own property) because there was a plug we hadn't learned to recognise yet. This plug of thick foliage and fallen trees, near the boundary of our property, was forcing the water to dump its silt behind it, instead of taking it downstream.

2006 ~ grass growing on the edges of the sandpit


We were fortunate to have this enormous sandpit on our property. Several other properties we had visited on either side, didn't have such features. They had narrow channels where the water flowed in downpours, instead. We didn't think too much about our sandpit, until we moved here though.

It's only when I stumbled across Peter Andrew's book, "Back from the Brink," and his follow up book, "Beyond the Brink," I started to understand how that sandpit had formed. But more importantly, how it could help us improve the landscape, naturally. We had a pre-existing natural feature on the lowest part of our property - a dry, wide, gully bed, that would seasonally fill with water and nutrients. How could we work with that?


Same sandpit, 2016, with a new toddler


Well, its not exactly a sandpit any more, but that's because we've encouraged the natural system which was already working. The strategy was to hold back water, before it actually reached the sandpit, by creating more debris plugs, upstream. Which has since, allowed the grass to move into the sand pit. Now becoming one of David's regular mowing chores.

We're not mowing for the sake of a pretty lawn though. We're mowing to discourage snakes from venturing to the house, but more importantly, we're "using" that natural fertility, where it can help.


Partly filled


Same sandpit, with a slight incision, caused by the 2011 Queensland floods. But we've been assisting, to repair it since. We're filling it with vegetative matter, to create the same plug effect.

Vegetative matter will break down, but it can act like a filter too, catching twigs, which catch even larger ones. When they hit a fallen tree trunk, this filter, really comes into its own. It slows the water flow, catches even more debris, and reduces the erosion. It gradually fills up the channel with silt and debris, instead of carrying it downstream.


 Completely filled with vegetative matter


When David brush-cutted recently, he raked and dumped the vegetative matter, into the water channel. This stuff is growing in such abundance, it helps us to move around the property better, if we manage it. These natural sequences, are only irrigated by the seasonal water flows, which arrive between spring and summer. Mostly summer.

By holding the water back though, we also allow the water to sink into the soil, for longer. Which is why you'll find, this lowest part of our property is always the greenest, and the coolest. This is the epicentre of fertility. All the forces of nature, converge here and transforms our predominantly harsh conditions, into somewhat of an oasis.


So much of an oasis, in fact, it can easily convert into a jungle. Which is why its David's regular summer chore (when the rains arrive) to maintain the paths we use on the gully floor. These paths help us move around with relative ease. But they also help the kangaroos seek safe passage from wandering domestic dogs. They can feed without fear of being spotted from afar. Which is why the mothers will always raise their joey's here.

There's yet another purpose for these paths however. It directs and captures excess water, when it overflows from the channel. Which is why some of the debris cut, are always left on the paths too. Not only does it help keep moisture in the ground longer, but it also acts as a brake, when water comes rushing through. Instead of taking bare ground, it has to pass through the vegetative filter again. These natural resources and systems were already here. We just had to figure out, how to work with them.


I imagine if we were attempting to raise livestock, we'd feel the pressure to have to do something different with this landscape. I believe it can carry animals, but at this point, its predominately native animals, and our single, free-range chicken (Matriarch) above, who get the benefits. Because we don't need the financial pressure or guilt, of having to maintain animals in a system, which is not yet stable enough, to sustain them.

At some point, I hope to introduce herbivores, possibly in the form of goats. Because I would like them to help convert fertility for us. I believe animals are meant as part of the natural sequences we see at work, here, but domestic animals are what we choose to enter the equation. It's up to us to determine when the right time is. Or else we can end up with a pressure load, the land cannot maintain. Resulting in selling off livestock, or spending money on buying external inputs to keep them.


In the meantime though, we continue our work on the gully floor - learning to appreciate where nature is directing the cues. Such as, a small tree, fallen across the water channel, and into a lantana thicket. It grew successfully, but then one day, just fell over.

This is the origins of how plugs, naturally end up in the water channel. We did not orchestrate this feature. Nature decided its form. You can see the silt which has built up over the years, and made the water channel, barely noticeable. The trees upper branches (not visible in the picture) are what's helping to plug the channel.

It's shallower here, than down stream. This shallower depression makes it easier to cross the channel, to the other side of our property. The wildlife uses it too. So nature builds multi-purpose, species neutral, features, to ultimately benefit the landscape.


Even further upstream, the vegetative barrier which has built-up, by the force of water, shows the natural filter at work too. It slows the water down, dumps nutrients and debris from upstream, and makes it available for plants to feed from. We can then cut down that fast growing, vegetative matter again, and so on and so forth.  But here's what it looks like, just a few meters, upstream, from this debris pile.


Green grass, is growing on the nearly filled-in with silt, water channel. It's almost flat ground now. In fact, this is where the water will spill over the edges, on both sides, when the flow is too much for the almost non-existent channel.

This area has not been irrigated by us. Its purely maintained by natural rainfall, which I have to say, has not been as impressive as other years. Yet we still have green grass. Which cannot be said for the slopes, higher up.


New toddler enjoying a new sandpit. This is the remnants of our sandpit now. Only, due to all the biological plugs we've encouraged along the spanse of our water channel, its migrated to the opposite end of the property now. That former sandpit you saw at the very beginning, has been choked out with vegetation. The only reason we have a sandpit, at the very border of our neighbour's upstream property, is because they don't utilise the same plugs we do. So we get all the silt from all the upstream properties.


At the edge of our upstream, neighbours property


There's a completely different story, for the downstream neighbouring properties, from us, who have benefited directly from our plugs. There are no sand pits downstream, only extremely green grass, which we quite envy. Only because the slopes which encroach on our narrow gully floor, widens up for them. It's like the delta, where fresh water meets the ocean. The nutrients have accumulated and been release into a wider pool. So everything flourishes on a wider scale.

But you have to work with what you've got, and that's what we continue to do.


2006


 2016

I have more to share about capturing natural fertility on your property. If you're not recognising you have it, then observe where water flows on your landscape. That will give you some clues to start from. Because there's always more to observe, than meets the eye.


Saturday, May 7, 2016

First wicking boxes

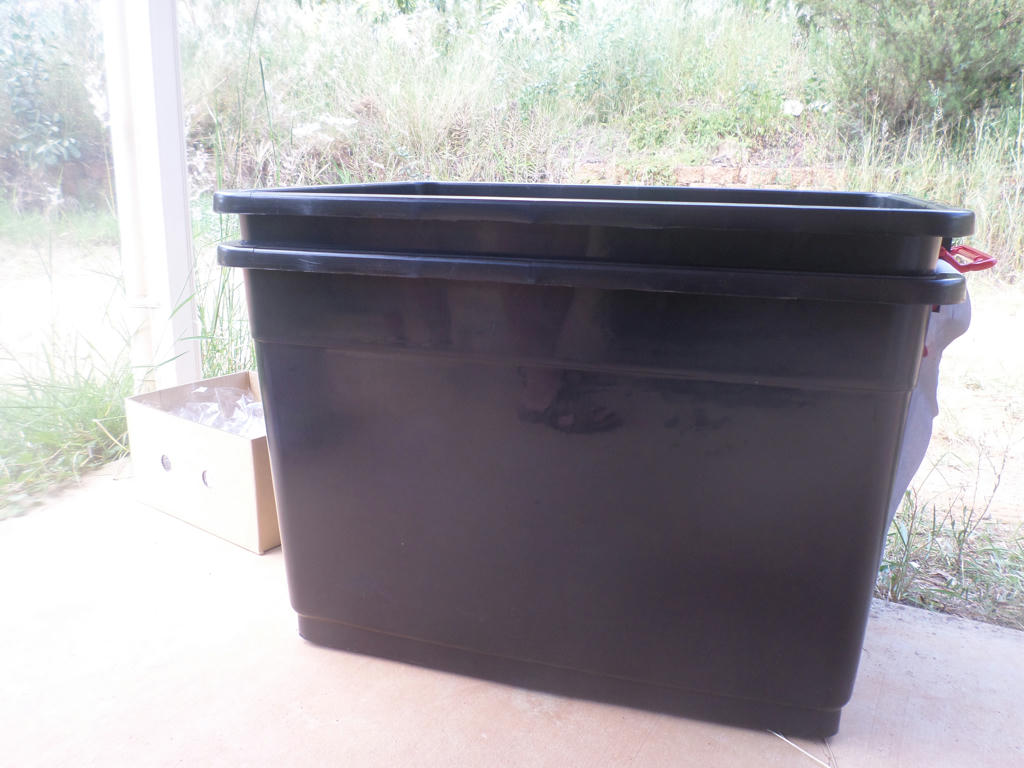
Back in March last year (over 12 months ago) I wrote a post about exploiting the environment. Basically, it was about recycling unnatural things, as a by-product of industry, and helping them benefit the environment instead. It was also the first time you would have seen a picture of these...


I mistakenly referred to them as 30 litre containers back then, when in fact, they are 160 litre containers. Which would basically take approximately, 6 x 25 litre bags of soil to fill each one. We purchased compost by the trailer load, to avoid all those plastic bags. Plus its more economical and a better product.

But I'm getting ahead of myself, because we had to make the wicking boxes first.


The perfect location for these containers, were next to our block retaining wall. They should get some nice radiant heat as winter approaches. We had enough room for three, but there's room for two more - so we continue to look for more discarded boxes.

David flattened the ground and set the tubs about 20cms apart. This was to ensure if we ever had to dismantle and move any in the future, we could access the sides, with our hands.

In the white tubs and green bucket above, were rocks collected around the property. We had a little blue metal (smaller rocks meant for back-filling walls) but to make them go further, we scrounged some rocks from elsewhere. We have a lot of petrified rock.


When we lined the bottom of the base with this petrified rock, we made sure they went down gently, so the base wouldn't crack. The flexible hose is just ordinary stuff (available at most hardware stores) sold as drainage hose to remove your laundry water, outside. We had owned this prior to moving here, so we didn't have to buy it. Frankly, I was relieved to see it being used for something other than a cupboard ornament.


It's attached to a smaller, tougher pipe, that was left over from our house build. It's plumbing pipe for houses, denoted by the green stripe down the length of the pipe. Grey-water pipe, is denoted with purple stripes instead, so its easily identifiable if they ever get uncovered or have to be dug up.

Neither pipe had any holes, so we had to make some in the flexible hose only. As that's how the water enters the base. We didn't require a drill for this part.


Our metal note-spike from inside, did the trick. We spaced them at roughly 10cm intervals, along the length of the pipe. Once the pipe was coiled on top of the petrified rock, we gently placed more rocks over the pipe - ensuring the straight section of pipe, stood up in the corner.


To help keep the straight pipe in place (it kept wanting to fall over) I temporarily propped it up with a large rock. It was removed once the pipe was covered with smaller rocks. Again, being careful when placing rocks in, so we didn't unnecessarily weaken the base.

This is actually the second wicking bed we set up, because we were too busy setting up the first one, to stop and take pictures.


Once the rocks were filled to approximately 10cms in depth (total), we put down some shade-cloth we had tucked away in the laundry. It had to be cut with about a 10cm overlap, to help keep the soil out of the water reservoir.

Once we filled the tub with about 30cms of compost, it was time to pop the water hose in the pipe, to see if it worked. We filled the reservoirs in both containers, with one of our chicken coop tanks (as we call them) as they're located at Hilltop chicken coop. The vegetable patch, is just down hill, so the water is gravity fed.


After about 5 minutes filling, we had success! Water came out of the overflow hole we drilled. Actually this hole wasn't drilled at first. I used our note-spike, first, as a guide - where I intended to come back later, with the drill. But the note-spike wasn't easy to make a hole with, and I didn't notice, until I looked on the other side, the plastic showed signs of stress.

So I placed some gaff tape over the hole, before drilling, for added support. So take note, only use a drill for making holes in your tubs. And start with a small drill bit, then incrementally work your way up to the larger. Don't force or otherwise push the plastic to get the hole made. As water retention is integral in the wicking box design.


I used some recycled, plastic milk-bottle tops, as a cover for the pipe, so things cannot fall in, and to prevent mosquitoes a place to breed. I noticed on the first windy day however, the caps blew off. So I've improvised by using a glass bead on top, to weigh it down. They haven't come off since.

Do you remember when glass beads in the garden, or in a vase, were all the rage? I bought these when I was a young 20 something, and can't think for the life of me, why I would specifically buy them! They hung around in a vase, becoming a dust magnet for ages, when I eventually moved them outside, to mulch my pot plants, My toddler recently discovered them to play with (he calls them eggs) and now a few of the larger ones, weigh down plastic bottle caps.

I would never buy these things today, but they haven't been entirely useless in their lifetime either.


Of course, in went our seedlings (and some seeds) at the earliest opportunity. We have planted a variety of brassicas, some rubarb, buckwheat, pot marigold, nasturtiums, lettuce and peas. I'll have to see how they go over winter. I will put a mulch layer down, once all the seeds we've planted, have germinated.

There is only one wicking box left to set up, and there's a reason it hasn't been done yet.


It has a crack in the base, probably due to the fact, we placed some heavy stuff in there for storage at one point. Or it could have always been there, and we missed it. Anyway, we have to come up with a way to seal it, cover it or do both.

If you want more detailed information about wicking boxes (and beds) what they are, and how to set them up. I would recommend this link. That's where I first heard of them and learned the theory behind them. Of course, reading Bev's blog at foodnstuff, and how she uses them to grow food, always kept the mental wheels turning, about how we could set them up too.

What I like about wicking boxes is how water efficient they are. Which is a strategy we need to employ more and more, in our increasingly water challenged environment. What really excites me about the potential of wicking boxes (and beds) though, is how they can be made with things which would otherwise go into landfill.

The only money we actually spent on this project, was for compost, and a few punnets of seedlings - marked down for quick sale. The rest of our materials were either pre-owned (shade-cloth, flexible hose, pipe and glass beads) or they were recycled (plastic tubs, and bottle caps) some were even scavenged, in the case of rocks. What it took the most of, was time to collect everything we needed. Hopefully we'll get a lot out of these boxes, in the years to come.

Is there something you've been meaning to try in the garden, and haven't managed to orchestrate yet?

Friday, May 6, 2016

Closing shop

It's time to close shop on the old vegetable beds, for winter. They've well and truly been neglected for several months now, and it's time to pull out, what can be saved. I had a few perennial crops, I needed to reclaim if I wanted them to produce for next year.


Blooming in summer


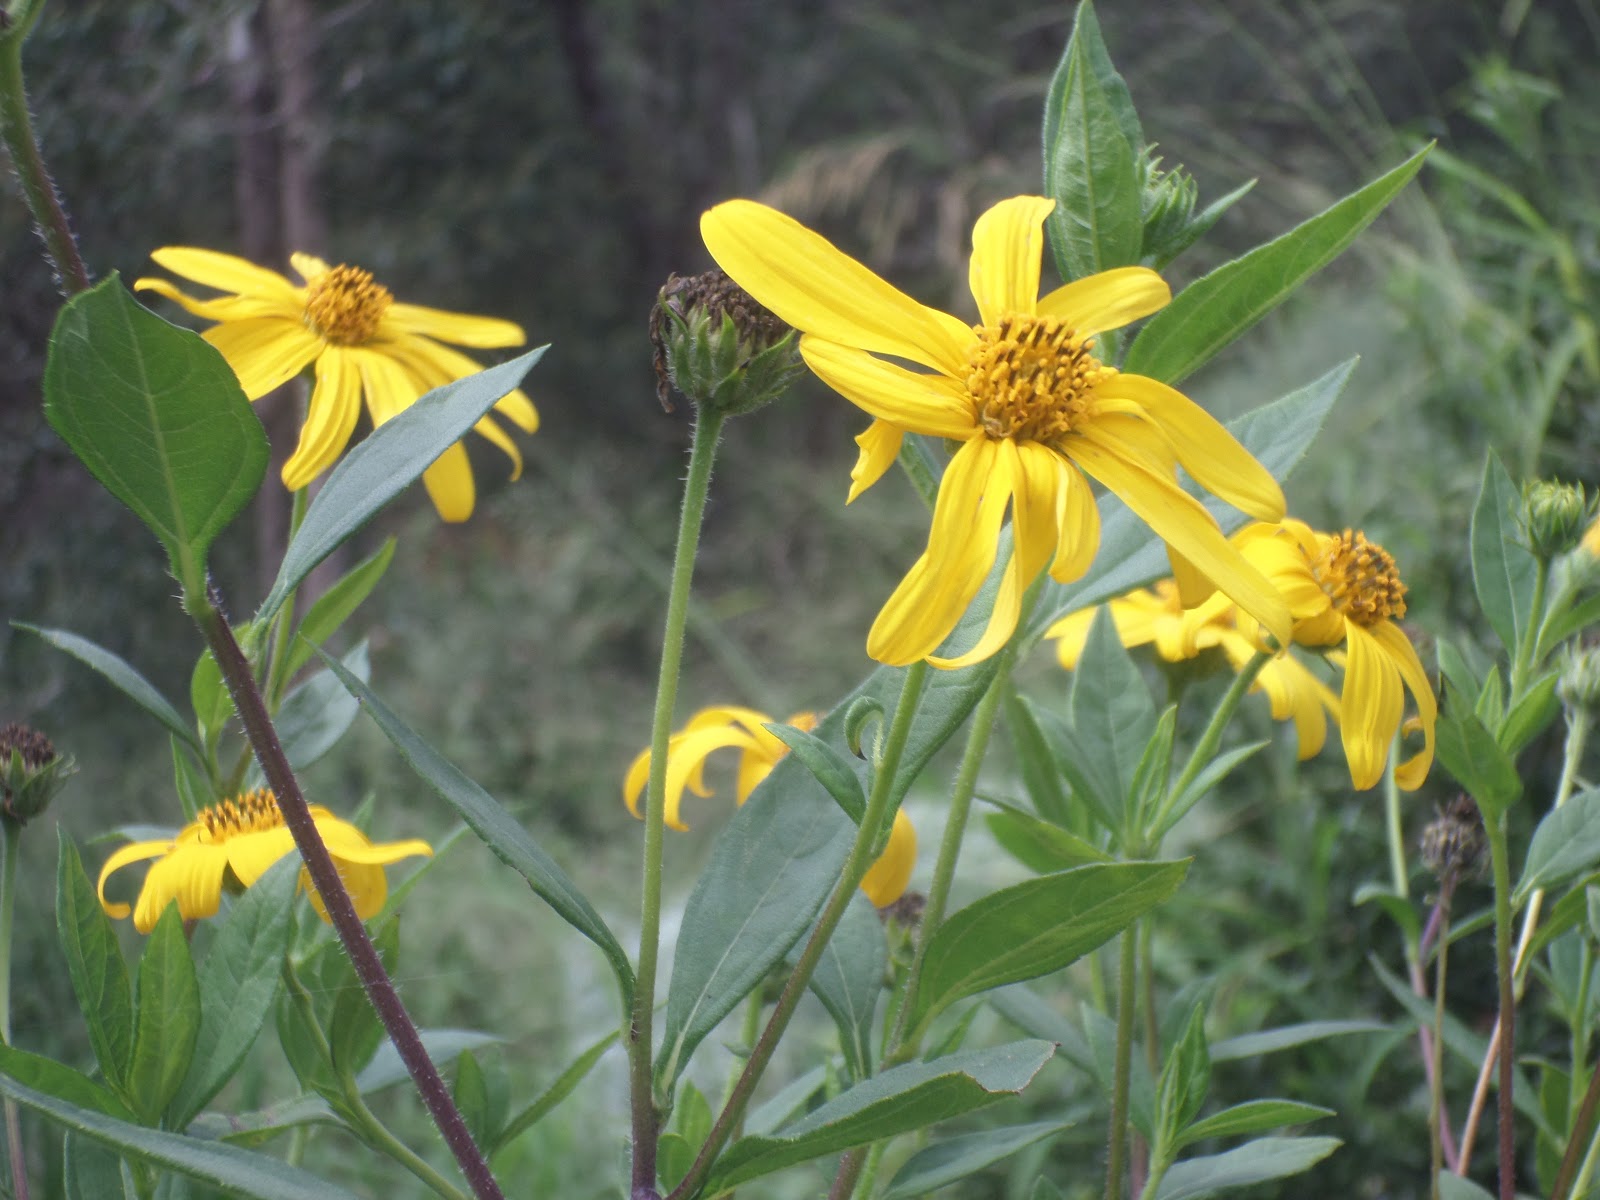
Back in their prime, the Jerusalem Artichokes were healthy and blooming; attracting the native bees. But in the time between drinks, they started to wane. Its important to remind myself, they were destined to die back anyway - even if they probably died back, a little sooner than I'd like.


The harvest


Three tubers out of the four I originally planted, grew, and we dug a crazy amount of tubers from those few plants. So this is definitely a keeper crop I wanted to save for next year. Although, I recently learned, if you pinch back the blooms, the yields increase. I'm not sure I want to deny the native bees the forage though.

We also picked the last of our Kent pumpkins from the vine. Not many produced, because, as usual, the larger bees weren't always around. Those pumpkin flowers are really made for European bees, because if you see them fully loaded with pollen, they struggle to fly straight! Its really funny to watch. So I wonder if that's why the smaller, native bees, avoid them - unless the European bees have reduced the pollen, first?

Do you watch bees in your garden? I like to observe who turns up to what, and how they operate.


Doing well, when moisture was available


Now onto the elusive Yacon tuber, which is my second attempt at planting here. The previous year's attempt died. I'd heard great things about this edible plant. It was meant to be hardy, delicious to eat and extremely easy to look after. If only that were the case for me. This year has proven to be another miss!


Yacon ~ centre


It grew tall, really quick, then the stalks proceeded to dry out with the lack of rain, and my inability to water them. Before they died completely, however, it was time to dig them up. What was waiting for me underneath the soil? Well, not a lot, apparently. 


Yacon harvest


I got one shrivelled, brown, edible tuber, which was soft and not really edible. There were no red tubers, which are the ones you are meant to use for propagation. Although, there was something worth noting, a little closer up...


Sprouting


It looks to be a brown tuber, re-sprouting. So its possible, I could save this perennial for next year? I've already planted it into a pot.

I'm painfully aware it's too early to plant, as winter is on its way, and this is a warm weather crop. Because of the small size however, I suspect the new shoot won't survive the wait through winter, in to spring. I'll just have to give the container, a warm spot through the colder months, and cross my fingers.


The last of the spoils


In the meantime, we'll just have to savour our last offering from summer, and eat it slowly. Before the native bush rats, find it curing on the tin roof, preferably.


Thursday, May 5, 2016

End of summer review

Goodness, summer was a bit of an adventure. So was spring. Now its autumn, and as everything starts to wane in the garden, its the time for David and I start to evaluating the property, reviewing what we've achieved. Namely, so we can figure out, what to do next, how to do it better, and possibly even what we should be dropping.

Not everything we try in the garden, works. In fact, a lot of what we try, doesn't work to its full potential. But as David likes to say, "we're doing the right things, we just have to do more of it." So autumn is the best time to see how the garden performed, against our well intentioned, efforts. So what did we do?


 August 2015


Back in late winter, I resurrected our old vegetable beds, which hadn't been managed for several years. I created four new growing beds to plant out. August was a busy month, because I also made a new sweet potato bed, away from the main vegetable area, they were attempting to dominate.

The sweet potato bed was a failure, because we didn't get the rain that would fill the swale next to it. We also had ground, around the bed, fully exposed to the sun. Moisture was quickly sucked out through evaporation. It was just another reminder, gardens work best with many functioning parts. Some parts, landscape water storage, some parts water retention strategies. Other parts, climate modifiers by the use of foliage cover.

We had one part right - the landscape water storage, via swale. But it failed when the rain didn't arrive, to fill it. In the end, it was just a huge sponge, sucking water I could cart by hand, to keep things alive. When I got busy elsewhere, our sweet potato bed, went into decline. If I know sweet potato though, it may well bounce back, next rainy season - but it won't be feeding us this season.


 Mid September 2015


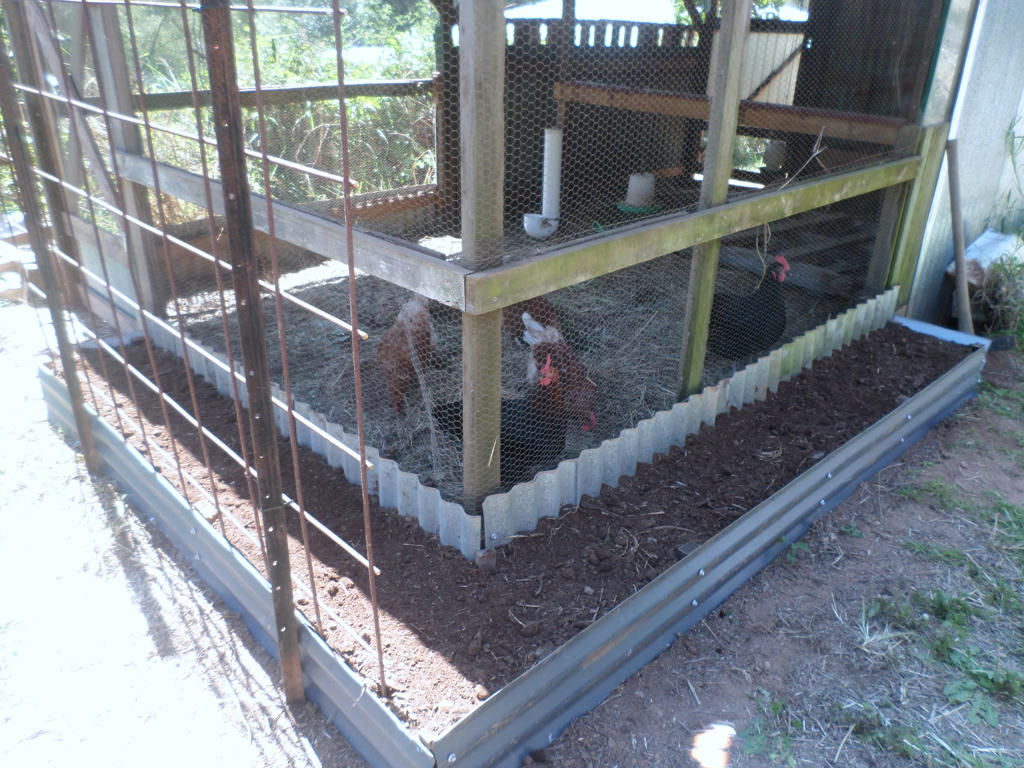
The next job we completed in spring though, was the raised bed, built, around the newly renovated, Hilltop chicken coop. It was designed for several purposes. To grow strong scented plants, to deter pests: to grow greens I could pick for the chickens; and to create a screen to help block the Western sun in the afternoon.

The choko I planted, died. But we successfully grew Sunflowers and a a few beans up their stalks. I collected the seeds and will plant more, next year. We ate a few beans, like maybe 10 in total.


 Sunflowers, as a living trellis for beans


Mostly, we grew tall grass, really well though. Which helped shield the chicken run from the weather extremes, in the end. The kale I planted, fed the chickens, until the heat of summer, and lack of rain, made them too tough to eat. We got some tomatoes, which I threw into the chicken coop - a delightful (if infrequent) treat for them. And several spaghetti squash grew, which were enjoyed by us. I saved seed for next year too!

But it was not enough to say, this production area was successful. Saving seed is great and all, but we really needed to eat from the fruit of it. It gave us some things, just not enough of what we needed. And this bed, also went into decline, without regular watering and the heat of summer.


Vegetable production, early October 2015


How did the vegetable garden perform over the growing season, though? Well, it took off with Spring and the warmer soil, which gave us some delicious treats to eat from the garden. The guinea pigs were fat and the chickens happy, with what I could throw in too. I was thrilled with how everything was growing. It made the effort, to water daily by watering can, worth it.


 Yacon growing (centre) late October 2015


If the truth be told, it was a milder spring and summer, temperature wise though. We had many overcast days, which helped keep things a little cooler. I suspect if this hadn't been the case, my manual cans of water, may not have been enough to keep everything hydrated. So the weather worked in our favour, at the start.


Harvesting ~ November 2015


By early November, we were starting to see some harvests. We were never overwhelmed at any point, but it was enough to feel the difference between store bought and home grown. I was looking for ways to use our scarce offerings in our meals, rather than have them go to waste. That's what happens when you spend the time nurturing a crop. You want to see everything used. Plus they taste better than anything you can buy.


Finished retaining wall ~ February 2016


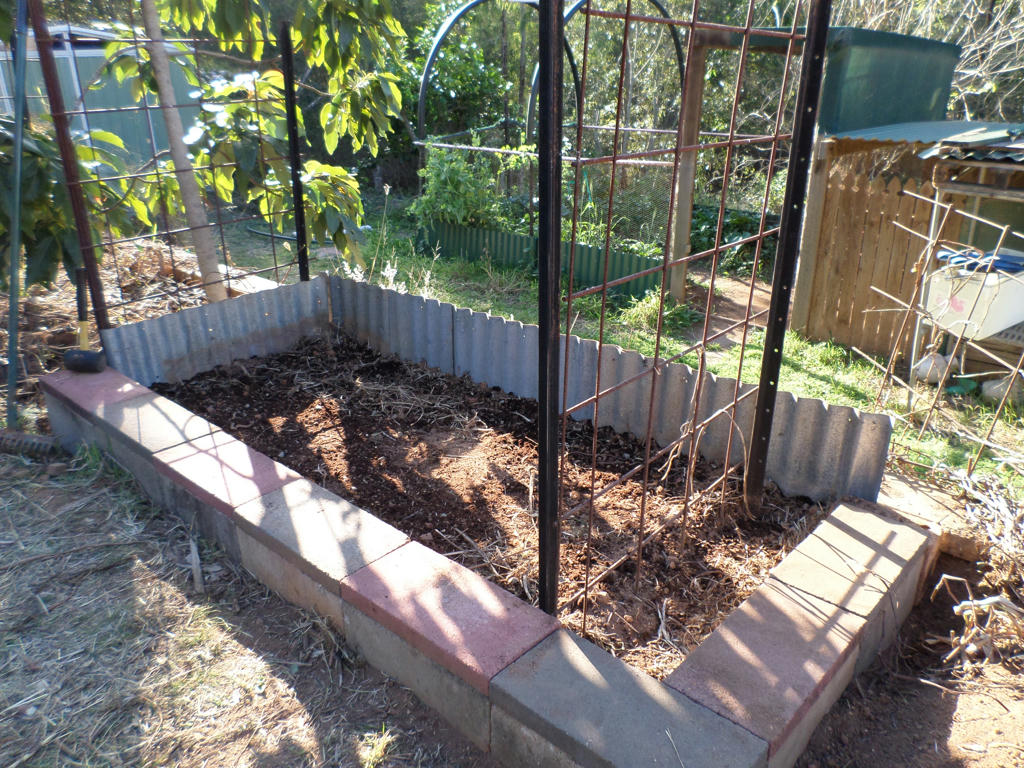
As the vegetable garden chugged along, in November, through to December, we were busy erecting a new retaining wall, opposite it. This was intended to expand our growing area, as the soil and passionfruit vines above, were constantly threatening the crops underneath. We hadn't used the area for growing vegetables in a long time, because of this constant invasion.

Now we could look forward to planting something underneath. What format would we settle upon though, when I didn't want to compromise the footings of the wall? More on what we came up with, at the end.


Christmas 2015


I was delighted, for Christmas lunch, however, to be able to make a peasant loaf, with fresh tomato and basil, picked from our garden. It truly felt like a luxury to have fresh food available, thanks to all our efforts. While we hadn't managed to harvest a lot from our garden (I keep repeating this) it was still memorable enough, to keep wanting to do more.

But then things changed in the garden, by mid summer. Between January and February, David left for five weeks, to boot camp. Where he would become...


March 2016


...A Private in the Queensland regiment of the Australian Defence Force. During his sustained absence however, it meant all the running of the property and our dependents, fell to me. It meant our garden, filled with so much promise at the start, stopped being watered by hand. I tried to keep up with the task, but I was quickly inundated by the rest of my responsibilities.

Those remaining months of summer were not kind to the vegetable growing areas. We didn't get much rainfall either. And it has been mostly dry all the way, into autumn too. Little showers, here and there, but not our usual amount to soak the soil properly. So my vegetable growing area, went from looking like this...


Main vegetable beds ~ February 2016


...to eventually, looking like this, today. Notice the difference in the grass, on the pathway, when the rain vacates for a sustained period of time?


 Main vegetable beds ~ May 2016


It goes to show, two very important things. Firstly, we were on the right track with starting the vegetable growing areas, we just weren't able to keep up momentum. Had we been able to, the garden would have severed us well and yielded more. Secondly however, and more telling is, it demonstrated how utterly dependent our growing systems are, upon us.

Which is why David and I are going to develop a new growing system, away from our existing vegetable patch. One that harnesses the natural forces which enter our property, and use it to our advantage. More on that later though. We're just getting the ball rolling, as autumn and winter are prime months for physical labour.

We aren't leaving the existing vegetable area, though. It will receive some upgrades. Especially, when we went to all that trouble, building a new retaining wall. We had something in mind, which shouldn't compromise the wall footings, and will actually improve the watering situation.


May 2016


We are building a series of Wicking beds. Because a can of water, received straight to the base of the plants, via the wicking bed system, won't have to contend with surface evaporation. This is especially important in summer. But more on our wicking beds, in another post. They deserve their relevant details expanded upon, rather than glossed over.

What David and I learned, after assessing our end of growing seasons notes, however, is that we need a more strategic approach. One which doesn't rely completely on the weather, or completely on man made systems. We actually need both, with many different variations in between.

Might I also add, we need imagination during this process too. It keeps our minds engaged, with exploring what's still possible, rather than focusing on negative feedback from what has failed. I can see the success we had at growing seeds for saving, and the small windows of production for us and our animals to eat - but it showed shortcomings, when tested. It makes sense to diversify and try different things.

I look forward to sharing our new developments, as they eventuate.


Sunday, May 1, 2016

Carob delight

I love it when I go into the garden, and get a surprise - something I wasn't quite expecting. Such was my surprise, when I ventured near the compost yesterday, and found our Carob tree, doing something amazing!


Surprise!


It was flowering for the first time! This Carob tree, has been in the ground the same amount of time as our Brazilian Cherry. So roughly 5 years. Normally, Carob requires both a male and female tree, like Paw paw, in order to reproduce. However, this variety of Carob tree (Clifford) was sold as the hermaphrodite variety, meaning its capable of self pollination.

I'm happy to report this claim is 100% correct. Not only are the flowers a sickly sweet smell (attracting all the native bees and ants around) but its also producing...


Spot me!


Carob fruit!! Which quite surprised me again, because it was easily camouflaged by the green foliage. I noticed the flowers first, and nearly jumped for joy after spotting the well developed pod.

The carob tree is reputed as being hardy, and I can testify to that claim too. As its been living on clay with the occasional helping of compost and tree branches. We threw some water on it a few weeks ago, because we needed to empty one of our small water tanks, and it seems to have set the ball in motion.


Bearing fruit ~ click to enlarge


In the above image, you can see different flowers, starting to produce pods at different stages. They seem to start with many successful flowers being pollinated, but then drop all but one in the end. Perhaps if our tree got a little more TLC, more pods would successfully stay on?

I saw so many ants, drunk from pollen, they could barely stay on the flowers. It had a fragrance of wild nectar, so intense it started to smell sickly if you took in too much. It was the fragrance which caught my attention, while I was standing near the compost. I actually thought it was the compost wreaking at first, but then my nose soon sniffed out the real culprit. To my delight!

So, that was something I was not expecting the garden to bring forth. And I was just starting to lament the fact, everything had started to dwindle, because of the lack of rain. Carob is a remarkable tree.